5. Fan Connection: Select the appropriate plug
to connect to the power cord adapter as shown
in Fig C. Plug the power cord into the appropriate
outlet. Be sure plug ts tightly in outlet. A loose
connection may cause overheating and damage
to the plug or fan.
NOTE: To prevent overloading a circuit, do not
plug the fan into a circuit that is servicing other
electrical needs.
English
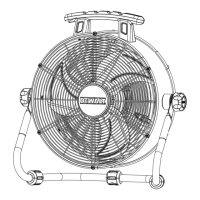
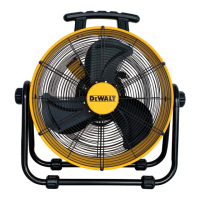
• Align and insert the to the side hole on
and , tighten them with the . Do not over
-tighten. Repeat above process for the
opposite side of fan.
1
Adjustment knob
2
Foot support
4
Drum
3
Adjustment knob pad
6
Screw
5
Cradle base
2
1
3
4
• Press the into the back hole on , then
tighten the on each side of the .
25
2
6
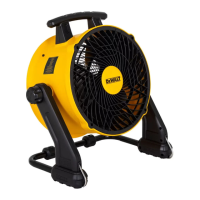
3. Fan Operation: Always operate the fan with
the cradle in its upright position. The fan itself can
be tilted into various positions depending on
applications, including straight upward.
4. Fan Location:
6. Turning Fan On: Place fan on stable level
surface. Plug fan into properly grounded outlet.
To start the fan, turn the switch from the OFF
position to the desired fan speed.
7. Turning Fan Off: To turn the fan off, turn
the switch from the current fan speed setting
to the off position. Remove plug from outlet.
8. Adjusting Fan Tilt: Loosen the adjustment
knob until the drum rotates freely on the frame.
Adjust the fan to desired tilt angle and re-tighten
the knob. Do not overtighten adjustment knob.
Place the fan in an area in
the room that will provide the most effective
air circulation.
SUSPENDING/MOUNTING
THE FAN
CAUTION: When the fan hangs by the hang
hooks, do not shake the fan or the object from which
it hangs. Do not hang the fan from any electrical wires
or anything that is not secure. Personal injury or
property damage may occur.
CAUTION: Only use the hang hooks for hanging
the fan as shown in Fig. B. The hang hooks are not
intended to support additional weight. Do not attach
or hang anything additional to the fan or risk of
breakage may occur.
CAUTION: Do not use the hang hooks to reach
with or to support your weight in any situation.
CAUTION: Do not stand underneath the fan
when it is mounted overhead. Serious personal injury
or damage to the fan may result if the fan falls.
CAUTION: Do not mount the fan to the ceiling.
NOTE: Locate the fan away from a corner or other
obstructions which may impede air ow. Your jobsite
fan has multiple options for mounting.
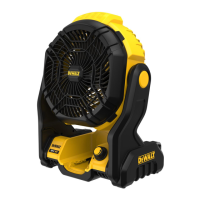
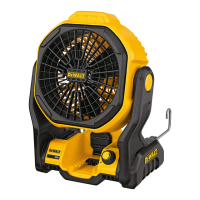
HANG HOOK
The built-in hang hooks telescope out of the back legs
and can be used to suspend the fan from 2X lumber
as shown in Fig. B. Be sure to fully extend the hooks
before using, then rotate as needed.
Protecting the environment
Separate collection. Products and batteries
marked with this symbol must not be
disposed of with normal household waste.
Products and batteries contain materials that can be
recovered or recycled reducing the demand for raw
materials. Please recycle electrical products and
batteries according to local provisions. Further
information is available at www.2helpU.com
CARE and MAINTENANCE
Cleaning:
Before cleaning the fan be sure to
disconnect power cord from the plug. Clean the grill
surface with a clean damp cloth. Do not use harsh
chemical or abrasive cleaners.
Maintenance: The Internal motor bearings are
Repair:
DO NOT OPERATE THE FAN
WITHOUT THE GRILL IN PLACE. DO NOT USE THE
FAN IF IT HAS MALFUNCTIONED OR BECOME
DAMAGED IN ANY WAY.
Storage: Keep original carton for storage of the fan.
Coil and tie the power cord to avoid damage during
storage.
permanently lubricated at the factory and do not require
any additional lubrication.
DO NOT IMMERSE THE FAN OR ANY
WIRES IN WATER. Replace front grill before fan use
and allow fan to dry completely before use. Periodic
grill cleaning with a vacuum will prevent dust build up.
The motor is sealed and does not require any interior
maintenance, cleaning or lubrication.
WARNING:
WARNING:
WARNING:
4
 Loading...