8
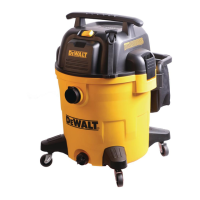
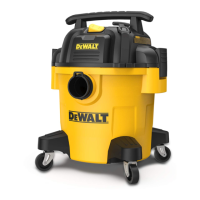
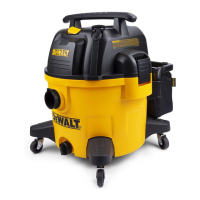
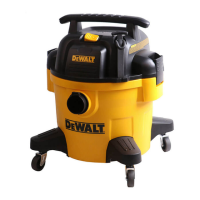
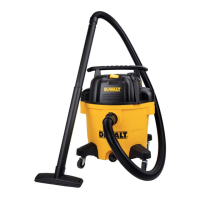
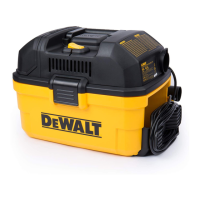
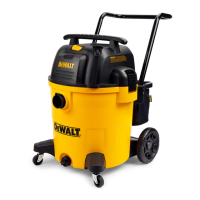
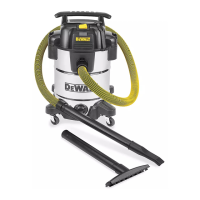
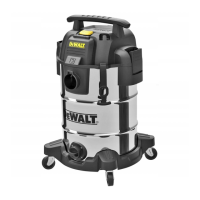
DESCRIPTION (Fig. A)
WARNING: Never modify the power appliance or
any part of it. Damage or personal injury could result.
1
Top handle/cord wrap
2
Power cord
3
On/o switch
4
Vacuum head
5
Lid latches
6
Dust tank
7
Hose
8
Casters
9
Clean Connect
TM
lter
10
Vacuum port
11
Hose strap
12
Disposable dust bag
ASSEMBLY AND ADJUSTMENTS
(Fig. A–C)
WARNING: To reduce the risk of injury, turn
appliance o and disconnect appliance from
power source before installing and removing
accessories, before adjusting or changing set-
ups or when making repairs. An accidental start-up
can cause injury.
WARNING: The ter
9
must always be in place
while vacuuming, except as described under WET
PICK UP APPLICATIONS under OPERATION.
When vacuuming ne dust, you may also need to
use an disposable dust bag to make emptying the
dust tank easier.
1. Install the disposable dust bag
12
, as shown in
Fig. B.
NOTE: Be careful not to tear the bag. Place bag
securely onto vacuum port
10
to provide a tight
seal for maximum dust collection performance.
2. Place the vacuum head
4
onto the dust tank and
secure it by closing the lid latches
5
.
3. Insert the end of hose
7
into clip-in hose vacuum
port
10
and tighten the end of hose to the tank.
OPERATION
INSTRUCTIONS FOR USE (Fig. A, D, E)
WARNING: Always observe the safety
instructions and applicable regulations.
1. Plug the power cord into an appropriate outlet.
2. Turn the on/o switch
3
to the ON position (I).
3. The DEWALT construction dust extractor is tted
with the DEWALT connection system. It allows a
fast, secure connection between the hose
7
and
power tool. The connector
13
connects directly to
DEWALT compatible tools or through the use of an
adapter (available from local DEWALT supplier). If
you need to Install the adapters, refer to Fig. E.
NOTE: If using an adapter ensure it is rmly
attached to the tool outlet before following the
steps below.
OPERATING INSTRUCTIONS
CASTER INSTALLATION (Fig. A, F)
1. Invert the dust tank and install the casters to the
bottom of the dust tank and x them with screws.
2. Return dust tank assembly upright.
REMOVE/CHANGE USED DISPOSABLE
DUST BAG (Fig. A)
WARNING: Appropriate personal protective
equipment like dust mask and gloves should be used
while handling used dust bags.
1. Turn o vacuum and unplug cord from outlet.
2. Unlatch lid latches
5
and remove vacuum head
4
.
3. Pull the disposable dust bag
12
carefully from
vacuum port
10
.
4. Seal the disposable dust bag
12
opening tightly
when removing it from the machine.
5. Dispose the disposable dust bag
12
in appropriate
container according to statutory provisions.
WET PICK UP APPLICATIONS
(Fig. A, G)
WARNING: If foam or liquid escapes from the
machine,switch o immediately.
WARNING: Do not use the machine with this set
up for dust Class L.
The ball oat
14
will block air to the motor when
the dust tank is full and the sound of the motor will
change at once. When the motor has a high pitched
sound and air/water ow stops, empty the dust tank.
1. Turn o vacuum and unplug cord from outlet.
2. Unlatch lid latches
5
and remove vacuum head
4
.
3. Empty contents of dust
6
tank into a suitable
container or drain.
CAUTION! Clean the water level limiting device
regularly and examine it for signs of damage. Refer
to Fig. G.
NOTICE: DO NOT remove ball oat
14
, doing
so will cause damage to the vacuum. The ball oat
keeps water from entering the motor.
Before using the vacuum for wet pick up:
• Ensure the dust tank is empty and free of excessive
dust.
• Remove the lter
9
.
TO CONVERT BACK TO DRY VACUUM
OPERATION (Fig. A)
1. Empty dust tank, refer to TO EMPTY DUST TANK
instructions.
2. Place dust tank upside down position until dry. DO
NOT use wet dust tank for dry pick up.
3. Place vacuum head
4
on a level surface
appliance dry.
4. Reinstall lters when vacuum head is dry. Refer to
TO INSTALL FILTERS.
5. When dust tank is dry place the vacuum head
4
onto the dust tank and secure it by closing
the lid latches
5
.
EN
 Loading...