37
ENGLISH
Bump Feed Trimmer Line Feed
WARNING: To avoid personal injury, never bump the
unit when the brush cutter assembly is attached to the
motorhousing.
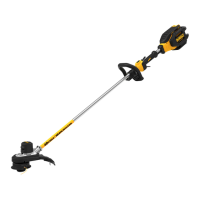
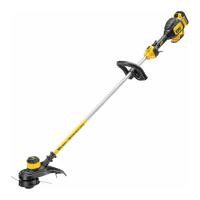
Your trimmer uses 2.032 mm diameter nylon line. Cutting line
will wear faster and require more feeding if the cutting is done
along sidewalks or other abrasive surfaces or heavier weeds are
beingcut.
As you use the trimmer, the string will get shorter due to wear.
Gently bump the trimmer on the ground while running at
normal speed and the line willfeed.
NOTE: Extending nylon line beyond the 330mm swath will
negatively affect performance, runtime, and the life of the
trimmer due to potential of damaging motor. Doing so may
void thewarranty.
Helpful Cutting Tips
• Use the tip of the string to do the cutting; do not force string
head into uncutgrass.
• Wire and picket fences cause extra string wear, even
breakage. Stone and brick walls, curbs, and wood may wear
stringrapidly.
• Do not allow spool cap to drag on ground or othersurfaces.
• In long growth, cut from the top down and do not exceed
304.8 mmhigh.
• Keep trimmer tilted toward the area being cut; this is the
best cuttingarea.
• The trimmer cuts when passing the unit from the left to
right. This will avoid throwing debris at the operator.
• Avoid trees and shrubs. Tree bark, wood moldings, siding, and
fence posts can easily be damaged by thestring.
Replacement Accessories
WARNING: To reduce the risk of serious personal injury,
turn appliance off and remove battery before making
any adjustments or removing/installing attachments
oraccessories.
WARNING: The use of any accessory not recommended by
D
WALT for use with this appliance could behazardous.
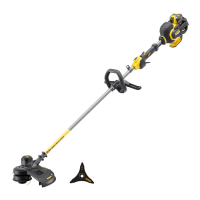
WARNING: Do not use any blades, or any accessory or
attachment other than those recommended by D
WALT
on this trimmer. Serious injury or product damage
mayresult.
Use
D
WALT
replacement line Model No. DT20650 (2mm),
DT20651 (2mm), DT20652 (2.5mm).
• For optimal performance, use Dewalt DT20650/51.
DT20652 can also be use but may degrade runtime of the
trimmer. Using any other line with the trimmer can degrade
performance and/or cause damage to thetrimmer.
Use
D
WALT
replacement
blades Model No. DT20653 255mm
(Tri-Blade Brush Knife), DT20654 (255mm Grass Cutting Blade),
DT20655 (230mm 4T Grass Cutting Blade).
Replacing the Cutting Line (Fig. P–S)
CAUTION: To avoid appliance damage, if the cutting line
protrudes beyond the trimming blade, cut it off so that it
just reaches theblade.
1. Removebattery.
2. Turn spool
36
clockwise to unlock as shown in figure P. The
white nub
37
inside the spool will rotate away from the
spool window
38
to indicate it isunlocked.
3. Pull the spool straight out toremove.
4. Remove any dirt and grass from the spool andhousing.
5. First, wind new line in the channel of the spool closest to
the holding slots
39
as shown in figureQ.
6. Place the end of the cutting line
40
into the retaining
hole
41
.
7. Wind the cutting line onto the spool in the direction of the
arrow on the bottom of thespool.
8. When the wound cutting line reaches the beginning of the
holding slots, cut the line approximately 106mm.
9. Push the line in the holding slots on one side of the spool to
hold the first line while you wind the second line.
10. Repeat the above procedure for the second cutting line on
the lower section of the spool.
CAUTION: Before you begin trimming, only use the
appropriate type of cutting line. Ensure that cutting line is
present in both sections of the spool as shown in FigureR.
11. Once both lines are wrapped around the spool
36
, place
your thumb and finger on the holding slots to further secure
the string and feed the end of each line through the two
holes
43
on either side of the head in the spool housing
12
as shown in figureS.
12. Line up the white nubs
37
inside the spool housing with
the recesses
42
of the spool. Align the holding slots
39
with the two holes
43
as close aspossible.
13. Push the spool into the spool housing and turn
counterclockwise to lock the spool in place. Ensure the
white nub
37
appears in the spool window
38
. Make sure
the line doesn't unravel and wrap around the shaft below
thespool.
14. Pull both ends of the cutting line to release them from the
holding slots. If the line extends past the cutting blade on the
guard cut the line so it just reaches theblade.
MAINTENANCE
Your
power tool has been designed to operate
over a long period of time with a minimum of maintenance.
Continuous satisfactory operation depends upon proper tool
care and regularcleaning.
WARNING: To reduce the risk of serious personal
injury, turn tool off and disconnect battery pack
before making any adjustments or removing/
installing attachments or accessories. An accidental
start-up can causeinjury.
1. Keep the air intake slots
44
, shown in figure T, clean to
avoidoverheating.
 Loading...