33
ENGLISH
Protecting the Environment
w
Separate collection. Products and batteries marked
with this symbol must not be disposed of with
normal householdwaste.
Products and batteries contain materials that can be
recovered or recycled reducing the demand for raw materials.
Please recycle electrical products and batteries according to local
provisions. Further information is available at
www.2helpU.com.
Rechargeable Battery Pack
This long life battery pack must be recharged when it fails to produce
sufficient power on jobs which were easily done before. At the end
of its technical life, discard it with due care for ourenvironment:
• Run the battery pack down completely, then remove it from
thetool.
• Li-Ion cells are recyclable. Take them to your dealer or a
local recycling station. The collected battery packs will be
recycled or disposed ofproperly.
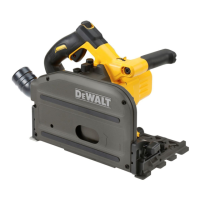
Tool Connect™ Chip (Fig.J)
WARNING: To reduce the risk of serious personal
injury, turn unit off and remove the battery pack
before making any adjustments or removing/
installing attachments or accessories. An accidental
start-up can causeinjury.
Your tool is Tool Connect™ Chip ready and has a location for
installation of a Tool Connect™ Chip.
Tool Connect™ Chip is an optional application for your
smart device (such as a smart phone or tablet) that connects
the device to utilize the mobile application for inventory
management functions.
Refer to Tool Connect™ Chip Instruction Sheet for
moreinformation.
Installing the Tool Connect™ Chip
1. Remove the retaining screws
12
that hold the Tool
Connect™ Chip protective cover
13
into thetool.
2. Remove the protective cover and insert the Tool Connect™
Chip into the empty pocket
14
.
3. Ensure that the Tool Connect™ Chip is flush with the
housing. Secure it with the retaining screws and tighten
thescrews.
4. Refer to Tool Connect™ Chip Instruction Sheet for
furtherinstructions.
Optional Accessories
WARNING: Since accessories, other than those offered
by DeWALT, have not been tested with this product, use
of such accessories with this tool could be hazardous.
To reduce the risk of injury, only DeWALT recommended
accessories should be used with thisproduct.
Consult your dealer for further information on the
appropriateaccessories.
D
Cleaning
WARNING: Blow dirt and dust out of the main housing
with dry air as often as dirt is seen collecting in and around
the air vents. Wear approved eye protection and approved
dust mask when performing thisprocedure.
WARNING: Never use solvents or other harsh chemicals
for cleaning the non-metallic parts of the tool. These
chemicals may weaken the materials used in these parts.
Use a cloth dampened only with water and mild soap.
Never let any liquid get inside the tool; never immerse any
part of the tool into aliquid.
C
Lubrication
Your power tool requires no additionallubrication.
MAINTENANCE
Your power tool has been designed to operate over a long
period of time with a minimum of maintenance. Continuous
satisfactory operation depends upon proper tool care and
regularcleaning.
WARNING: To reduce the risk of serious personal
injury, turn tool off and disconnect battery pack
before making any adjustments or removing/
installing attachments or accessories. An accidental
start-up can causeinjury.
The charger and battery pack are notserviceable.
Next, tip the saw backward until the back edge of the shoe
is resting on the work surface and the blade clears the work
surface (position 1, Fig.H). Now switch motor on, and allow
saw to come up to speed. Grip saw firmly with both hands and
begin a slow, deliberate upward swing with the handle of the
saw, keeping the bottom of the shoe firmly in contact with
the workpiece (position 2, Fig.H). Blade will begin to feed into
material. Always be sure blade is completely through material
before continuing with pocketcut.
NOTE: In areas where blade visibility is limited, use the edge
of the saw shoe as a guide. Lines for any given cut should be
extended beyond edge of cut to bemade.
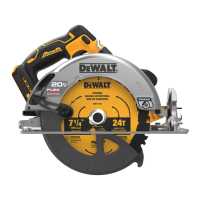
Metal Cutting (Fig.I)
Your saw has different metal cutting capacities depending upon
type of blade used and the metal to be cut. Use a finer blade for
ferrous metals and a coarse blade for non-ferrous materials. In
thin gauge sheet metals it is best to clamp wood to both sides
of sheet. This will ensure a clean cut without excess vibration or
tearing of metal. Always remember not to force cutting blade as
this reduces blade life and causes costly bladebreakage.
NOTE: It is generally recommended that when cutting metals
you should spread a thin film of oil or other lubricant along
the line ahead of the saw cut for easier operation and longer
bladelife.
 Loading...