13
ENGLISH
D
Cleaning
WARNING: Blow dirt and dust out of the main housing
with dry air as often as dirt is seen collecting in and around
the air vents. Wear approved eye protection and approved
dust mask when performing thisprocedure.
WARNING: Never use solvents or other harsh chemicals
for cleaning the non‑metallic parts of the tool. These
chemicals may weaken the materials used in these parts.
Use a cloth dampened only with water and mild soap.
Never let any liquid get inside the tool; never immerse any
part of the tool into aliquid.
C
Lubrication
Your power tool requires no additionallubrication.
MAINTENANCE
Your power tool has been designed to operate over a long
period of time with a minimum of maintenance. Continuous
satisfactory operation depends upon proper tool care and
regularcleaning.
WARNING: To reduce the risk of serious personal
injury, turn tool off and disconnect battery pack
before making any adjustments or removing/
installing attachments or accessories. An accidental
start‑up can causeinjury.
The charger and battery pack are notserviceable.
2. Press the magazine latch
15
and remove any
loadedstaples.
3. Visually check inside magazine for any jammedstaples.
4. Remove bent staple, using pliers ifnecessary.
5. If driver blade is in the down position, cycle the stall release
lever
11
using enough force to fully slide it to the other end
of the slot in thehousings.
6. Reinsert batterypack.
NOTE: The tool will disable itself and not reset until the
battery pack has been removed andreinserted.
7. Reinsert staples into magazine (see Loading the Tool)
Cold Weather Operation
When operating tools at temperatures below freezing:
1. Keep tool as warm as possible prior touse.
2. Actuate the tool 5or 6times into scrap timber beforeusing.
Hot Weather Operation
Tool should operate normally. However, keep tool out of direct
sunlight as excessive heat can deteriorate bumpers and other
rubber parts resulting in increasedmaintenance.
2. Insert fasteners into the side of magazine; fasteners should
be loaded with head against back ofmagazine.
3. Close sliding magazine until magazine latch clips snuggly.”
Unloading the Tool (Fig.F)
WARNING: The trigger lock‑off should always be locked
off whenever any adjustments are made or when tool is
not inuse.
1. Press magazine latch
15
and open sliding
magazine
6
fully.
2. Tip the tool up until the staples slide freely out of the side of
the magazine.
3. Check to ensure no loose staples remain insidemagazine.
4. Close sliding magazinefully.
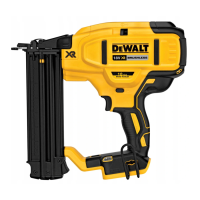
Dryfire Lock Out feature (Fig.A)
Tool is equipped with a dryfire lock out feature to prevent tool
from cycling when there are no fasteners loaded. When no
fasteners are visible in the Fastener Window
16
, the tool is
running low on fasteners. If this happens, the tool will be locked
out and will not actuate until more staples are loaded. (Refer to
Loading the Tool)
Adjusting Depth (Fig.G)
The depth that the fastener is driven can be adjusted using the
depth adjustment wheel
3
on the side of thetool.
WARNING: To reduce risk of serious injury from
accidental actuation when attempting to adjust
depth, ALWAYS:
• Remove batterypack.
• Engage trigger lock‑off.
• Avoid contact with trigger duringadjustments.
1. To drive the staple shallower , rotate the depth
adjustment wheel
3
away from the nose of thestapler.
2. To sink a staple deeper , rotate the depth adjustment
wheel
3
toward the nose of thestapler.
Headlights (Fig.H)
There is a headlight
4
located on each side of the stapler.
Headlights turn on upon battery insertion, activation of
the trigger, or depressing the contact trip. The lights will
automatically shut off after 20seconds unless tool remains
inuse.
NOTE: These headlights are for lighting the immediate work
surface and are not intended to be used asflashlights.
Low battery indicator: The left‑side headlight will flash four
consecutive times and then shut down to indicate lowbattery.
Jammed staple indicator: The right‑side headlight will flash
continually if a staple becomes jammed in the nosepiece
(seeClearing a JammedStaple).
Clearing a Jammed Staple (Fig.A, I)
If a staple becomes jammed in the nosepiece, keep the tool
pointed away from you and follow these instructions toclear:
1. Remove battery pack from tool and engage the trigger
lock‑off.
 Loading...