DeZURIK
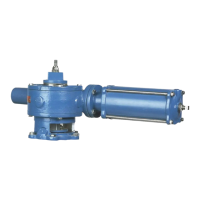
G-Series Cylinder Actuator Used on BAW Butterfly Valves
D10480 Page 8 August 2012
Removing Cylinder
This procedure can be performed with the actuator installed on the valve or removed.
1. Discontinue flow and relieve pipeline pressure.
2. Apply air pressure to the port in the cylinder cap (the end farthest from the actuator housing)
until the valve has moved to the end of its stroke.
Accidental operation of power actuator can cause personal injury or equipment damage.
Disconnect and lock out power to actuator before servicing.
3. Disconnect and lock out the pneumatic power to prevent accidental operation of the actuator.
4. Disconnect the tubing from both cylinder ports.
5. Remove the screws (B23), nuts (B24), lockwashers (B28) and stop cap (B29) from the housing
(B1).
6. Remove the cap nut (B25), jam nut (B22) and spacer (B21) from the end of the rack rod (B6).
7. Remove the screws (B27) fastening the cylinder assembly to the housing (B1), and carefully
remove the cylinder assembly by sliding it away from the actuator until the rack rod clears the
housing.
8. See Cylinder Instructions for details on rebuilding the cylinder.
Installing Cylinder
1. Scrape the old gasket material from the actuator housing and cylinder head, then place a new
gasket on the cylinder head.
2. Install the cylinder/rack rod assembly by sliding the rack rod through the rack (B4) and fasten
the cylinder to the housing (B1) with screws (B27).
NOTE: If the rack rod is not attached to the cylinder assembly, clean the threads of both the rack rod and
the cylinder shaft, then apply Loctite to the cylinder shaft threads and screw the rack rod onto the cylinder
shaft.
3. Slide the spacer (B21) and nuts onto the rack rod.
4. Screw the jam nut (B22) onto the rack rod (B6) until spacer is tight against rack (B4).
5. Screw the cap nut (B25) onto the rack rod (B6) and tighten the two nuts against each other.
6. Apply a thin bead of silicone sealant Dow RTV-732 to the stop cap (B29) and attach it to the
housing (B1) with screws (B23), nuts (B24) and lockwashers (B28).
7. Scrape old gasket material from the housing (B1) and stop cap (B29).
8. Apply a thin bead of silicone sealant Dow RTV-732 to the stop cap (B29) and attach it to the
housing (B1) with screws (B23), nuts (B24) and lockwashers (B28).
9. If the actuator is a powered actuator, reconnect power to the actuator.
10. Adjust the open and closed position stops described in the “Adjusting Position Stops” section.
 Loading...
