DeZURIK
G-Series Cylinder Actuator Used on BAW Butterfly Valves
D10480 Page 10 August 2012
Reassembling Actuator
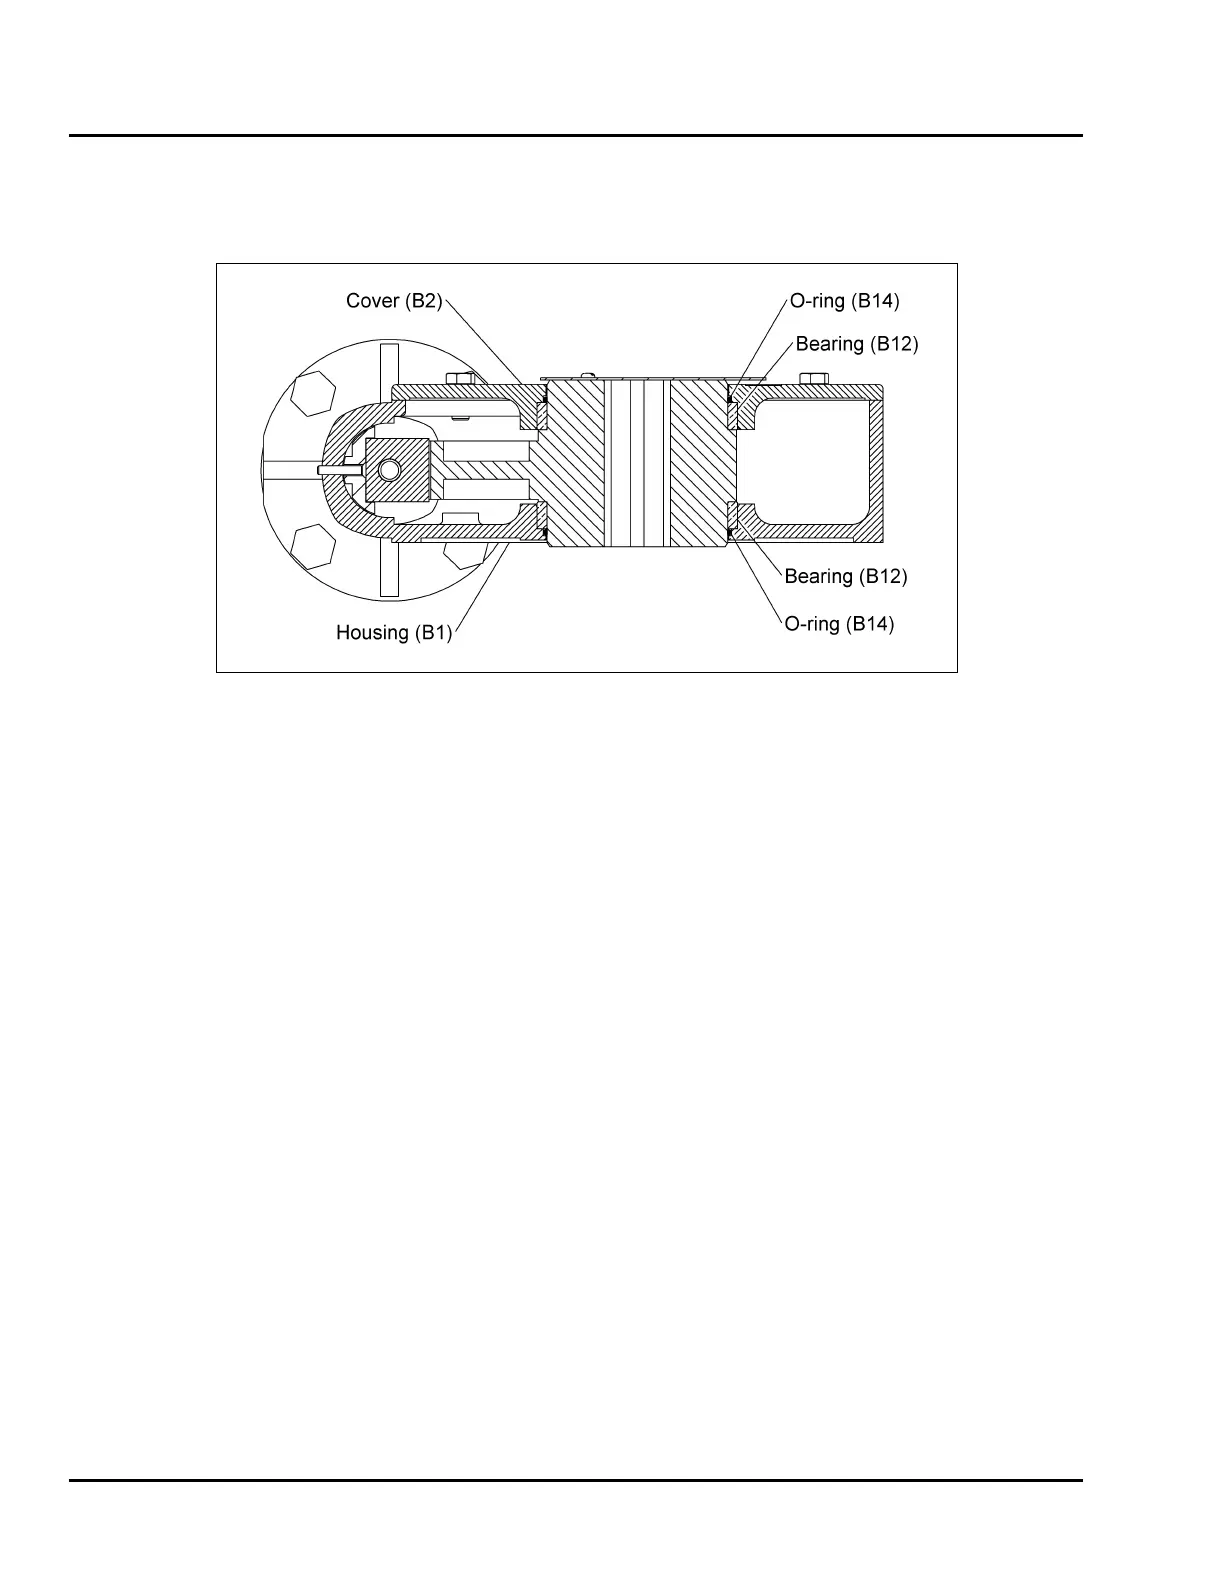
Install new bearings (B12) and O-rings (B14) in the housing (B1) and cover (B2) if necessary. See
Figure 6 for proper placement.
Figure 6 – Bearing and O-ring Locations
1. Scrape old gasket material from the housing (B1), cover (B2) and stop cap (B29).
2. Line up the scribe marks on the adaptor plate (P1) and actuator housing (B1) made during
actuator removal, then set the actuator housing on the adaptor plate.
3. Fasten the actuator housing (B1) to the adaptor plate (P1) using screws (P4) and lockwashers
(P10).
4. Drive the pin (B11) through the rack bearing (B7) and housing (B1) (if worn rack bearing was
removed).
5. Apply a liberal amount of lubricant to the teeth and back of the rack (B4) which contacts the rack
bearing (B7) and install the rack in the housing (B1).
6. Apply a liberal amount of lubricant to the teeth and journals of the gear (B3), then place the gear
in the housing (B1) and carefully align the teeth with the rack as shown in Figure 7.
NOTE: It may be necessary to loosen the adapter mounting screws and move the housing a small
amount to align the gears. Be sure to retighten the mounting screws after aligning the gears.
 Loading...
