Digital Projection E-Vision Laser 7500 & 8500 Series
Rev D January 2017
Page 12
Important Information
Basic Operation Instructions
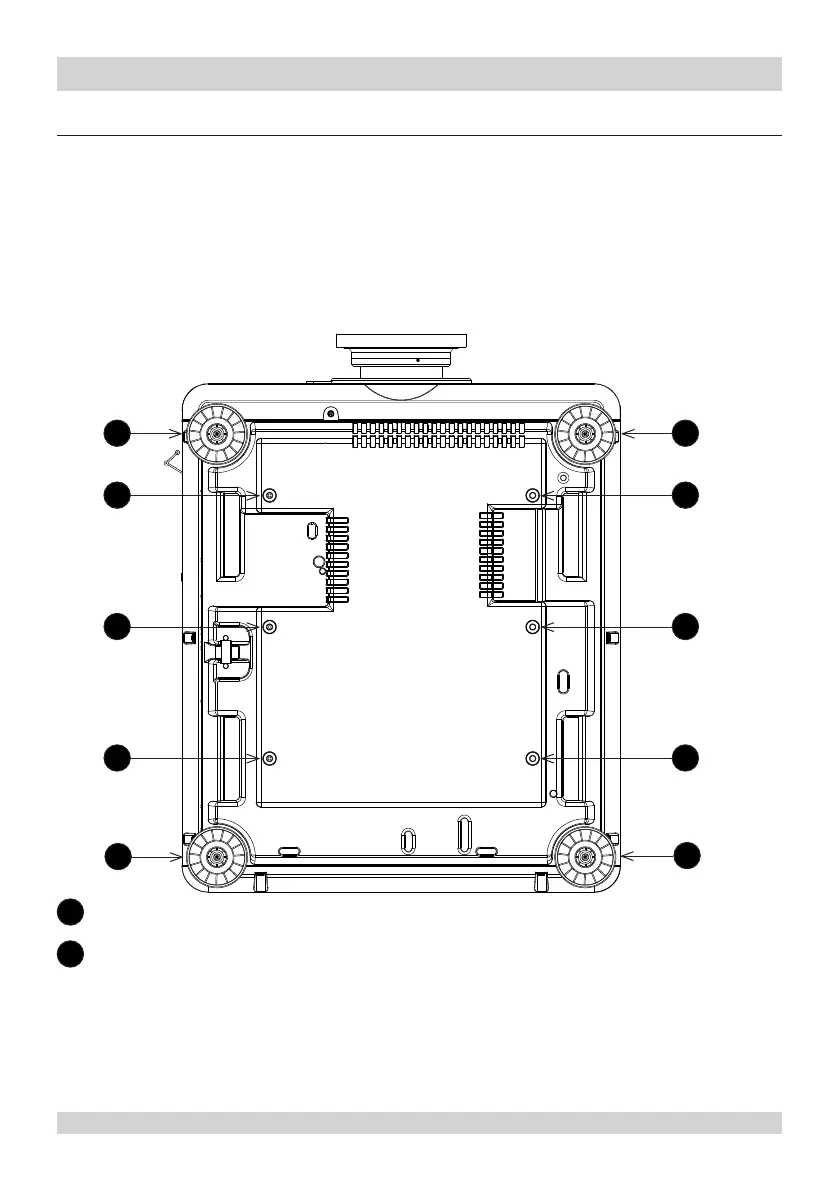
Positioning the screen and projector
1. Install the screen, ensuring that it is in the best position for viewing by your audience.
2. Mount the projector, ensuring that it is at a suitable distance from the screen for the image to ll
the screen. Set the adjustable feet so that the projector is level, and perpendicular to the screen.
The drawing below shows the positions of the feet for table mounting, and the xing holes for ceiling
mounting.
1
Four adjustable feet
2
Six M4 holes for ceiling mount
The screws should not penetrate more than 15 mm into the body of the projector.
1
2
1
1
1
2
2
2
2
2

 Loading...


