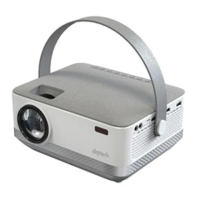
This document describes the Digitech AP4014 1080p Projector, a versatile home entertainment device designed for projecting images and videos with built-in speakers.
Function Description
The Digitech AP4014 is a 1080p projector capable of displaying content from various sources, including HDMI, USB, SD cards, and AV inputs. It features built-in speakers for audio output, making it a self-contained entertainment solution. The projector is designed for home entertainment and is not recommended for PowerPoint or other business presentations. It supports Bluetooth playback for audio devices, allowing connection to external Bluetooth speakers or headphones.
Important Technical Specifications
- Light Source Type: LED
- Display Native Resolution: 1080P
- Supported Video Resolution: 1080p, 1080i, 720p, 576i, 480p, and 480i
- Display Color: 7000K~8000K
- Brightness Output: 250-280 ANSI Lumens (White light output)
- Included Adapter Connect: Input AC100-240V, 50/60HZ; Output DC19V, 5A
- Connect Types: HDMI / USB / Micro USB(TF) / AV / Audio
- Input Ports: HDMI2 / AV1 / Micro USB(TF) 1 / USB1
- Output Ports: Audio Out *1 / Bluetooth
- USB Port Support: USB device up to 1000GB
- SD Card Support: SD card up to 1000GB
- Supported Image Formats: *.jpg, *.png, *.bmp
- Supported Audio Formats: *.mp3, *.wma, *.ogg, *.aac, *.flac
- Supported Video Formats: *.avi, *.flv, *.rmvb, *.mkv, *.mp4, *.3gp, *.mov, *.mpg, *.mpeg, *.ts, *.tp, *.vob
- Dimension: 254*197*109mm
- Recommended Projection Distance: 3-9ft
Usage Features
The projector offers flexible viewing options, allowing projection onto a wall or screen, or mounting from the ceiling or on a table. For rear projection, a special screen (not included) is required. The remote control should be aimed at the sensor on the front or rear of the projector.
Operation:
- Turning On/Off: Press the power button on the unit or remote. The projector turns on after approximately 5 seconds. Always turn off the projector before unplugging the power source to prevent damage.
- Vertical Location Adjustment: An "ANGLE ADJ" knob allows fine-tuning of the display angle.
- Focus and Keystone Adjustment: The lens focus wheel adjusts image clarity, while keystone correction facilitates horizontal angles.
- Input Source Selection: Users can select input sources (AV, HDMI1, HDMI2, Media Player) via the projector's touch panel or remote control.
- Multimedia Connection: Insert USB or Micro SD cards into the corresponding slots. Select "Photo," "Music," or "Video" from the Media Player menu to access content.
- HDMI Device Connection: Connect laptops, DVD players, Blu-ray players, Chromecasts, or TV Sticks via one of the two HDMI ports. Select the corresponding HDMI input source (HDMI 1 or HDMI 2).
- AV Video Device Connection: Connect AV devices using an AV cable (not included) to the AV input.
- Audio Device Connection: Connect headphones or wired audio systems using a 3.5mm jack (not included).
- Bluetooth Playback: The Bluetooth function, off by default, supports audio devices only (not smartphones or tablets). To use, turn on Bluetooth, search for nearby devices, and connect. The projector will display the Bluetooth name upon successful connection. The device retains pairing status if Bluetooth is open on both devices. For new Bluetooth speakers, turn off previous connections before searching.
- Remote Control Functions: The remote includes buttons for power, previous/next track, stop, flip display (180°), play/pause, navigation (arrows/OK), menu access, GoTo (chapter/track numbers), mute, volume control, source selection, exit, and zoom (aspect ratio 16:9 / 4:3/Auto for USB/SD/HDMI video).
- Picture Settings: Users can adjust picture modes (e.g., "User") and other settings via the menu. For non-professionals, using default values is recommended.
Maintenance Features
- Lens Cover: Remove the lens cover before use and replace it when the unit is not in use to protect the lens.
- Cleaning: Clean the lens with a dry cloth. For spots on the screen, use a vacuum cleaner to clean the lens. If issues persist, contact support.
- Ventilation: Do not block ventilation openings to prevent overheating.
- Battery Installation (Remote): Install 2XAAA batteries (not included) in the remote, observing polarity. Do not expose batteries to excessive heat, mix old and new batteries, or attempt to recharge non-rechargeable batteries. Dispose of batteries properly.
- Troubleshooting:
- No Power: Ensure the AC power cable is securely plugged in and the power switch is pressed.
- No Image: Verify device connection, lens cover removal, correct input signal source, and that the video source is 1080P or under.
- Lamp Switches Off: Allow the projector to cool, check for blocked ventilation, then restart.
- Image but No Sound (HDMI via laptop): Ensure the audio cable from the HDMI adapter is connected from the laptop's audio output to the projector's 3.5mm audio jack.
- Insufficient Brightness: The projector is ideal for dark environments.
- Loud Noise: Fan noise is normal due to heat generation. Placing the projector further away or connecting a louder external speaker can mitigate this.
- Blurry Image: Adjust keystone correction for a rectangular image, then focus for clarity. Optimal focus is achieved when pixels are clearly visible.
- Bluetooth Not Working: Confirm it's an audio device (not a smartphone/tablet). If issues persist, contact customer service.
Safety Instructions
- Use only the included AC power cable and accessories.
- Avoid looking directly into the projector lens when on, as it can cause eye damage.
- Do not expose the device to rain or moisture.
- Keep liquids away from the device.
- Protect from direct sunlight, extreme heat, large temperature fluctuations, and moisture.
- Operating and storage temperature: 0°C to 35°C (0°F to 95°F).
- Avoid impacts to prevent internal damage.
- Do not attempt self-repair; this will void the warranty. Contact the seller for technical support.
FCC Warning
Changes or modifications not expressly approved by the responsible party could void user authority. The equipment complies with Class B digital device limits. It may generate radio frequency energy and cause interference if not installed according to instructions. If interference occurs, try reorienting the receiving antenna, increasing separation between equipment and receiver, connecting to a different circuit, or consulting a dealer/technician.