8
Copyrighted by AmperorDirect.com
Assembling the HDX 1000
Installing an internal hard disk drive (Optional)
If you don’t plan to install an internal hard disk drive, please skip to the next page.
Do not connect any wires to the HDX 1000, before installing the internal hard disk.
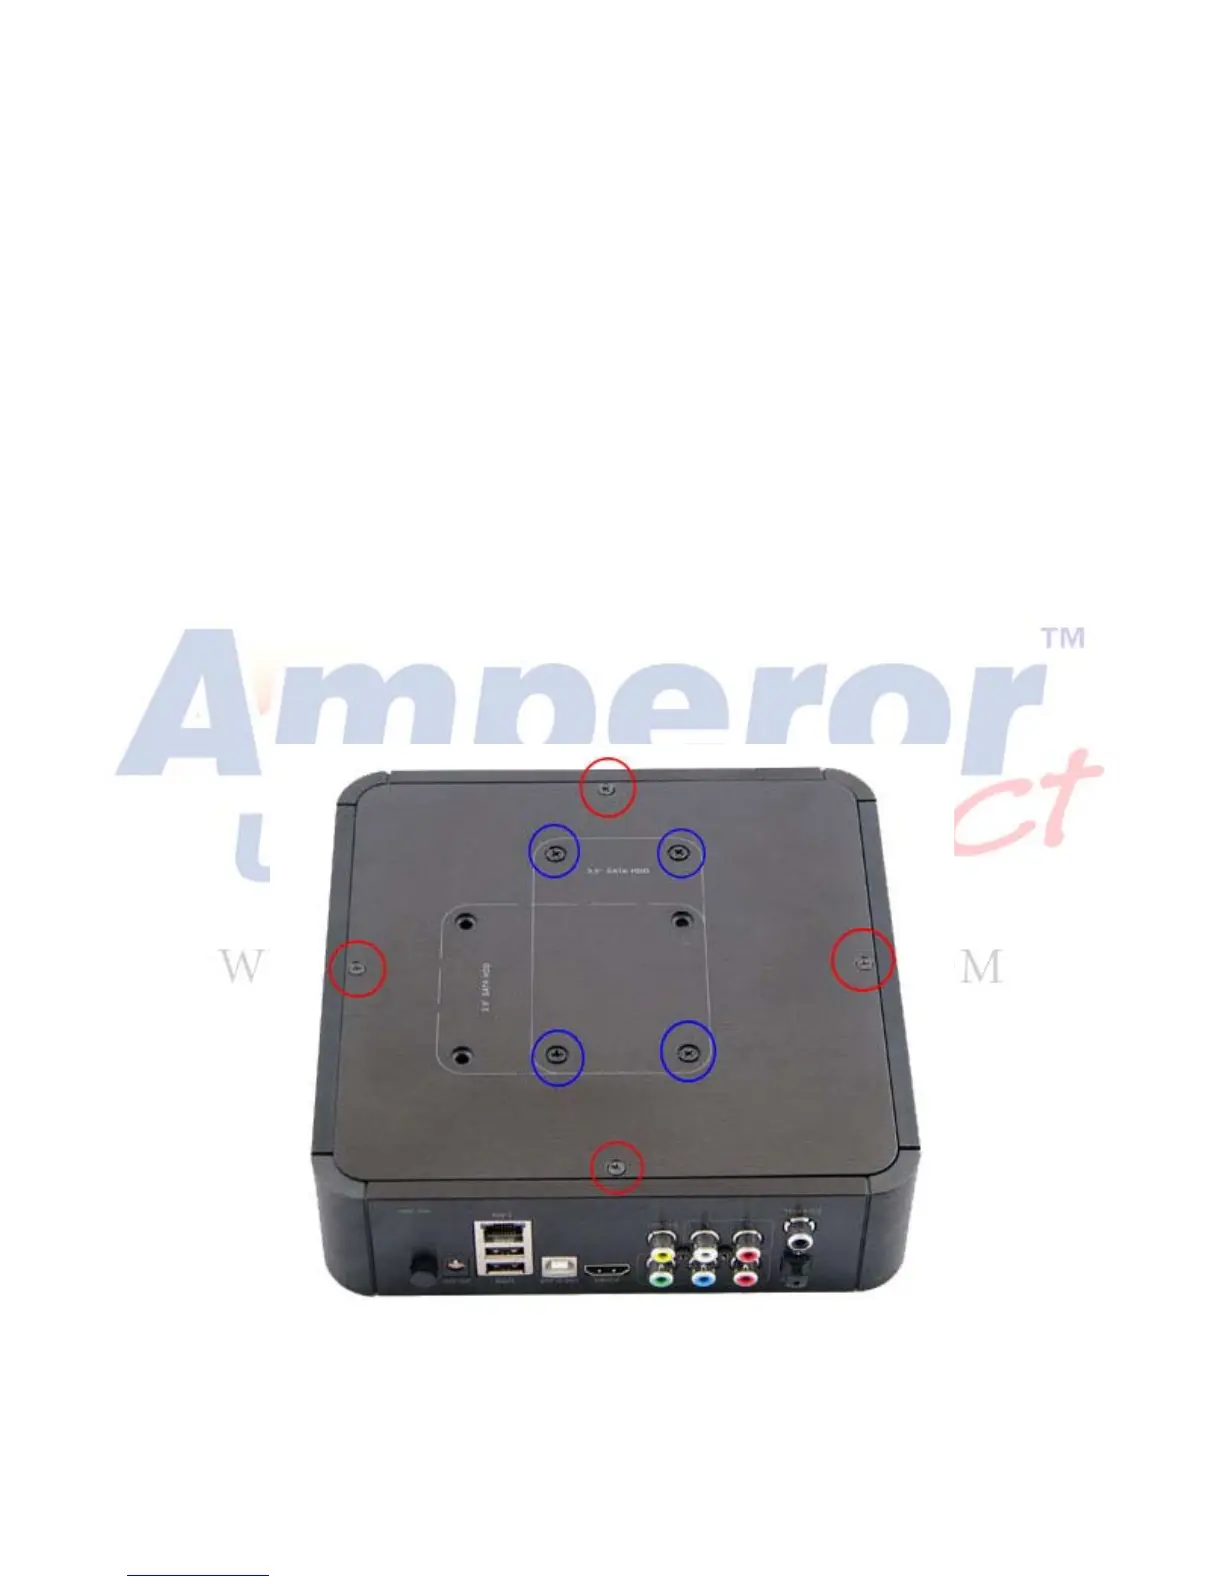
1. Remove the 4 screws (circled in red) on the back plate of the HDX 1000 using a Phillips head
screwdriver.
2. Remove the back plate and attach the hard disk to the cable.
Note: HDX 1000 only supports SATA.
3. Take the screws out of the small plastic bag and secure the hard disk by screwing the hard disk on
to the back plate.
Note: The 4 screw holes circled in blue are for installing the 3.5” hard drive.
4. Place the back plate back onto the HDX box and screw it back in place with the original four
screws.