5
INSTRUCTIONS
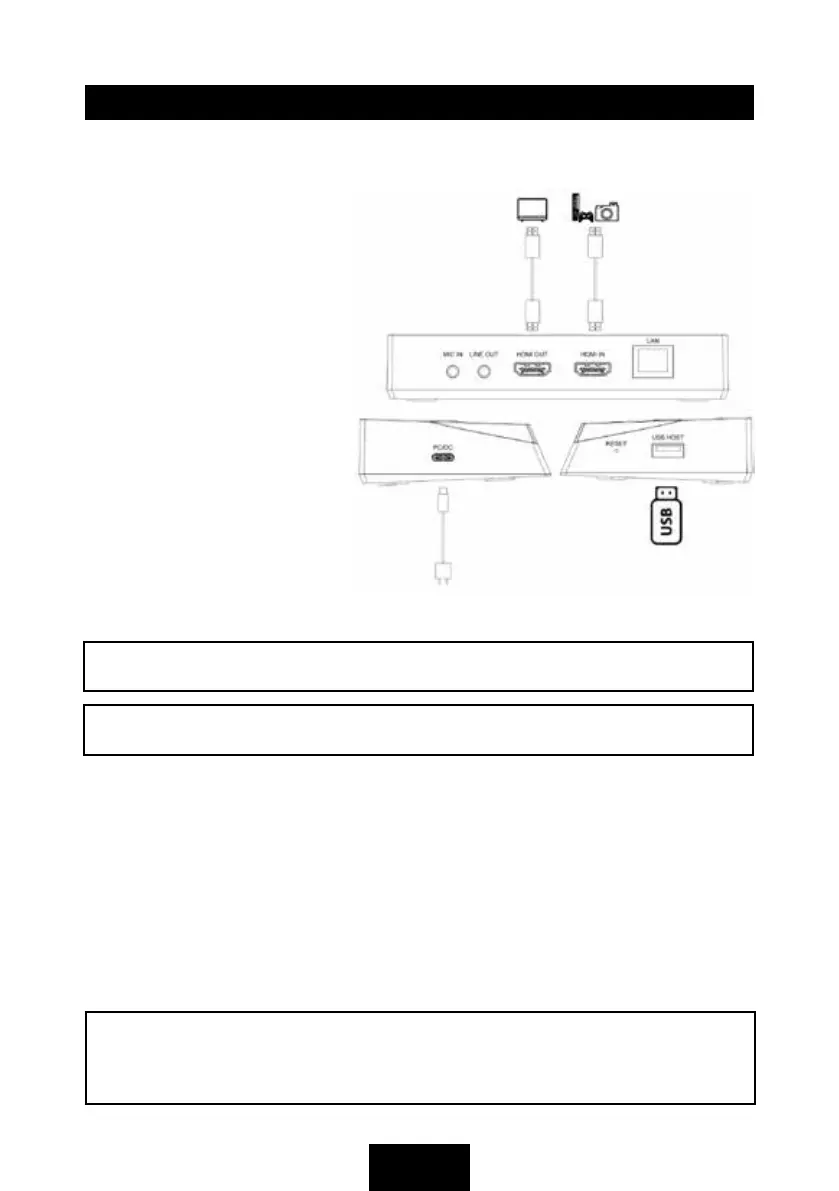
Record video to USB flash drive or USB HDD
1. Plug USB Type-C connector of
included USB cable to PC/DC
port, and USB Type-A connector
to your mains power supply to
power on device. REC button will
flash in RED, it means device is
not ready.
2. Use a HDMI cable to connect
HDMI IN port and HDMI video
source.
3. Use a HDMI cable to connect
HDMI OUT port and TV or
monitor. You should get video and
audio on TV right now.
4. Plug an USB flash drive or USB
HDD (exFAT or FAT32 format
with enough space) to USB HOST
port of device. REC button will be
illuminated WHITE now, and it
means the device is ready to record.
5. Press REC button to start recording, REC button will be illuminated GREEN, it means
device is recording. Press REC button again to stop recording, and save the recorded file
into the USB flash drive. GREEN REC button will be extinguished, and WHITE indicator is
illuminated. Please plug-out USB flash drive until WHITE indicator is illuminated, which may
take a few seconds.
6. Please refer to the step 5 of the next Stream live video on YouTube with network bonding
(RTMP) guide to set recording bitrate and FPS. The default settings are 16Mbps and 60pfs.
The recording resolution depends on the HDMI input resolution.
7. Use FAT32 format USB flash disk to record video, the max single file is about 4GB. During
recording, when the file reaches 4GB, device will automatically save a file and create another file.
NOTE: NTFS format is not supported.
NOTE: While the REC indicator is flashing in RED, it means the setup or configurations
are incorrect: No HDMI signal input. No USB storage inserted in USB HOST port. Incorrect
system format for USB storage. The capacity of USB storage is full.
NOTE: If using an external hard drive, please ensure the device has sufficient power.
 Loading...