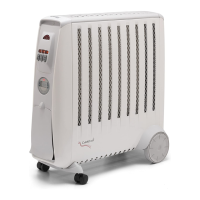
Heat Selector Switches (CDR2T & CDR2TI models only)
Mono and Dual Panel Heat Settings
Selector switches located on the control panel provide a choice of Half
Heat or Full Heat output to suit varying conditions and for economy of
operation.
Half Heat Setting - left hand side - This switch as shown in
Fig.’s 2 & 3 provides half heat output when activated. When it is
activated a neon light ‘x’ illuminates below the control button and the left
hand side element turns on.
Half Heat Setting - right hand side - This switch as shown in
Fig.’s 2 & 3 provides a half heat output when activated. When it is
activated a neon light ‘x’ illuminates below the control button and the
right hand side element turns on.
High Heat Setting - With both switches activated (see
Fig.’s 2 & 3) the maximum output of the heater can be achieved. When
both switches are activated neon lights ‘x’ below each control button
illuminate.
Note: The heater will only operate when the On/Off button is activated.
Digital Timer Operation (see ‘z’ in Fig. 3 & Fig. 5)
IMPORTANT: Remember to observe all safety warnings when operating
the heater on auto setting, either attended or unattended.
The timer allows you to select ‘AUTO’ or ‘MAN ON’ by pressing the
‘MODE’ button until the required MODE appears at the bottom of the
timer display.
‘AUTO’ MODE allows the heater to switch ON and OFF according to a
set 24 Hour program period (see ‘Setting Programs’ section below).
‘MAN ON’ MODE allows power to the heater uninterrupted by the
program settings.
Key Lock:
If ‘ENTER’ and ‘MODE’ are pressed within 1 second, the keys will be
locked. The user will know the keys are locked as the lock symbol ‘ ’
will be displayed on the top left hand corner of the screen. To unlock
the keypad, press ‘ENTER’ and then ‘MODE’ within 1 second.
Initial Operation
For initial use, plug the heater into a regular household power point and
turn the power on. The timer is now ready to be set up for use.
Setting Current Time
1. Press the ‘PROGRAM’ button ONCE. The clock symbol appears
on the top left hand side of the screen. The user can now set the
clock.
2. The hour digit will flash. To adjust the hour use the ‘-‘ & ‘+’ buttons.
Confirm the hour digit by pressing ‘ENTER’.
3. Once ‘ENTER’ has been pressed the minutes will flash. To adjust the
minutes use the ‘-‘ & ‘+’ buttons. Confirm the minute digit by pressing
‘ENTER’.
4. The timer now returns to the default display.
5. To reset incorrect time, repeat previous steps.
Once the correct time is set, a total of four ON/OFF time programs can
be set for operation.
Setting Programmes
Press the ‘PROGRAM’ key twice to set the programs.
You are now setting the programs starting with P1 ‘ON’.
SETTING P1 ON TIME:
1. To set the hour use the ‘-‘ & ‘+’ buttons. Confirm the hour digit by
pressing ‘ENTER’.
2. To set the minutes use the ‘-‘ & ‘+’ buttons. Confirm the minute digit by
pressing ‘ENTER’.
Note: The minutes can only be set in 10 minute blocks in programme
‘MODE’.
SETTING P1 OFF TIME:
3. To set the hour use the ‘-‘ & ‘+’ buttons. Confirm the hour digit by
pressing ‘ENTER’.
4. To set the minutes use the ‘-‘ & ‘+’ buttons. Confirm the minute digit by
pressing ‘ENTER’.
Repeat steps 1 to 4 to programme P2, P3 & P4. After programming P4
‘OFF’ you automatically exit to the default display.
At any time while programming the timer you can press the ‘PROGRAM’
button to exit to the default display.
Note: If the ‘ON’ time is the same as the ‘OFF’ time the appliance will
ignore the program.
The Advance Function
When in ‘AUTO’ MODE, if the ‘+’ button is pressed for longer than 2
seconds the programme will ADVANCE to the next setting programmed
and will only revert back to the program when the subsequent
programme time is reached. When the ‘ADVANCE’ function is running
the ‘ADVANCE’ segment will be displayed on the LCD screen. If the ‘-‘
button is pressed when the ‘ADVANCE’ programme is running the
‘ADVANCE’ feature will be automatically cancelled and the programme
will run as normal.
Note - Timer Memory Back Up Batteries - Once the heater has
been left plugged in with the socket switched on for at least 72 hours
the timer’s memory back up batteries will be fully charged.
Once the timer batteries are fully charged, if there is a power cut or
if the heater is disconnected from the mains for less than six months,
then the timer will continue to keep time & the settings in the memory
will remain intact.
If however the timer back up batteries have not been charged fully, or
if the heater is deprived of power for longer than six months, then the
time and the programme settings are likely to be lost and you may
therefore need to reset the time and the programme before using the
AUTO MODE again.
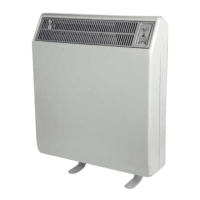
Electronic Climate Control - see Fig. 4
(CDR2ECC & CDR3ECC models only)
Operation
The electronic control allows MANUAL and AUTO operation.
In MANUAL ON mode there are three heat settings :
L/H Side Heat, R/H Side Heat and High Heat
In AUTO mode the heater comes on as per the programmed timer
settings (see Setting programs). At any point if the heater is active i.e.
heat is being produced, the ‘ ’ neon is lit - see Fig. 4.
Initial Operation
When the heater is connected to the mains the ‘ ’ neon will be lit and
the display is blank. Press the ‘ ’ button and the display goes to full
heat set to 35
o
C - see Fig. 8.
Note: All display characters are displayed in Fig. 13.
Standby Mode
With the heater ON if the ‘ ’ button is pressed, the heater will go into
standby mode, heater switches off, the display goes blank and only
the MAINS ON neon ( ) remains lit. On pressing the ‘ ’ button again
the heater will come on in the mode and with the settings it had prior to
going into standby mode.
Setting Time
To set the time press ‘P’ and the ‘ ’ appears with the digits flashing -
see Fig. 9.
1. Press the ‘ ’ or ‘ ’ until the correct time is displayed.
2. Press ENTER. The display will return to the state prior to entering
set time.
N.B. If no keys are pressed after 4 minutes the display will revert to the
state prior to entering set time.
Manual Operation
Pressing ‘ ’ from the default HIGH screen (Fig. 8) brings the heater
into AUTO mode - see ‘Setting the Timer Programs’. Press again to put
the heater into OFF mode - see Fig. 6. Press again for left hand side
heat ( appears on LCD display - see Fig. 7). Press again for right
hand side heat ( appears on LCD display). Press again brings the
user full circle to FULL heat mode ( appears on LCD display).
Setting the Desired Temperature
The desired temperature can be set using the ‘ ’ or ‘ ’ keys. The
temperature can be set from 5
o
C to 35
o
C and this will be shown on the
display. When the temperature is reached the heater will automatically
switch OFF. If the ambient temperature drops the heater will come on
again automatically. Note the electronic climate control device conserves
energy and assists with temperature regulation e.g. if the heater is set
to HIGH heat and the temperature is set to 28
o
C, at 27
o
C the heater will
switch to a lower heat setting. Then at 28
o
C the heater will switch off
completely.
 Loading...