Remote Control
turned on, and the LED indicator will show “HIGH”.
Pressing this key allows for the selection of either
low heat or high heat power options.
OSC (Oscillation)
When the unit is operating, press the “ ” key,
the heater body will begin turning left and right
automatically up to 76°. The LED indicator of this
oscillation function will be turned on.
Press this key again, the oscillation function will
stop and the LED light will turn off.
MODE
When the unit is in operation, press the “ ” button
to set the timer or thermostat.
Note: when the set key “ ” has been pressed to
set the timer or change the required temperature,
the LED light will icker for approx 5 seconds.
During this 5 second interval changes can be
inputted by pressing the “+” or “-” keys.
However if after pressing the set key “ “ no
further buttons are pressed the unit will return to
display the room temperature and to make further
changes the process needs to begin again.
Setting the timer:
Press the key, the light will show “0 h”, then press
the “+” or “-“keys to set the working time, (within
a range of 1-12 hours).
The time can increase or decrease in intervals of
1 hour/each by pressing the “+” or “-“keys. The
display will show the nal time you have set.
Setting the thermostat:
When the timer has been set (if desired), press
the “ ” again. The LED displays 25°C, now
you can adjust the thermostat to your required
temperature setting. The temperature setting is
increased or decreased in intervals of 1°C/each
press of the “+” or “-“keys. The display will show
the nal temperature you have set.
Range 15 - 35°C)
When the room temperature is ≤ -10°C, the LED
display will show as “LO”
When the room temperature is > 40°C, the LED
display will show as “HI”.
When the room temperature is between -10°C
to 40°C, then the LED display will show the
corresponding temperature by number.
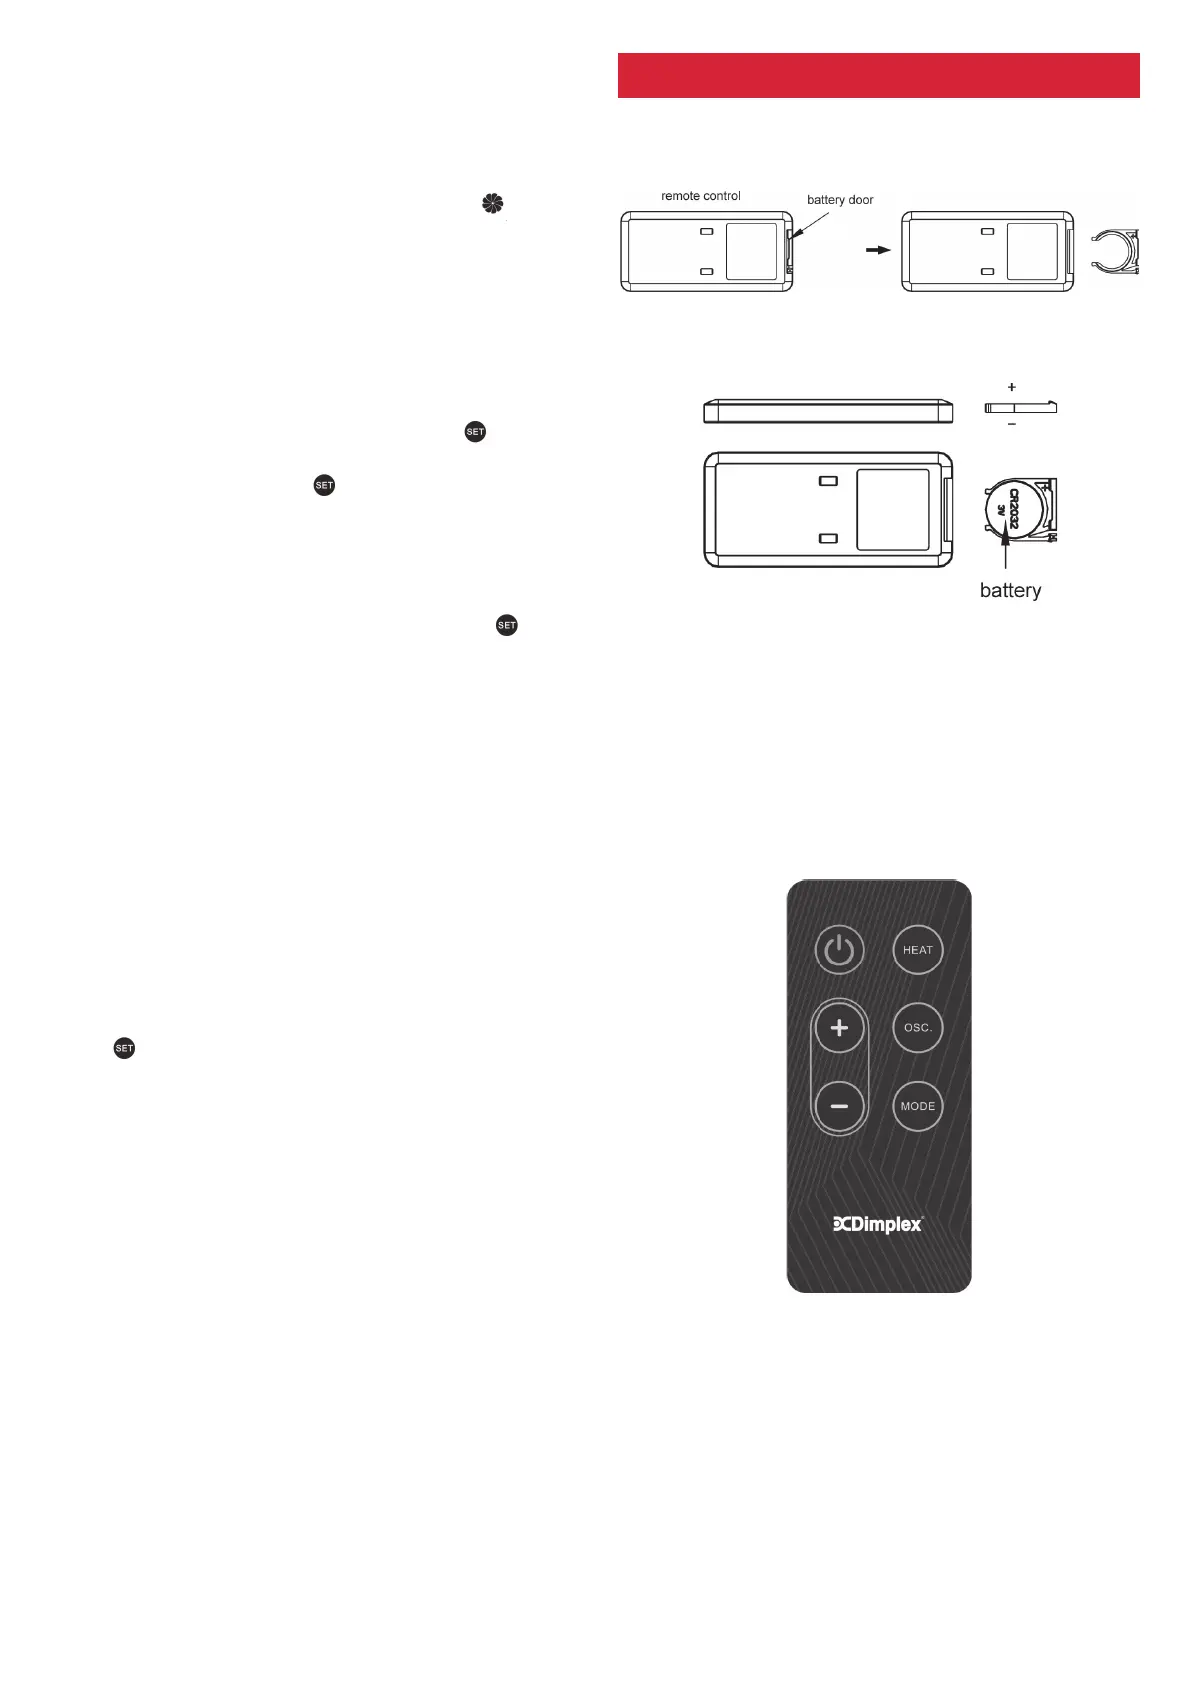
Fig. 6
Fig. 7
Slide out the battery holder at the rear of remote
control. (Fig. 6)
Insert a 3V Li battery (CR 2032) into the tray of
the door, battery text facing up. (Fig. 7)
Slide the battery holder back into the remote
control; it is now ready for use.
There are six function keys on the remote control
and their functions match those on the control
panel of the heater.
When operating the remote control, always point
the remote towards the display window of the
heater retaining line of sight with the heater and
away from any walls; the signal distance is approx.
6 meters.
REPLACING THE BATTERY
OPERATION
Fig. 8