Dingo K9-4 Operation & Maintenance Manual
13
Maintenance
It is essential to maintain the engine as detailed
in the engine manual. Service recommendations
will vary depending on your engine type, refer
to your engine manual for this information.
Any information relating to the engine in the
following table is intended as a guide only.
Refer to the Pre Start Up section for maintenance
that should be completed before starting the
Dingo (each and every time).
Disconnecting
1 Lower attachment to the ground or onto a
trailer.
2 Turn the ignition key OFF to stop the
engine.
3 Move the auxiliary hydraulics lever forward,
backward and back to neutral position to relieve
hydraulic pressure at the hydraulic couplers.
4 Slide collar back on the hydraulic coupler and
disconnect attachment couplers from machine
couplers. (Note: if this is difcult return to step
3 and repeat).
5 IMPORTANT: Connect attachment hoses
together to prevent contamination during
storage.
6 Install protective caps onto Dingoes hydraulic
couplers.
7 Disengage the attachment lock pins by turning
them to the outside.
8 Start engine, tilt the mount plate forward and
back machine away from the attachment.
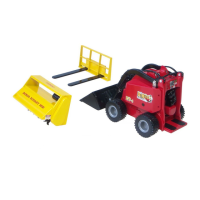
Attachments
Connecting
IMPORTANT: Use only Dingo approved
attachments. Attachments can change stability
and operating characteristics of the machine.
The warranty of the machine may be voided if
used with unapproved attachments.
IMPORTANT: Before connecting any
attachments to the machine, make sure mount
plates are free of any dirt and debris.
1 Move pump control lever to slow (turtle)
position.
2 Slowly push the attachment tilt lever forward
to tilt the attachment mount plate forward.
3 Position mount plate into the upper lip of the
attachment’s receiver plate.
4 Raise the Dingo arms while tilting back the
mount plate at the same time.
5 IMPORTANT: The attachment should be
raised enough to clear the ground and the mount
plate tilted all the way back.
6 Turn the ignition key to OFF to stop the
engine.
7 Engage the attachment lock pins (the lock pins
should go down 15mm as they turn). Note: Lock
pins are located on the outer edge of the mount
plate and should be turned towards the inside
to engage.
8 Note: Proceed to next step if auxiliary
hydraulics are required with attachment.
9 IMPORTANT: Make sure all foreign matter
is cleaned from hydraulic connections before
making connections.
10 With the engine turned off move the auxiliary
hydraulics lever to the forward, backward, and
back to neutral position to relieve hydraulic
pressure at the hydraulic couplers.
11 Remove protective plugs from the hydraulic
couplers on the Dingo (The hydraulic couplers
are located on the inside of the left arm). Connect
plugs together to prevent contamination during
operation.
12 Slide collar back on hydraulic coupler
and connect attachment couplers to machine
couplers. There will be two connections to
make.
13 Conrm that connection is secure by pulling
on the hoses.
14 Connecting the 4in1 Bucket is done in the
same way except the receiving couplers for the
4in1 bucket are located on the inside of the right
arm of the Dingo. No mistake can be made as
the 4in1 couplers are smaller and will not t the
auxiliary couplers.