USING DJI LIGHTBRIDGE
1. Search “DJI Lightbridge” in Google Play and install it onto your mobile device.
3. Connect ground system and mobile device using a USB cable.
2.Ensure "Developer options" is enabled and "USB debugging" is on. Otherwise,
follow below steps to operate or surf the Internet for a solution.
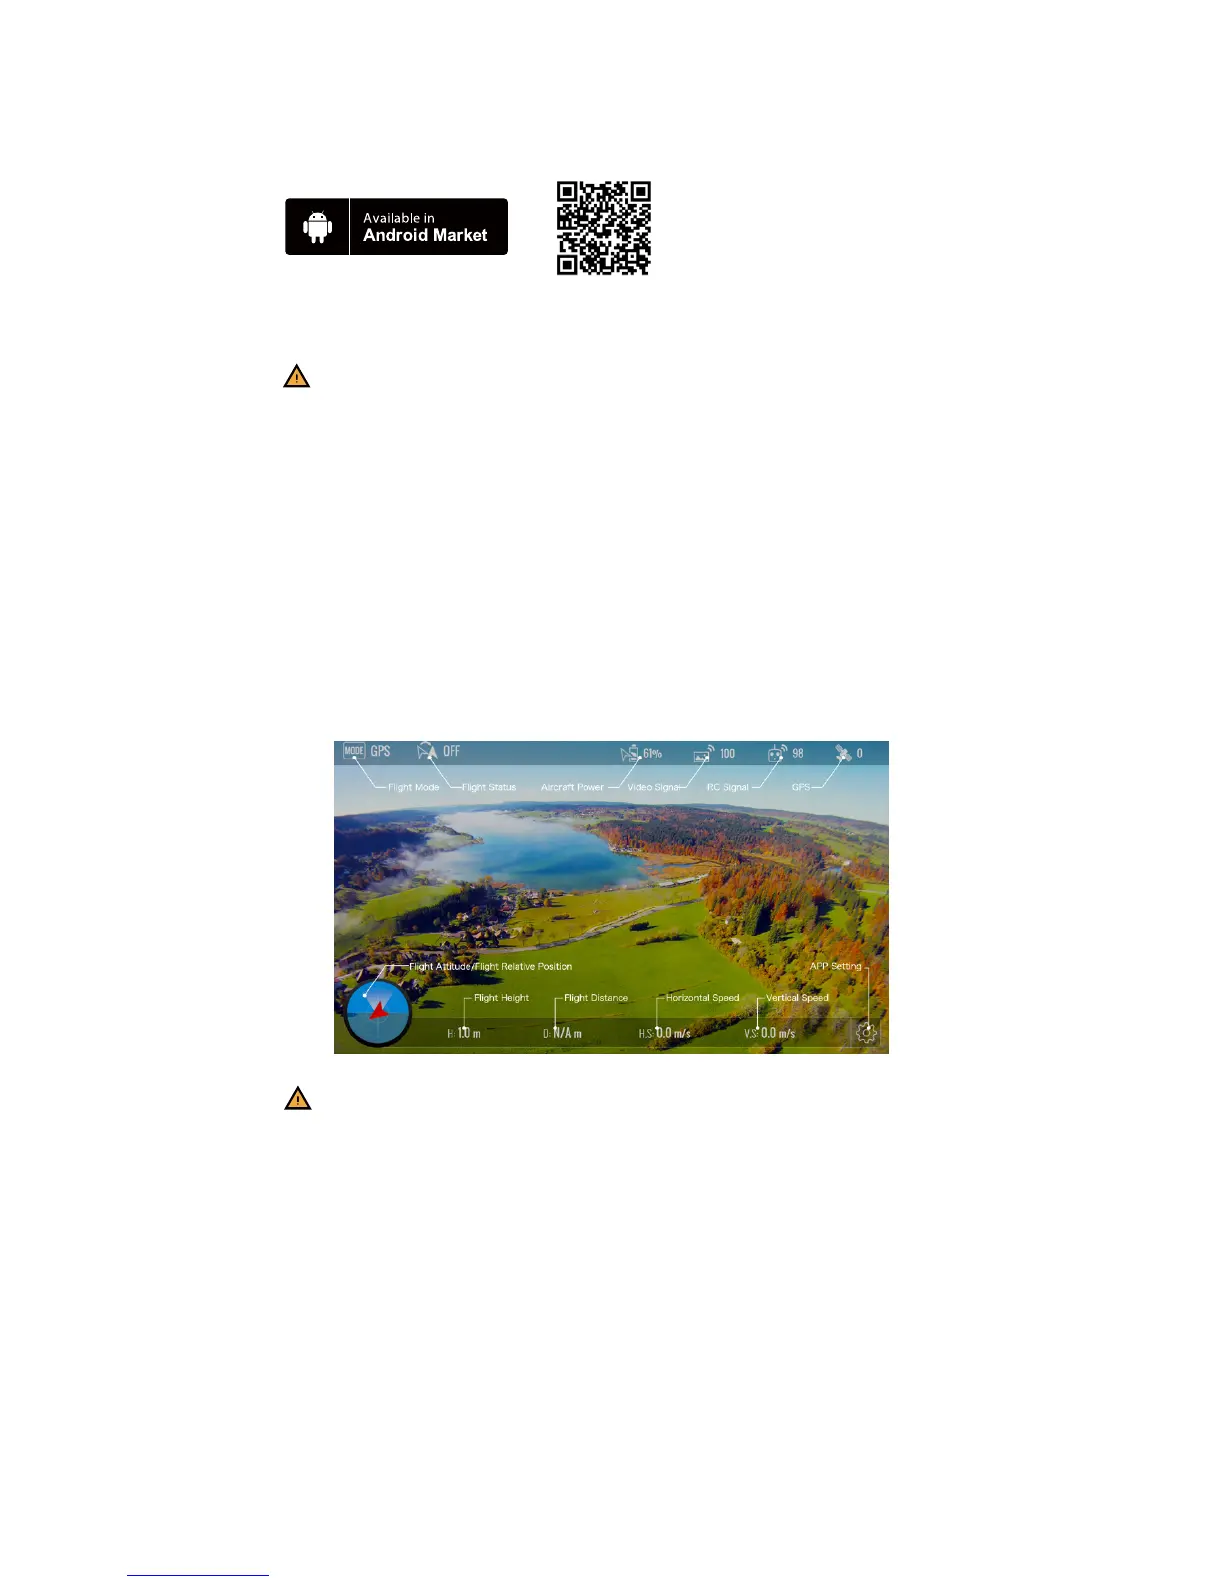
4. Enter DJI Lightbridge setting menu, tap “Video Source Setting” and select
either “HD gimbal“ or “HDMI/AV” as video source base on your camera
profile.
5. Or connect to a monitor using the HDMI output.
(
1
)
Tap “Settings” ->”About phone” ->”Build number”. Tap “Build number”
7 times.
(
2
)
Toast message will change to “No need, you are already a developer.”
(
3
)
Return to “Settings” and you will see that “Developer options” is enabled.
(
4
)
Tap “Developer options” then tap “USB debugging”.
Scan the two-dimension
code or log in to Android
Market to download
How to enable developer options on Android (Samsung note3 used as
demonstration)
Note that 1st level voltage warning is disabled now when using with
NAZA-MV2.
 Loading...