Do you have a question about the DKS 1812 Classic and is the answer not in the manual?
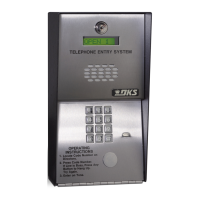
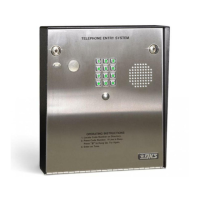
Details the unique telephone communication system, direct line connection, call waiting, two relays, and clock/calendar functions.
Provides detailed front, side, back, and bottom view dimensions for surface mount installations.
Provides detailed front, side, back, and bottom view dimensions for wall mount installations.
Details side, front, and bottom view dimensions for flush mount installations including rough-in and flush boxes.
Details FCC compliance, regulations, and registration for the digital device.
Explains Canadian Department of Communications certification, requirements, and user responsibilities.
Provides instructions for mounting the 1812 Classic unit, including removing the control board and handling static sensitive components.
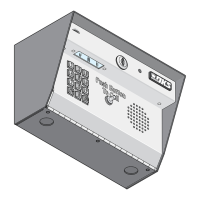
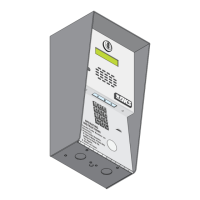
Details mounting options for surface, wall, and flush mount models, including using mounting posts or direct wall mounting.
Instructions for mounting the flush mount model into a pilaster, wall, or kiosk using a rough-in box.
Steps for re-installing the control board, including connecting plugs and ensuring proper wiring and grounding.
Details the installation and importance of the by-pass board for telephone mode configurations and outdoor installation requirements.
Explains telephone line wire types, conversion, tip/ring definitions, polarity, and recommended wire types for outdoor/underground runs.
Specifies the required 24 VAC power, transformer usage, and limitations for powering the 1812 Classic system.
Covers proper grounding techniques and the importance of surge suppressors for system protection.
Provides wiring instructions for connecting a single 1812 unit to a telephone company line in telephone mode.
Details wiring the 1812 unit to the internet for telephone mode operation, including connection to modems and routers.
Explains how to wire multiple 1812 units in series for telco or internet telephone mode, including programming notes for multiple systems.
Provides wiring instructions for connecting a single 1812 unit for intercom mode operation directly to a homeowner's phone or PBX/KSU system.
Details wiring multiple 1812 units in series for intercom mode, including programming requirements for each unit.
Describes the function of each terminal on the 1812 Classic main board, including phone connections, relays, and power inputs.
Explains the two methods for programming the 1812 Classic: using the system keypad (preferred) or a touch-tone telephone.
Details how to reprogram the master code, essential for accessing and configuring the system's memory.
Guides users through programming various system parameters like phone mode, setup codes, and timing functions.
Covers programming of time-related features such as calendar chip, Do Not Disturb zones, and relay activation schedules.
Details programming for call forwarding numbers, enabling/disabling the feature, and setting up preprogrammed dial-out numbers.
Explains programming, deleting, and managing access codes for controlling gates and doors, including time zone restrictions.
Adjusts the speaker volume for clear audio, balancing sound level to prevent feedback.
Adjusts the feedback potentiometer (FB1) to minimize microphone feedback when connected to the resident telephone.
Adjusts the feedback potentiometer (FB2) to minimize microphone feedback for calls to outside phone lines.
Guides guests on how to initiate a call to the homeowner and how the homeowner can grant or deny access.
Explains how the homeowner can manage incoming calls while communicating with a guest at the 1812 unit.
Details how guests can use preprogrammed numbers (01, 02, 03) to automatically dial specific external numbers.
Explains how access codes are used to operate access control devices, including the function based on location code and time zones.
Enables or disables the call forward feature, allowing calls to be routed to a programmed number.
Enables or disables the call forward time zone feature, controlling when calls are automatically forwarded.
Enables or disables the Do Not Disturb feature, preventing the unit from ringing the house phones during programmed times.
Enables or disables the access code time zone feature, restricting access code usage to specific time periods.
Enables or disables the automatic relay activation time zones, controlling relay operation based on programmed schedules.
Manages the auto-answer feature, allowing remote access for programming and relay activation via phone.
Allows checking the status of relays (latched or active) by calling the system and listening for specific tones.
Details how to program the 1812 system remotely using a touch-tone telephone, requiring the auto-answer feature to be enabled.
Explains how to activate or deactivate relays remotely via phone, using programmed tone open numbers.
Describes the function of switch inputs for activating relays and external time zones.
Provides guidance on diagnosing and resolving common problems with the 1812 system, including wiring and programming issues.
Presents a detailed wiring schematic of the 1812 Classic control board, illustrating terminal connections and component placement.
Explains the importance of phone line polarity and how to check it to prevent operational problems.
Offers a step-by-step procedure to find and correct noise or hum issues on the homeowner's phone line.
A table listing common system symptoms and their potential solutions for troubleshooting.
Lists available accessories for the 1812 system, such as secondary keypads, surge suppressors, and mounting posts.
Provides templates for logging programmed information, including master code, tone open numbers, and time zones.
| Brand | DKS |
|---|---|
| Model | 1812 Classic |
| Category | Control Systems |
| Language | English |