Do you have a question about the Dogtra iQ and is the answer not in the manual?
Intended for behavior modification of dogs only. Not for human or other animal use. Dogtra not liable for improper use.
Consult a dog training professional when using an e-collar to correct aggressive dogs towards others.
Dogtra's filtering system minimizes interference. Digital microprocessor offers unique codes to eliminate frequency match-up.
Unit shuts down after 12 seconds of constant button hold, reactivates upon release and re-press.
Loose fit causes movement, rubs skin, causes irritation. Tight fit hinders breathing. Proper fit ensures consistent contact.
Extended wear in same location causes skin irritation. Reposition collar occasionally and check for irritation.
Dog's reaction to stimulation varies. Adjust level based on temperament, situation, and distractions.
E-collars can be used with various methods. Consult a dog training professional for concerns with Dogtra methods.
Lists components included with the iQ system: Transmitter, Receiver, Battery charger, Splitter cable, Owner's manual.
Details optional accessories like Field Auto Charger and European Charger, and where to purchase them.
The receiver is waterproof, indicating it can withstand water immersion.
The transmitter has water-resistant properties, offering protection against splashes or light rain.
Specifies the operational range of the training system, up to 400 yards.
Offers a wide range of stimulation intensity levels, from 0 to 100.
Available modes include Nick (rapid pulse), Constant (sustained), and Pager (vibration).
Specifies the minimum dog weight suitability for the system, starting from 10 lbs.
Highlights the fast charging capability, allowing a full charge in approximately 2 hours.
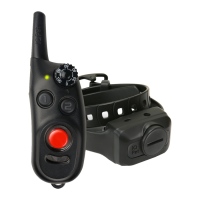
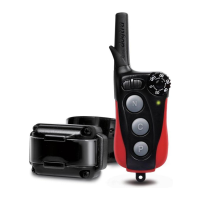
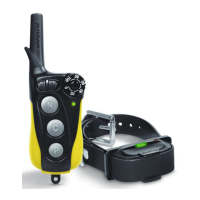
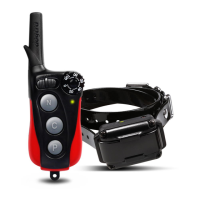
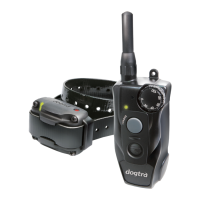
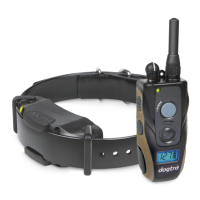
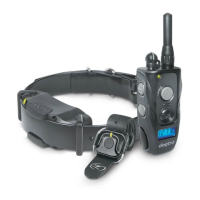
Diagram and labels for the transmitter, showing buttons, dial, LED, antenna, and charging port.
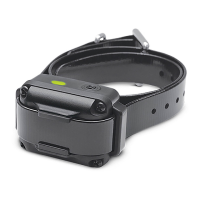
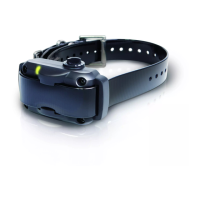
Diagram and labels for the receiver, showing contact points, collar strap, LED, and charging port/magnetic switch.
Procedure to activate/deactivate the receiver/collar by aligning magnetic dots on transmitter and receiver.
Explanation of transmitter buttons: Nick (rapid pulse), Constant (sustained up to 12s), Pager (vibration).
Proper fit ensures contact points press skin. Allows finger/two snug fit. Prevents movement and irritation.
Start low, increase gradually. Find level causing mild negative reaction (neck jerk). Adjust for distractions.
Hold transmitter away from body. Keep unit charged. Avoid touching antenna for maximum range.
Receiver LED flashes every 4s when on. Steady glow when buttons pressed. Color indicates battery: Green (full), Amber (medium), Red (needs charge).
Remove rubber plug, insert charger, plug into outlet. LED glows red during charge, green when full. Replace plug.
Dog needs basic obedience. Train with leash first, then introduce distractions. Use positive reinforcement.
Teach commands (sit, stay, here, heel, kennel) with leash. Use praise for compliance. E-collar reinforces commands.
Use e-collar for reinforcement after leash training. Apply light stimulation when command is given, remove upon compliance.
Always start low, increase as needed. Use just enough stimulation to get point across for less stress.
Secure rubber plugs. Inspect for damage. Rinse receiver after use. Clean dirt/debris to maintain waterproof guarantee.
Charge fully before storage. Recharge monthly during storage. Store in moderate temperatures, not extreme climates.
Check receiver is on, red dots aligned. Ensure collar is tight for contact. Consider longer contact points or trimming hair.
Test on fingertips, increase stimulation. Check contact points are touching skin. Battery may be low.
Avoid touching antenna. Range affected by terrain, brush, hills, moisture. Avoid electrical conductors.
Check charging pin. Clean port. Rinse receiver/charging port if exposed to salt water. Batteries may need replacement after 2 years.
May be due to contact points. Consult vet. Check dog's neck each time unit is used. Return to normal condition before reuse.
Covers original purchaser for 1 year from purchase date (parts, labor, accessories). After 1 year, customer pays for parts/labor/shipping.
Register product online or by phone within 30 days of purchase. Proof of purchase is required if not registered.
Excludes secondhand purchases, misuse, improper maintenance, alterations, water damage on specific models, and removed serial numbers.
Refer to Troubleshooting Guide, call customer service before sending. Customer pays for shipping. Provide problem explanation and contact info.
| Range | 400 yards |
|---|---|
| Waterproof | Yes |
| Type | Remote Dog Training Collar |
| Battery Type | Lithium Polymer |
| Battery Life | 2 hours |
| Stimulation Type | Nick, Constant |
| Stimulation Levels | 100 levels |