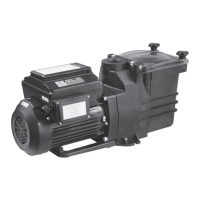
This document describes the Doheny In-Ground Variable Speed Pumps, specifically item numbers 90950 and 90951. It provides instructions for programming, adjusting settings, and using various features of the pump's control panel.
Device Function Description
The Doheny In-Ground Variable Speed Pump is designed to circulate water in an in-ground pool system. Its variable speed capability allows users to optimize energy consumption by running the pump at different RPMs for various durations throughout the day. The control panel facilitates the setting of custom schedules, quick cleaning cycles, and adjustment of the current time.
Important Technical Specifications
Control Panel Indicators:
- AM/PM Indicator Light (1): Shows whether the current time displayed is AM or PM.
- Speed/Duration/Time/Watts Indicator Light (2): A glowing green light indicates which measurement (Speed, Time, Duration, or Watts) is currently being displayed or adjusted.
- Power Light (3): A red light indicates that the pump is receiving power.
- Speed Indicator Lights (1-4): Green lights above buttons 1, 2, 3, and 4 indicate if that speed is currently running or being adjusted.
- Quick Clean Indicator Light (5): A green light next to the Quick Clean button indicates if the quick clean cycle is running or being adjusted.
Performance Specifications:
- Minimum RPM: 1000 RPM
- Maximum RPM: 3450 RPM
- Total Duration for Scheduled Options: The combined duration for speeds 1 through 4 must be 24 hours or less.
Usage Features
1. Adjusting the Time:
- Initiation: Press "Setting/Enter" (7) to begin. The "Time" indicator light (2) will highlight, and one of the digits on the display (8) will flash.
- Adjustment: Use the left and right arrow keys (9) to select the flashing digit and the up and down arrow keys (9) to adjust the time.
- AM/PM Selection: The AM or PM indicator (1) will highlight to show the selected period.
- Confirmation: Press "Setting/Enter" (7) a second time to lock in the set time.
2. Programming a Custom Schedule:
- Prerequisite: Ensure the pump is stopped before programming.
- Setting Speed 1:
- Press "1" (Speed 1 button) on the control panel. The "Speed" indicator light (2) will illuminate, and the current RPM will be displayed.
- Press "1" again. The numbers on the display (8) will flash. Use the arrow keys (9) to adjust to the desired RPM.
- Press "1" again. The display will move to the start time. Use the arrow keys (9) to set the desired start time for Speed 1.
- Press "1" again. The display will move to the duration. Use the arrow keys (9) to set the desired run time for Speed 1.
- Press "Setting/Enter" (7) to lock in these settings.
- Setting Speeds 2, 3, and 4: Repeat the above steps for buttons "2", "3", and "4" to program additional speeds, start times, and durations.
- Starting the Schedule: Once all desired speeds are programmed, press "Start/Stop" (6) to begin the cycle.
- Important Note: The total duration for all programmed speeds (1-4) must not exceed 24 hours.
3. Using a Quick Clean Cycle:
- Initiation: Press "Quick Clean" (5) on the control panel. The "Speed" indicator light (2) will illuminate, and the current RPM will be displayed.
- Adjusting Speed: Press "Quick Clean" (5) again. The numbers on the display (8) will flash. Use the arrow keys (9) to adjust to the desired RPM for the quick clean.
- Adjusting Duration: Press "Quick Clean" (5) again. The "Duration" indicator light (2) will illuminate. Use the arrow keys (9) to set how long the pump should run at the selected speed.
- Starting Quick Clean: Press "Start/Stop" (6) to initiate the quick clean cycle.
- Behavior: The quick clean cycle runs once for the set duration and then reverts to the previously programmed schedule. It does not repeat automatically the following day.
4. Display Modes:
- Cycling Through Modes: Press "Display" (8) to cycle through different display modes, showing various settings such as speed, time, duration, and watts.
5. Arrow Keys (9):
- Used to make adjustments to time, speed, and duration settings.
6. Start/Stop Button (6):
- Used to either start or stop the pump from running.
7. Setting/Enter Button (7):
- Used to lock in a setting after changes have been made or to adjust the time.
Maintenance Features
1. Resetting Pump to Default Schedule:
- Prerequisite: Ensure the pump is stopped and not running.
- Procedure: Hold down buttons "1" and "2" simultaneously for 3 seconds.
- Confirmation: Continue holding until the pump starts beeping continuously. The pump will then stop beeping and display the time, indicating that all individual stages have been reset to the default schedule found in the manual.
- Note: The current time will not be reset and must be manually changed if needed.