7
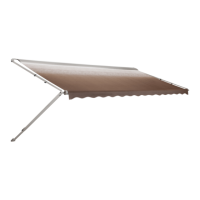
TO OPEN AWNING:TO OPEN AWNING:
TO OPEN AWNING:TO OPEN AWNING:
TO OPEN AWNING:
1. Loosen the black adjustment knob behind each main
arm. Push travel latch tab toward center of arm to
disengage.
(FIG. 1)(FIG. 1)
(FIG. 1)(FIG. 1)
(FIG. 1)
2. Pull the lock lever to release the awning.
(FIG. 2)(FIG. 2)
(FIG. 2)(FIG. 2)
(FIG. 2)
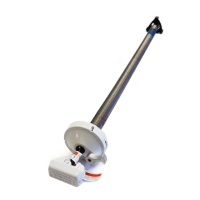
3. Hook the rod into the loop of the pull strap, and pull the
awning all the way out.
(FIG. 3)(FIG. 3)
(FIG. 3)(FIG. 3)
(FIG. 3)
4. Slide the rafter up. Insert the into the casting. Repeat for
other side.
(FIGS. 4 & 5)(FIGS. 4 & 5)
(FIGS. 4 & 5)(FIGS. 4 & 5)
(FIGS. 4 & 5)
5. Pull down and out on the sliding rafter to remove slack
from the fabric. Tighten the black adjustment knob.
Repeat for other side.
(FIG. 4)(FIG. 4)
(FIG. 4)(FIG. 4)
(FIG. 4)
2
FIG. 1
LOOSEN KNOB RELEASE TRAVEL LATCH
FIG. 2FIG. 2
FIG. 2FIG. 2
FIG. 2
FIG. 3FIG. 3
FIG. 3FIG. 3
FIG. 3
FIG. 4
FIG. 5FIG. 5
FIG. 5FIG. 5
FIG. 5
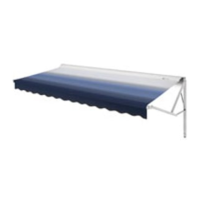
6. Slide the pull strap to the right end of the roller and wrap
it around the main arm.
(FIG. 6)(FIG. 6)
(FIG. 6)(FIG. 6)
(FIG. 6)
7.
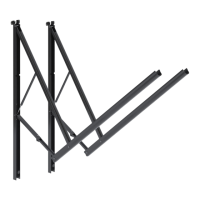
OPTIONAL CARPORT POSITION: OPTIONAL CARPORT POSITION:
OPTIONAL CARPORT POSITION: OPTIONAL CARPORT POSITION:
OPTIONAL CARPORT POSITION: Press the release
lever at the bottom end of one main arm. Pull the arm
assembly outward to a vertical position.
8. Reposition the foot and drive stakes through the foot
into the ground.
(FIG. 7)(FIG. 7)
(FIG. 7)(FIG. 7)
(FIG. 7)
9. Rotate lock spring to "UNLOCK" position, pull up on the
lift handle, and raise the arm assembly to the desired
height. Swing handle in and allow the lock button to
snap into one of the holes. Rotate lock spring back to
"LOCK" position. Repeat for the other side.
(FIG. 8)(FIG. 8)
(FIG. 8)(FIG. 8)
(FIG. 8)
FIG. 9FIG. 9
FIG. 9FIG. 9
FIG. 9
FIG. 7
10.Lower the end furthest from the door to allow water to
flow off.
(FIG. 9) (Refer to CAUTION on next page.) (FIG. 9) (Refer to CAUTION on next page.)
(FIG. 9) (Refer to CAUTION on next page.) (FIG. 9) (Refer to CAUTION on next page.)
(FIG. 9) (Refer to CAUTION on next page.)
FIG. 6
Slide Pull
Strap to the
Right end of
roller
Wrap around
main arm
FIG. 8

 Loading...