8
3
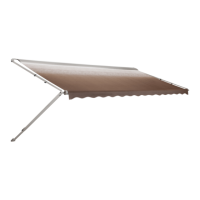
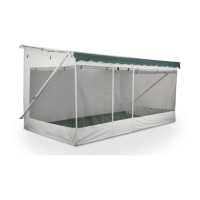
FIG. 1
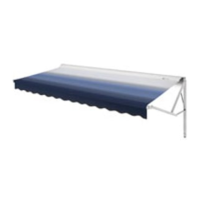
FIG. 2
Whenever heavy or prolonged rain or wind is antici-Whenever heavy or prolonged rain or wind is antici-
Whenever heavy or prolonged rain or wind is antici-Whenever heavy or prolonged rain or wind is antici-
Whenever heavy or prolonged rain or wind is antici-
pated, or you will leave the awning unattended, it ispated, or you will leave the awning unattended, it is
pated, or you will leave the awning unattended, it ispated, or you will leave the awning unattended, it is
pated, or you will leave the awning unattended, it is
important to close the awning. Damage as a result ofimportant to close the awning. Damage as a result of
important to close the awning. Damage as a result ofimportant to close the awning. Damage as a result of
important to close the awning. Damage as a result of
weather is NOT covered by warrantyweather is NOT covered by warranty
weather is NOT covered by warrantyweather is NOT covered by warranty
weather is NOT covered by warranty.
TO CLOSE AWNING:TO CLOSE AWNING:
TO CLOSE AWNING:TO CLOSE AWNING:
TO CLOSE AWNING:
1. Pull stakes from the ground. Return the foot to the
original position, swing arm toward the vehicle, and
snap the patio foot into the bracket. Repeat for other
side, and proceed to the next step.
(FIG. 1)(FIG. 1)
(FIG. 1)(FIG. 1)
(FIG. 1)
2. Rotate the lock spring to "UNLOCK" position and raise
the lock handle to release the lock button. Lower main
arm to the stop plug. Swing the handle in to engage the
lock button in a hole. Rotate lock spring back to "LOCK"
position. Repeat for other side.
3. Loosen black adjustment knob, lift slider catch, and
slide the rafter arm down to the bottom of the main arm.
Leave black adjustment knob loose. Repeat for other
side.
(FIG. 3)(FIG. 3)
(FIG. 3)(FIG. 3)
(FIG. 3)
4. Grasp the pull strap, pull toward you, and flip the locking
lever to the ROLL UP position.
(FIG. 4)(FIG. 4)
(FIG. 4)(FIG. 4)
(FIG. 4)
DO NOT release the awning now. It is under tensionDO NOT release the awning now. It is under tension
DO NOT release the awning now. It is under tensionDO NOT release the awning now. It is under tension
DO NOT release the awning now. It is under tension
and could snap back against the vehicle sideand could snap back against the vehicle side
and could snap back against the vehicle sideand could snap back against the vehicle side
and could snap back against the vehicle side.
5. Slide the pull strap to the center, and using it to control
speed, allow the awning to return slowly to vehicle side.
NOTE:NOTE:
NOTE:NOTE:
NOTE: Wind the strap diagonally to prevent a bulge in
the fabric.
(FIG. 5)(FIG. 5)
(FIG. 5)(FIG. 5)
(FIG. 5)
6. Tighten black adjustment knob, squeeze rafter into
arms to engage latch. Repeat for other side. The
awning is now ready for travel.
(FIG. 6)(FIG. 6)
(FIG. 6)(FIG. 6)
(FIG. 6)
FIG. 5FIG. 5
FIG. 5FIG. 5
FIG. 5
FIG. 4FIG. 4
FIG. 4FIG. 4
FIG. 4
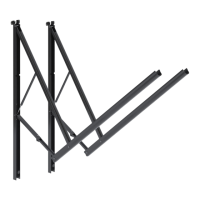
FIG. 6
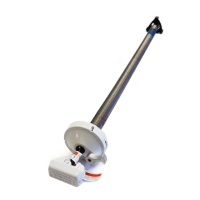
FIG. 3

 Loading...