Do you have a question about the Dometic A&E Systems 8500 and is the answer not in the manual?
Details required recess dimensions, structure, and alignment for awning installation.
Instructions for installing the door roller and edge guard for awning clearance.
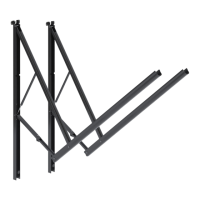
Securely attaches the awning arms to the top castings using specified hardware.
Attaches bottom brackets to the angled mounting plate and vehicle using screws.
Aligns and secures top brackets in the recess using pre-drilled holes and screws.
Installs stop plugs on the adjustable arm for proper awning function and clearance.
Removes the cotter pin from the Safe-T-Lock™ end to release factory pre-set torsion.
Warns to close the awning during heavy rain, wind, or when unattended to prevent damage.
Loosens adjustment knobs and disengages travel latch tabs to prepare for opening.
Advises on securing hardware for travel and contacting a technician for malfunctions.
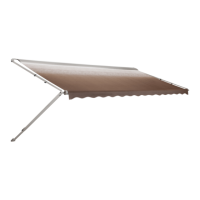
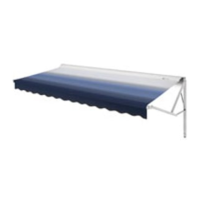
This document provides comprehensive installation and operating instructions for the A&E Systems 8500 & 9000 Fabric Roller Tube Assembly with Recessed Universal Hardware. These awnings are designed for recreational vehicles, including motorhomes, mini-motorhomes, 5th wheels, and travel trailers with both straight and curved sides. The system is engineered to integrate seamlessly into a special pocket built into the side of the vehicle, providing a clean and streamlined appearance.
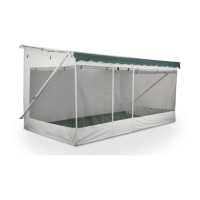
The A&E Systems 8500 & 9000 awning serves as an extendable shade solution for recreational vehicles. It consists of a fabric roller tube assembly and recessed universal hardware, which includes support arms, mounting brackets, and a tensioning system. The primary function is to provide protection from sun and light rain, enhancing comfort and usability of the outdoor space adjacent to the vehicle. The awning extends and retracts, offering flexibility in managing outdoor conditions.
The core of the system is the fabric roller tube assembly, which stores the awning fabric when retracted and deploys it when extended. This assembly is supported by two main arms that attach to the vehicle's side. The recessed hardware design means that much of the support structure is integrated into a pocket within the vehicle's sidewall, contributing to a sleek aesthetic when the awning is closed.
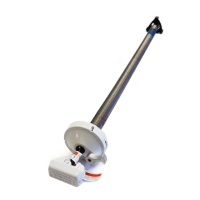
A key feature is the Safe-T-Lock™ system, which is part of the tensioning mechanism. This system ensures that the awning remains securely rolled up during travel and provides proper tension when deployed. The installation process involves carefully mounting the arms to top castings, securing bottom mounting brackets, and aligning the entire assembly within the vehicle's recess. Once installed, the awning can be easily extended and retracted using a pull strap and a lock lever.
The awning is designed to be robust, with components like hex head cap screws, lock washers, and nylon insert lock nuts ensuring secure attachment. The installation also emphasizes sealing all bolt and screw locations with clear silicone to prevent water entry, protecting the vehicle's structure.
For vehicles with entry doors, a door roller or door edge-guard must be installed above the door handle or on the screen door. This prevents the sharp corner of the door from contacting and potentially damaging the underside of the awning fabric when the door is swung open while the awning is extended low. This detail highlights the thoughtful design considerations for user convenience and product longevity.
The system also supports optional accessories such as the A&E Optima Tension Rafter and the A&E Automatic Center Support. These accessories, purchased separately, can be used to provide additional stability and support to the awning, particularly in windy conditions or for extended use. The tension rafter helps maintain fabric tautness, while the center support prevents sagging over long spans.
Operating the A&E Systems 8500 & 9000 awning is designed to be straightforward, involving a series of steps for both opening and closing.
Important Safety Note: A crucial warning is provided regarding weather conditions. Whenever heavy or prolonged rain or wind is anticipated, or if the awning will be left unattended, it is imperative to close the awning. Damage resulting from weather is explicitly not covered by warranty, underscoring the importance of responsible operation.
Proper maintenance is essential to ensure the longevity and optimal performance of the A&E Systems 8500 & 9000 awning. The manual provides several helpful hints for awning care:
The manual also includes guidance on when to seek further help:
Overall, the A&E Systems 8500 & 9000 awning is a well-designed product for RVs, offering both functionality and aesthetic integration. Adhering to the detailed installation, operation, and maintenance instructions provided in the manual will ensure a safe, efficient, and long-lasting experience for users.
| Operation | Manual |
|---|---|
| Material | Vinyl |
| Type | Patio Awning |
| Length | 8 feet |
| Mounting Type | Wall-mounted |
| Warranty | 1-Year Limited |