- 7 -
INSTRUCTIONS FOR USE
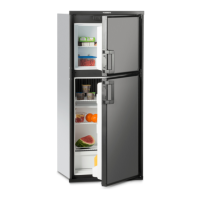
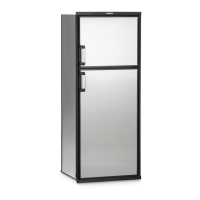
REFRIGERATOR VOLUME
MODEL TOTAL REFRIGERATED
VOLUME (CU.FT)
RM2351& RM2354 3
RM2451& RM2454 4
RM2551 & RM2554 5
DM2652, DM2662 & DM2663 6
DM2852 & DM2862 8
NDM1062 9.2
STORAGE COMPARTMENTS
EXPLOSION HAZARD. Never store explosive
substances in the refrigerator, such as cigarette
lighter fuel, gasoline, ether or the like. Failure to
heed this warning could cause an explosion result-
ing in death or severe personal injury.
USING THE ICE MAKER
NDM1062 WITH ICE MAKER
HOW IT WORKS
Before the ice maker can operate, make sure that the:
• Refrigerator is connected to 120 VAC.
• Water valve supplying the refrigerator is turned on.
• Ice level bail arm is in its fully down position.
When the ice maker thermostat senses the preset temperature
for the ejection of the ice cubes, the ngers will start to rotate,
dumping any ice cubes and lling the mold with water. When
the storage container is full, the bail arm will come in contact
with the ice cubes. The bail arm cannot return to the full down
position and the ice production is stopped until the bin is emp-
tied, or ice cubes are removed.
When on the road, the water in the ice maker might, depend-
ing on road conditions, splash out of the mold. To avoid
splashing, the mold needs to be either empty - or - the water in
the mold must be frozen.
WATER SUPPLY
The water supply system must have a minimum pressure of
15 pounds per square inch gauge (psig). Use a 1/4” diameter
water line to the water valve at the rear of the refrigerator. The
water line must have a manual shutoff valve placed where it is
easily accessible.
If necessary change the water ow by adjusting the water sup-
ply, see the step-by-step instruction in ADJUSTING THE SIZE
OF CUBES.
The maximum water level is repre-
sented by a thin line. It is essential
that the water level does not exceed
this line!
ADJUSTING THE SIZE OF CUBES
The rst container of ice cubes should be dumped if the water
system has been winterized or not used for several weeks.
Note that if the ice maker have been cleaned and drained, no
ice cubes will be dumped into the bin during the rst cycle.
The rst few cycles may produce small cubes due to air
trapped in the water lines. Once the ice maker has run through
several cycles and if the cubes are too small or sticking to-
gether, adjustment is necessary on the amount of water enter-
ing the mold.
To adjust the size of cubes, follow these steps:
1. Remove the protective cover from the ice maker
mechanism.
2. Locate the adjusting screw under the protective
cover.
3. To increase the size of cubes, turn the screw counter
clockwise. To decrease the cube size or if the cubes
are stuck together, turn the screw clockwise.
NOTE! To prevent overlling, DO NOT turn the adjustment
screw more than one revolution at a time. Allow the ice maker
to cycle several times before another adjustment is made.
Be sure to replace the protective cover on the cycle after the
adjustments are complete.
Cover
Adjusting screw
Ice level
bail arm
Down
position
Ice level
bail arm
Down
position
Maximum
water level

 Loading...