4445103327 9
Intended use
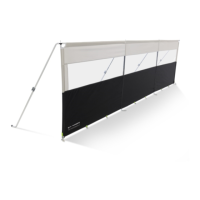
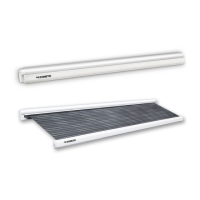
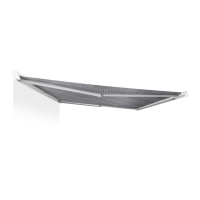
The PRO WINDBREAK is suitable for:
• Freestanding
• Light to moderate weather
•Touring
The PRO WINDBREAK is not suitable for:
• Very strong winds
• Seasonal pitch or commercial use
This product is only suitable for the intended pur-
pose and application in accordance with these
instructions.
This manual provides information that is necessary
for proper installation and/or operation of the
product. Poor installation and/or improper operat-
ing or maintenance will result in unsatisfactory per-
formance and a possible failure.
The manufacturer accepts no liability for any injury
or damage to the product resulting from:
• Incorrect assembly or connection, including
excess voltage
• Incorrect maintenance or use of spare parts
other than original spare parts provided by the
manufacturer
• Alterations to the product without express per-
mission from the manufacturer
• Use for purposes other than those described in
this manual
Dometic reserves the right to change product
appearance and product specifications.
Using the windbreak
Before first use
Familiarize yourself with the product by carrying
out a test set up before the product is used for the
first time. Check if the scope of delivery is
complete.
Choosing a site
1. Choose a flat site for stability.
2. Choose a shaded site to avoid UV degradation
of the fabric.
3. Avoid pitching under trees as falling branches,
resin, etc. can damage the product.
4. Clear the site of sharp stones and debris .
5. Set up the windbreak with the opening facing
away from the wind.
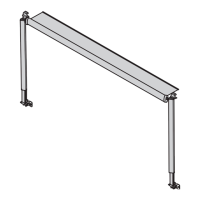
Setting up the windbreak
I
Keep the following tips in mind while setting up the
windbreak:
• The illustrations provide a general overview of
the set-up. The actual set-up will vary slightly
based on the model of windbreak.
• Get help. The set-up is easier with more people.
• Peg the support poles so that the windbreak is
under tension without distorting the shape.
Set up the windbreak as follows:
1. To protect the windbreak from dirt and dam-
age, lay down a groundsheet or footprint
before unpacking.
2. Unpack the windbreak.
3. Separate and identify the different
components.
4. Proceed as shown to set up the windbreak
(fig. 1, page 3 to fig. 8, page 6).
To set up the optional PRO WINDBREAK DOOR:
➤Proceed as shown to set up the windbreak
(fig. 9, page 6 to fig. 0, page 7).
Dismantling the windbreak
1. Remove all dirt from the windbreak.
2. Reverse the set-up procedure.
3. Ensure that all parts are clean before packing
them into the carry bag.
NOTE
• The supplied pegs will be suitable for
many sites but for some types of
ground special pegs will be needed.
Ask your dealer.
• Drive the pegs at a 45° angle away
from the windbreak into the ground.
• Peg the support poles in line with the
seam it starts from.
DometicPROWindreaks_INM_4445103327_EMEA(16)_2021-03-31.book Page 9 Wednesday, March 31, 2021 3:35 PM