13
Install two screws in the top frame.2.
Remove the top decoration panel. Open the a)
door and gently push the tabs out of the hole in
the hinge with a flat blade screwdriver, (both
sides), see Fig. 14.
Carefully tilt the top decoration panel and lift b)
up to remove from top frame. Be careful not to
damage the circuit board and wires.
Install the two screws in the top frame. (The c)
holes are accessible from underneath.)
Seal the opening for the screws with alumini-d)
um tape.
Replace the top decoration panel. Be careful e)
not to pinch the wires behind the panel. Make
sure the tabs snap back into the holes in the
hinge plate.
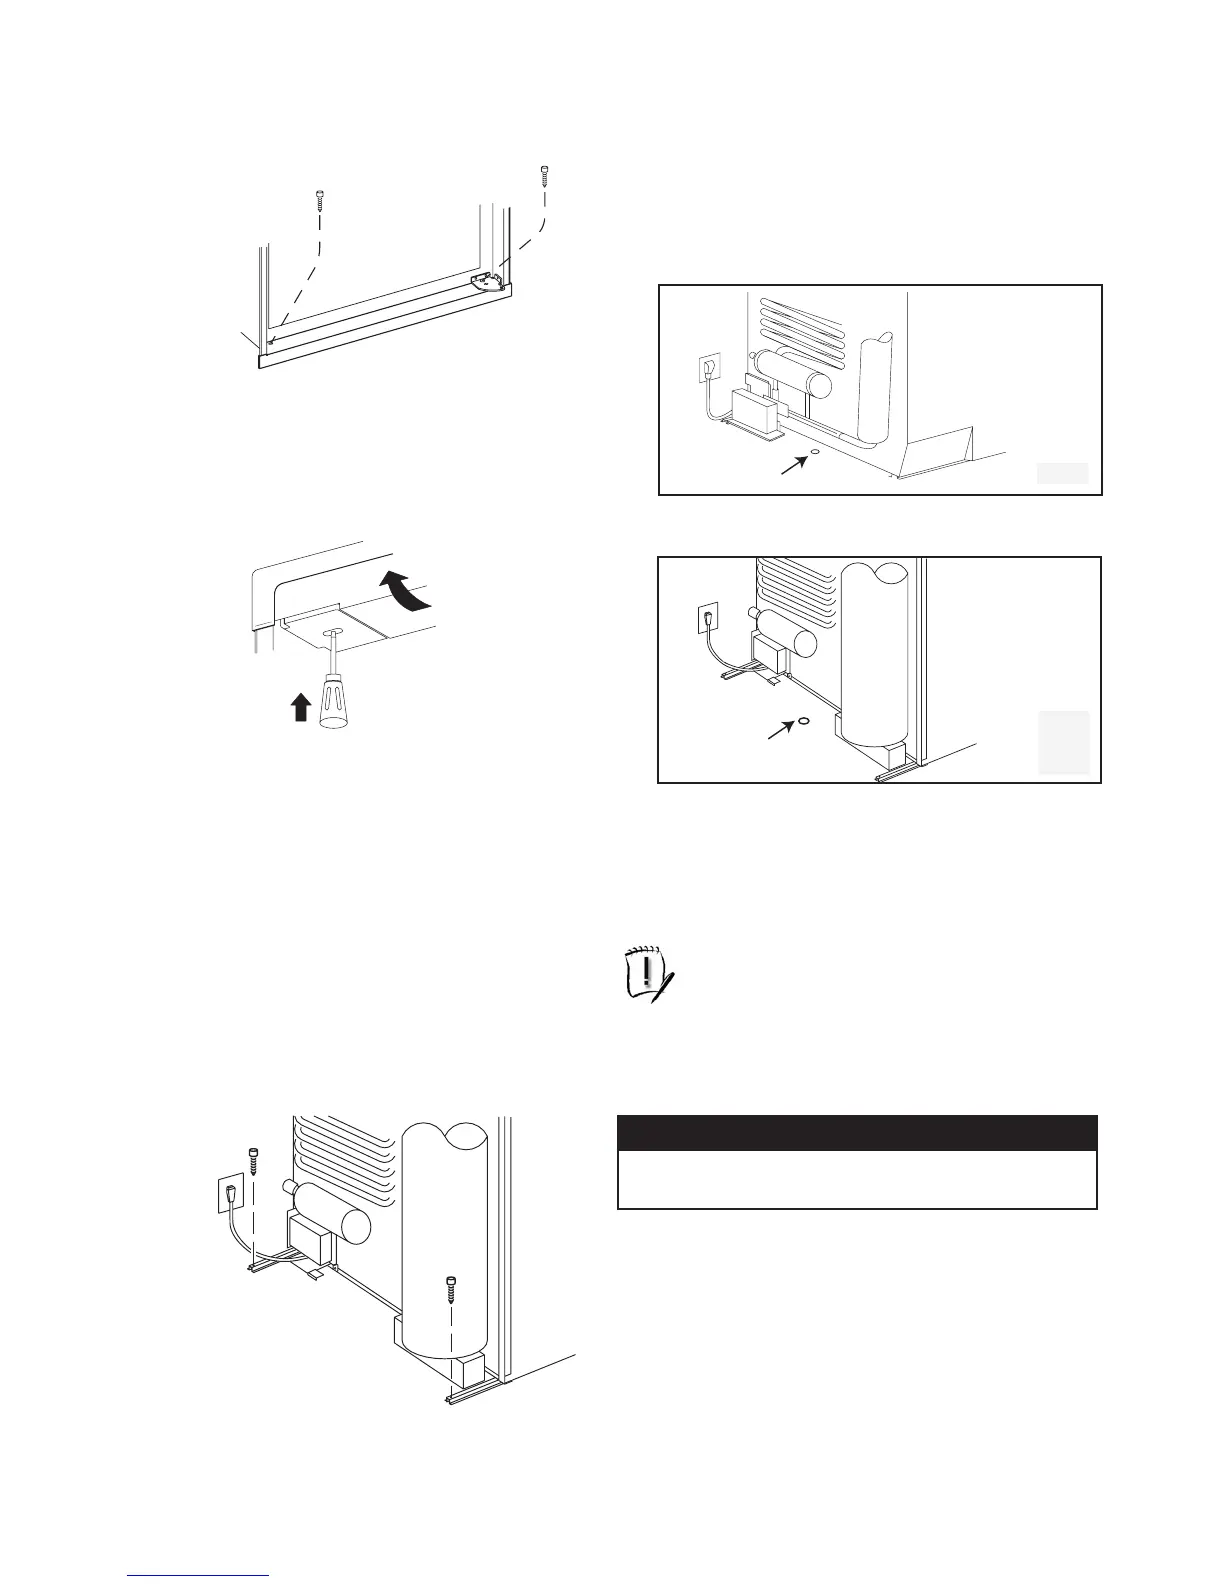
Install two screws in the rear base, see Fig. 15. 3.
DRAIN WATER HOSE
A hole must be drilled through flooring, see Fig. 16 / 17.
The installer has to make sure that the hose does not kink when
run through the floor. Seal around the hose that goes through
the drilled hole.
If a longer hose than supplied is required to get the water to
drain outside of the vehicle, the installer will have to supply the
extra length of hose.
CONNECTIONS
LP GAS CONNECTION
The refrigerator is designed for operation on Propane (Propane
only Australia) and LP gas (LP gas New Zealand).
Alternative gas types must not be used to operate
this appliance!
The gas supply system must incorporate an approved gas pres-
sure regulator to maintain a supply pressure of 2.75 kPa. The
test point pressure must be 2.70 kPa. Check that this is stated
on the data plate.
The gas installation and servicing must be carried out by an
authorised person and conform to gas fitting regulations.
The appliance shall be installed in accordance with AS 5601-
Gas Installations.
The gas supply pipe should be connected to the gas inlet con-
nection at the rear of the refrigerator by means of a suitable
threaded coupling.
The connection nipple is furnished with an ISO 7/1 - Rp 1/8
internal pipe thread connection.
Fig. 13
Fig. 17
RM2455
RM2555
RM4605
Secure the refrigerator and the lower front strip b)
with two screws: One screw through the hinge,
and on the opposite side and then, one screw
through the lower front strip, see Fig. 13.
CAUTION
Check that the gas supplied to the refrigerator is at the
correct pressure.
6
!

 Loading...