VT50WiFi Connecting the transmitter electrically
15
• When laying the cables (fig. 8, page 6), make sure:
– they are not kinked or twisted
– they do not rub on edges
– they are not laid in sharp-edged ducts without protection.
• Protect every through-hole made in the bodywork against water penetration, e.g. by using a
cable with a sealant and by spraying the cable and the cable sleeve with sealant.
I
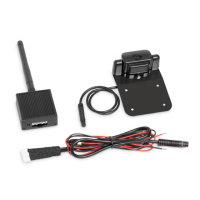
7.2 Connecting the transmitter electrically
A
I
Connecting the transmitter to the reversing light
I
Proceed as follows (fig. 2, page 3):
➤ Connect the red cable of the transmitter (3) to the positive cable of the reversing light.
➤ Connect the black cable of the transmitter (4) to the earth wire (–) on the reversing light or to
the earth terminal on the bodywork.
➤ Connect the transmitter to the camera (fig. 9, page 7):
– Plug the connection cable (1) together.
– Insert the plug (2) into the transmitter’s camera connection (3).
✓ After a few seconds, the VT50WiFi establishes the digital wireless connection.
NOTE
Only start sealing through-holes when you have completed all installation work on the
camera and have laid the required cable lengths.
NOTICE!
Make sure the polarity is correct.
NOTE
The transmitter creates a wireless network that does not permit access to the Internet.
Therefore internet services cannot be used once the transmitter is being supplied with
power.
The use of telephony and text messages is also restricted.
NOTE
On some vehicles, the reversing light only works when the ignition is switched on. In
this case, you must switch on the ignition to identify the positive and earth cables.
VT50WiFi-IO-16s.book Seite 15 Freitag, 30. Juni 2017 11:04 11
 Loading...