18
Donaldson Company, Inc.
Optional Settings
See Printed Circuit Board illustration.
230 VAC Power Supply
To operate at 230 VAC, remove two jumpers labeled W1 and W3. Reinsert one of the jumpers in position W2.
Change from English to Metric (SI) Units
1. Turn power to the Delta P Plus Control ON.
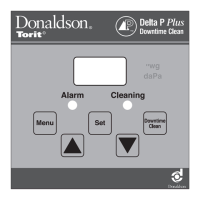
2. Use the Menu key to select PAS.
3. Press SET, then use the arrow keys to display “4”, press SET again.
4. Press the MENU key repeatedly until you reach P7.
5. Press SET, then use the arrow keys to display “0”, press SET again.
6. After 10 seconds with no further button action, the display will return to reading the pressure.
Disable Setpoint Adjustment
To restrict setpoint changes, install a jumper wire across the PROG. DISABLE terminals (3 & 4) on Terminal Block 2, TB2. The
current settings will still be displayed, but no changes can be made until the jumper is removed. Interrupting the jumper with a
key-operated, normally-closed switch installed in the enclosure door provides temporary access to the setting functions without
opening the door.
External Alarm Reset / Disable (TB2, Terminal 5 & 6)
If desired, wire the ARM RESET terminals (5 & 6) on Terminal Block 2, TB2, to a key-operated, normally-open switch. Closing the
switch turns the alarm OFF.
Internal Alarm Disable (J5)
To disable the alarm internally, remove the jumper on MODE Jumper Block J5, located on the lower-right quadrant of the circuit
board. Disabling the alarm relay reduces the alarm function to the ALARM LED visual display only.
Hi/Lo Control (TB3, Terminals 7, 8, & 9)
Per the wiring diagram supplied with the controller, the Hi/Lo terminals are connected to the pressure switch input on the timer
board. In most cases this connection is made at the factory.
Terminal 8 is common, terminal 7 is normally open, and terminal 9 is normally closed.
Auxiliary Relay Output (TB3, Terminals 10, 11, & 12)
1. If the jumper on the MODE Jumper Block J5 is not installed, the auxiliary relay output will not function.
2. If the jumper is installed in the ALARM mode position, the auxiliary relay output activates based on the setting of the ALARM
setpoint.
3. If the jumper is installed in the SLAVE mode position, the auxiliary relay output activates in parallel with the HI/LO CONTROL
relay.
Terminal 11 is common, terminal 10 is normally open, and terminal 12 is normally closed.
Analog Output (TB4, Terminals 13 & 14)
Terminals 13 & 14 on Terminal Block 4, TB4, in the upper-left quadrant of the circuit board, provide a 4 to 20 mA output
proportional to the 0-to-maximum span of the pressure sensor. This circuit requires a 500 ohm maximum load.


 To Next Page