EasyManua.ls Logo

DoorKing 1600 Series - User Manual

DoorKing 1600 Series
5 pages
Print Icon
To Next Page IconTo Next Page
Loading...
2600-267-G-6-16
120 S. Glasgow Avenue
Inglewood, California 90301
U.S.A.
Black
Green
White
Copyright 2016 DoorKing, Inc. All rights reserved.
HIGH VOLTAGE KIT
This kit will alter the input AC voltage on a DoorKing 115 VAC: 6500, 6300, 9000, 9150 or 1600 Series operators to
208, 230, 460 or 575 VAC. DO NOT USE THIS KIT ON ANY OTHER OPERATOR.
Choose and follow the installation and wiring instructions for YOUR specific operator on the next 4 pages.
DoorKing Part Number
2600-266
Step-Down Transformer Optional Voltage Wiring
AC Input Power Wire Limitations
Input Voltage
Motor Amps
Wire Size / Max Distance in FeetPrimary/Single Operator
12 AWG 10 AWG 8 AWG 6 AWG
208/230 VAC
460 VAC
575 VAC
208/230 VAC
460 VAC
575 VAC
1/2 HP
1/2 HP
1/2 HP
1 HP
1 HP
1 HP
685
2875
2875
380
1500
1500
1100
4600
4600
650
2500
2500
1830
7665
7665
1100
4000
4000
2750
11,500
11,500
1600
6500
6500
2.8 Amps
1.4 Amps
1.0 Amp
5.0 Amps
2.5 Amps
2.0 Amps
The table below shows the AC input power wire size and maximum distance wire run limitations. If AC power wire run is greater than the maximum distance
shown, it is recommended that a service feeder be installed. When large gauge wire is used, a separate junction box must be installed for the operator
connection. An external power disconnect switch is required. Check local building codes before installation.
Choose desired input voltage plug and connect accordingly AFTER step-down transformer has been mounted in the operator.
Note: Wire run distances are based on
NEC guidelines for copper wire allowing
a maximum 3% voltage drop on the line.
The calculated distance was then further
reduced by 10% to allow for other loses
in the system.
Never run HIGH voltage rated wire
insulation in the same conduit as
LOW voltage rated wire insulation.
Keep them in separate conduits.
Step-Down
Transformer
To operator
115 VAC
power
terminal.
To operator
Chassis
Ground.
Transformer Plug
Configuration
Black/White White
Brown
Blue
Black
X Open
1st Leg
2nd Leg
3rd Leg
208 VAC Input
Use only two legs of the
incoming 3-phase power
and terminate the 3rd leg.
208 VAC
1-Phase/
3-Phase
Power Wire
External Power
Disconnect
Switch
Required
208 V
Plug
208 V Plug
Configuration
1st Leg
2nd Leg
Transformer
Plug
X
Input Voltage Plug
230 VAC Input
1st Leg
2nd Leg
Use only two legs of the
incoming 3-phase power
and terminate the 3rd leg.
230 VAC
1-Phase/
3-Phase
Power Wire
External Power
Disconnect
Switch
Required
3rd Leg
230 V
Plug
Transformer
Plug
230 V Plug
Configuration
1st Leg
2nd Leg
X
Input Voltage Plug
460 VAC Input
460 V Plug
Configuration
1st Leg
2nd Leg
1st Leg
2nd Leg
3rd Leg
Transformer
Plug
Use only two legs of the
incoming 3-phase power
and terminate the 3rd leg.
460 VAC
3-Phase
Power Wire
External Power
Disconnect
Switch
Required
460 V
Plug
X
Input Voltage Plug
575 VAC Input
575 V Plug
Configuration
1st Leg
2nd Leg
1st Leg
2nd Leg
3rd Leg
Transformer
Plug
Use only two legs of the
incoming 3-phase power
and terminate the 3rd leg.
575 VAC
3-Phase
Power Wire
External Power
Disconnect
Switch
Required
575 V
Plug
X
Input Voltage Plug

Questions and Answers

  • R
    Ruben CampbellAug 8, 2025
    What to do if DoorKing 1600 loop detector LED is on continuously?
    • J
      Jacob BrownAug 8, 2025
      If the loop detector LED remains continuously illuminated, try the following: * Activate the reset switch on the loop detector. * Decrease the loop detector's sensitivity. * Check the loop wire for resistance to ground using a meg-ohm meter. * Ensure the loop lead-in wire is twisted at least six turns per foot. * Verify that all loop connections are soldered. * Consider replacing the loop detector.
  • L
    Linda CollinsAug 17, 2025
    How to fix DoorKing 1600 Gate Opener if it won't run and the power LED is OFF?
    • A
      anne84Aug 17, 2025
      If your DoorKing gate opener is not running and the power LED is off, check the following: * Ensure that the power to the operator is turned on. * Use a voltmeter to check for 117 VAC at control board terminals 1 and 2. If the voltage measures 0, inspect the power supply to the operator or check the terminal strip. * If the voltage measures OK, the control board may need to be replaced.
  • K
    Kimberly MoodyAug 21, 2025
    What to do if DoorKing 1600 Gate Opener arm rotates up, but will not rotate down?
    • Q
      qtoddAug 21, 2025
      If the arm of your DoorKing gate opener rotates upward but does not rotate downward, consider the following checks: * Examine the LEDs on terminals 6, 7, and 9. If any of these are ON, it indicates a shorted input holding the arm in the UP position. * Inspect the LEDs on the loop detectors. An illuminated LED suggests a possible loop or loop detector problem, holding the arm up. * If the auto timer is not in use (SW 1, switch 7 off), ensure that SW 1, switch 6 is in the ON position. * Confirm that SW 1, switch 4 is ON.
  • V
    Valerie SimonAug 26, 2025
    What to do if DoorKing Gate Opener loop detector LED never activates?
    • R
      ryanmurphyAug 26, 2025
      If the loop detector LED on your DoorKing gate opener never activates, try these steps: * Increase the loop detector sensitivity. * Check the continuity of the loop wire; it should measure 0 ohms. * Move the loop detector board to the other loop detector port on the control board and check loop operation. * If the loop detector still fails, replace the loop board. * If the loop detector operates OK in the other loop port, replace the control board.
  • K
    Kimberly RodriguezAug 30, 2025
    What to do if DoorKing 1600 Gate Opener down input / down loop will not rotate arm to down position?
    • J
      Jacqueline HansenAug 30, 2025
      If the down input or down loop on your DoorKing gate opener fails to rotate the arm to the down position: * Ensure that switch 4 is in the ON position. * The down input must be activated and then deactivated to cause the arm to rotate down.
  • E
    Erica BryantSep 3, 2025
    What to do if DoorKing Gate Opener battery back-up system will not raise arm upon power outage?
    • S
      Stephen MatthewsSep 3, 2025
      If the battery back-up system on your DoorKing gate opener fails to raise the arm during a power outage: * Check that the back-up system toggle switch is in the ON position. * Check to be sure that the 1473-010 battery back-up control board switch settings are set as described in SECTION 6. * Check the batteries for proper voltage, replace if necessary. * Replace the 1473-010 back-up control board.
  • S
    Stephen Price DDSNov 11, 2025
    Why DoorKing 1600 won't run but power LED is ON?
    • C
      Christopher GarciaNov 11, 2025
      If your DoorKing gate opener's power LED is illuminated but the operator is not running, try the following: 1. Momentarily jumper terminal 6 to terminal 14. If the input LED does not come on, inspect the terminal strip or consider replacing the control board. If the LED illuminates, proceed to the next step. 2. Remove the circuit board from the terminal strip and turn off power to the operator. 3. Momentarily jumper terminal 2 to terminal 3 (Caution – High Voltage). Briefly turn the power ON. The motor should activate. 4. Ensure the power is OFF, then remove the jumper. 5. Momentarily jumper terminal 2 to terminal 4 (Caution – High Voltage). Briefly turn the power ON. The motor should activate. If the motor fails to run in either or both of the last two steps, the issue may stem fr...

Overview

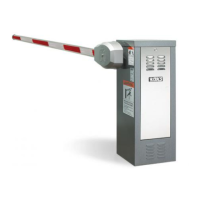
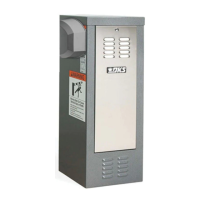
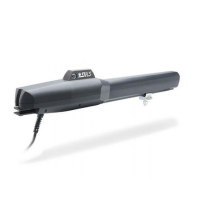
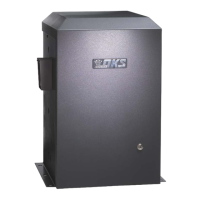
This document outlines the installation and wiring procedures for a High Voltage Kit, designed to modify the input AC voltage of specific DoorKing gate operators. The kit enables these operators to function with 208, 230, 460, or 575 VAC power, rather than their standard 115 VAC. It is crucial to note that this kit is exclusively for DoorKing 115 VAC 6500, 6300, 9000, 9150, or 1600 Series operators and should not be used with any other models.

The primary function of this kit is to integrate a step-down transformer into the gate operator's electrical system. This transformer converts the higher input AC voltages (208, 230, 460, or 575 VAC) down to the 115 VAC required by the operator's internal components. This allows the specified DoorKing operators to be deployed in environments where only higher voltage AC power is readily available, expanding their versatility and application range.

Usage Features:

The installation process is broken down by operator model, ensuring clear and specific instructions for each compatible unit. Before beginning, users must select the appropriate input voltage plug and connect it to the step-down transformer after it has been securely mounted within the operator.

A critical aspect of using this kit involves understanding the AC input power wire limitations. A detailed table provides guidelines for wire size (AWG) and maximum run distances in feet for various input voltages and motor horsepower ratings (1/2 HP and 1 HP). These distances are based on NEC guidelines, allowing for a maximum 3% voltage drop, with an additional 10% reduction to account for other system losses. If the required wire run exceeds these maximum distances, installing a service feeder is recommended. For large gauge wires, a separate junction box is necessary for the operator connection. An external power disconnect switch is always required, and local building codes must be consulted.

A significant safety feature emphasized throughout the document is the warning against running high voltage rated wire insulation in the same conduit as low voltage rated wire insulation. These must be kept in separate conduits to prevent electrical interference and potential hazards.

For each operator model (6500, 6300, 9000, 9150, and 1600 Series), the document provides step-by-step instructions for mounting the step-down transformer. For the Model 6500, the transformer is bolted into position using existing holes. The Model 6300 requires mounting the transformer on four existing threaded studs. Similarly, the Model 9000 uses four nuts and bolts to secure the transformer. The Model 9150 involves mounting the transformer on four existing threaded studs below the motor, with a helpful tip to flip the operator upside down for easier access. For the 1600 Series, the installation involves removing a screw, unbolting a ground wire, carefully removing the circuit board, bolting the transformer to existing threaded studs on the back of a supplied plate, and then carefully reinstalling the plate and circuit board.

Across all models, the operator must be properly grounded to ensure safe operation. Diagrams clearly illustrate the wiring connections for the transformer plug, input voltage plug, and the operator's 115 VAC power terminal. The transformer plug configuration shows connections for Black/White, Open, Brown, Black, and Blue wires, leading to the operator's 115 VAC power terminal (White and Black) and chassis ground (Green).

Maintenance Features:

While the document doesn't explicitly detail ongoing maintenance, it strongly emphasizes critical pre-operational checks that directly impact the longevity and safe functioning of the system. The most crucial maintenance-related instruction is a prominent "DANGER HIGH VOLTAGE!" warning, coupled with the directive to "Double check your chosen input voltage plug BEFORE applying power to the step-down transformer. Failure to choose the CORRECT input voltage plug for your desired input voltage WILL damage operator and VOID warranty." This highlights the importance of correct initial setup as a preventative measure against damage and the need for subsequent repairs or replacements.

Another important note for all installations is to "Keep wires away from moving parts." This is a fundamental maintenance practice that prevents wear and tear on wiring, which could lead to electrical shorts or disconnections over time. Ensuring wires are properly routed and secured away from mechanical components will minimize the risk of damage and extend the operational life of the system.

For dual gate operator installations, a specific usage feature with maintenance implications is highlighted: when installing on bi-parting gates, only the PRIMARY gate operator requires a step-down transformer and AC input power wire. Furthermore, the AC input power wire run maximum distance must be reduced by ONE-HALF for these setups. This consideration helps maintain proper voltage delivery and prevents potential issues that could arise from extended wire runs in a dual gate configuration.

For installations involving an optional heater, users are directed to refer to the "high voltage AC power wire size and distance limitations" table provided with the heater kit. This ensures that the wiring for the heater, which is an additional electrical load, is also correctly sized and installed to prevent overheating or insufficient power delivery, thereby contributing to the overall reliability and safety of the system.

In summary, this High Voltage Kit provides a robust solution for adapting DoorKing gate operators to higher voltage environments. Its design focuses on clear, model-specific installation instructions, critical safety warnings, and preventative measures that contribute to the long-term reliability and safe operation of the gate system. The emphasis on correct initial setup and proper wire management serves as the primary "maintenance" guidance, aiming to prevent issues before they occur.

DoorKing 1600 Series Specifications

General IconGeneral
Horsepower1/2 HP
Max Gate Weight1000 lbs
Control OptionsKeypad, Card Reader
Safety FeaturesObstruction Detection
Relay Rating10A
HousingHeavy-Duty Steel
MountingGround Mount
Model1600 Series

Related product manuals