EasyManua.ls Logo

DoorKing 1602 - User Manual

DoorKing 1602
44 pages
Print Icon
To Next Page IconTo Next Page
Loading...
Installation/Owner’s Manual
1601 / 1602
1601 / 1602
1601 / 1602
Copyright 2009 DoorKing, Inc. All rights reserved.
Copyright 2019 DoorKing
®
, Inc. All rights reserved.
Use this manual for circuit board 1601-010 Revision W or higher.
Date Installed:
Installer/Company Name:
Phone Number:
Leave Manual with Owner
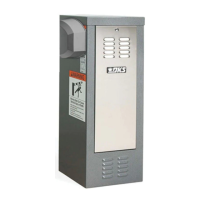
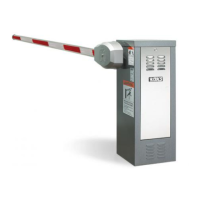
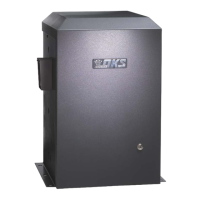
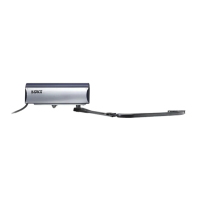
Barrier Gate Operator
Circuit Board
Serial Number
and Revision Letter:
Conforms To UL STD 325
Certified To CSA STD C22.2 # 247
M
ov
ing Gate Can
C
aus
e
Seri
ous Inj
ury or
D
eat
h
KEEP
CL
EAR
!
G
a
te
m
ay m
o
ve a
t
a
n
y
t
i
m
e
w
it
h
o
u
t prio
r
w
a
rn
in
g.
D
o
n
o
t le
t ch
ildre
n
ope
ra
te
th
e
g
a
te
o
r
p
la
y
in th
e
gate
area
.
Th
is
e
ntra
n
ce
is fo
r ve
hicle
s
o
n
ly.
Pe
de
stri
a
n
s
m
u
s
t
use
s
e
pa
rate
e
n
tr
a
nc
e.
THIS PRODUCT IS TO BE INSTALLED AND SERVICED BY A TRAINED GATE/DOOR SYSTEMS TECHNICIAN ONLY.
Visit
www.doorking.com/dealer-locator
to find a professional installing and servicing dealer in your area.
MOV
I
NG
A
R
M
c
a
n
c
a
u
s
e
v
e
h
i
c
l
e
d
a
m
a
g
e
,
s
e
r
i
o
u
s
i
n
ju
ry
o
r
d
e
a
t
h
.
S
T
A
Y
C
LE
A
R
o
f
a
r
m
a
t
a
l
l
t
i
m
e
s
.
NO:
P
ed
e
s
t
r
i
a
n
s
B
i
c
y
c
l
e
s
M
o
t
o
r
c
y
c
l
e
s
W
ARNI
NG
C
L
A
S
S
C
ER
T
I
F
IE
D
T
O
C
A
N
/
C
S
A
C2
2
.
2
N
O.
2
4
7
C
O
N
F
OR
M
S
T
O
A
N
SI/U
L
-3
2
5
VE
H
I
C
U
L
A
R
G
A
T
E
O
P
E
R
A
T
O
R
H
P
5
3
3
8
2
MO
D
E
L
S
E
RI
A
L
V
O
L
T
S
P
HA
S
E
A
MP
S
6
0
Hz
MAX
G
A
T
E
L
O
A
D
D
o
o
r
K
i
n
g
,
I
n
c
.
,
I
n
g
l
e
wo
o
d
,
C
A
M
ov
ing Gate Can
C
aus
e
Serious In
j
ury or
D
eat
h
KE
E
P
CL
EAR
!
G
a
te
m
a
y
m
o
v
e
a
t
a
n
y
ti
m
e
with
o
u
t
p
ri
o
r wa
rn
in
g
.
D
o
n
o
t le
t childre
n
o
p
e
ra
te
th
e
g
a
te
o
r
p
la
y
in
the
g
a
te
a
re
a
.
Th
is
e
n
tr
a
n
c
e
is
fo
r
v
e
hicle
s
o
n
ly
.
Pe
de
stri
a
n
s
m
u
s
t
u
s
e
s
e
p
a
ra
te
e
n
tr
a
n
c
e
.
M
O
V
I
NG
A
R
M
c
a
n
c
a
u
s
e
v
e
h
i
c
l
e
d
a
m
a
g
e
,
s
e
r
io
u
s
i
n
j
u
ry
o
r
d
e
a
t
h
.
S
T
A
Y
C
LE
A
R
o
f
a
r
m
a
t
a
l
l
t
i
m
e
s
.
NO
:
P
e
d
e
s
t
r
i
a
n
s
B
i
c
y
c
l
e
s
M
o
t
o
r
c
y
c
l
e
s
W
ARNI
NG
1602
1601
AC Motor
AC Motor
1601-065-P-12-19

Other manuals for DoorKing 1602

Questions and Answers

  • M
    mbrownJul 25, 2025
    What to do if DoorKing Gate Opener loop detector LED is on continuously?
    • G
      Garrett MolinaJul 25, 2025
      If the loop detector LED remains continuously illuminated, try the following: * Activate the reset switch on the loop detector. * Decrease the loop detector's sensitivity. * Check the loop wire for resistance to ground using a meg-ohm meter. * Ensure the loop lead-in wire is twisted at least six turns per foot. * Verify that all loop connections are soldered. * Consider replacing the loop detector.
  • C
    Cathy HillAug 3, 2025
    How to fix DoorKing Gate Opener if it won't run and the power LED is OFF?
    • M
      Molly DayAug 3, 2025
      If your DoorKing gate opener is not running and the power LED is off, check the following: * Ensure that the power to the operator is turned on. * Use a voltmeter to check for 117 VAC at control board terminals 1 and 2. If the voltage measures 0, inspect the power supply to the operator or check the terminal strip. * If the voltage measures OK, the control board may need to be replaced.
  • R
    Richard VasquezAug 7, 2025
    What to do if DoorKing 1602 arm rotates up, but will not rotate down?
    • J
      Jessica WigginsAug 7, 2025
      If the arm of your DoorKing gate opener rotates upward but does not rotate downward, consider the following checks: * Examine the LEDs on terminals 6, 7, and 9. If any of these are ON, it indicates a shorted input holding the arm in the UP position. * Inspect the LEDs on the loop detectors. An illuminated LED suggests a possible loop or loop detector problem, holding the arm up. * If the auto timer is not in use (SW 1, switch 7 off), ensure that SW 1, switch 6 is in the ON position. * Confirm that SW 1, switch 4 is ON.
  • K
    kelly35Aug 11, 2025
    What to do if DoorKing 1602 loop detector LED never activates?
    • C
      Christopher BrennanAug 11, 2025
      If the loop detector LED on your DoorKing gate opener never activates, try these steps: * Increase the loop detector sensitivity. * Check the continuity of the loop wire; it should measure 0 ohms. * Move the loop detector board to the other loop detector port on the control board and check loop operation. * If the loop detector still fails, replace the loop board. * If the loop detector operates OK in the other loop port, replace the control board.
  • L
    Louis PenaAug 16, 2025
    What to do if DoorKing Gate Opener down input / down loop will not rotate arm to down position?
    • L
      linda89Aug 16, 2025
      If the down input or down loop on your DoorKing gate opener fails to rotate the arm to the down position: * Ensure that switch 4 is in the ON position. * The down input must be activated and then deactivated to cause the arm to rotate down.
  • T
    Thomas SharpAug 19, 2025
    What to do if DoorKing 1602 Gate Opener battery back-up system will not raise arm upon power outage?
    • R
      Richard WilliamsAug 20, 2025
      If the battery back-up system on your DoorKing gate opener fails to raise the arm during a power outage: * Check that the back-up system toggle switch is in the ON position. * Check to be sure that the 1473-010 battery back-up control board switch settings are set as described in SECTION 6. * Check the batteries for proper voltage, replace if necessary. * Replace the 1473-010 back-up control board.
  • D
    Denise AndersonOct 28, 2025
    Why DoorKing 1602 won't run but power LED is ON?
    • S
      Stephen MedinaOct 28, 2025
      If your DoorKing gate opener's power LED is illuminated but the operator is not running, try the following: 1. Momentarily jumper terminal 6 to terminal 14. If the input LED does not come on, inspect the terminal strip or consider replacing the control board. If the LED illuminates, proceed to the next step. 2. Remove the circuit board from the terminal strip and turn off power to the operator. 3. Momentarily jumper terminal 2 to terminal 3 (Caution – High Voltage). Briefly turn the power ON. The motor should activate. 4. Ensure the power is OFF, then remove the jumper. 5. Momentarily jumper terminal 2 to terminal 4 (Caution – High Voltage). Briefly turn the power ON. The motor should activate. If the motor fails to run in either or both of the last two steps, the issue may stem fr...

Summary

Installation;Owners Manual

AC Motor

Description of the AC motor component for the barrier gate operator.

UL 325 Classifications

Safety and Traffic Management

IMPORTANT Safety Information

DoorKing Pedestrian Safety

QUICK GUIDE: Terminal Descriptions

Terminal Descriptions

Detailed explanations of each terminal's function and wiring.

1601 Specifications

1601 Housing

Dimensions and features of the 1601 barrier gate operator housing.

1601 Barrier Arm Options

Available arm types for the 1601 model, including plastic, wood, and aluminum.

1602 Specifications

1602 Housing

Dimensions and features of the 1602 barrier gate operator housing.

1602 Barrier Arm Options

Available arm types for the 1602 model, including 3-piece assemblies.

SECTION 1 - INSTALLATION

1.1 Underground Conduit Requirements

Guidelines for installing underground conduit for wiring.

1.2 New Concrete Pad

Instructions for preparing a new concrete pad for operator mounting.

1.3 Trenching Existing Concrete

Procedures for trenching existing concrete for conduit installation.

SECTION 2 - WIRING

2.1 High Voltage Wire Runs

Wire size and distance limitations for high voltage power.

2.2 High Voltage Terminal Connections

Instructions for connecting high voltage power to the operator.

2.3 Dual Gate Operators

Wiring considerations for primary and secondary operator setups.

2.4 Main Terminal Description

Explanation of the functions of the main terminal connections.

2.5 Control Wiring

Details on control wiring for single/primary operator configurations.

Pedestrian Non-Contact Sensor

Wiring and function of the pedestrian non-contact sensor.

2.6 P.A.M.S. Sequencing

Configuration for sequencing multiple gate operators using PAMS.

SECTION 3 - LOOP DETECTOR LANE SETUPS

3.1 Entry Lane Only

Setup for a single entry lane utilizing loop detectors.

3.2 Exit Lane Only

Setup for a single exit lane utilizing loop detectors.

3.3 Two-Way Traffic Lane

Configuration for bidirectional traffic flow with loop detectors.

3.4 Ticket Spitter Entry Lane

Setup for entry lanes incorporating ticket spitters.

3.5 Operator Timer ON Entry Lane

Timer configuration for entry lanes without a down loop.

SECTION 4 - ARM INSTALLATION

4.1 Mounting Hub(s)

Instructions for mounting the operator's hub assembly.

4.2 1601 Mounting Arm

Specific procedures for attaching arms to the 1601 operator.

4.3 1602 3-Piece Arm Assemblies

Specific procedures for attaching 3-piece arms to the 1602 operator.

SECTION 5 - ADJUSTMENTS

5.1 1601 Circuit Board Description

Details and adjustments for the 1601 model circuit board.

5.2 DIP-Switch SW 1 and SW 2 Settings

Configuration settings using DIP switches SW 1 and SW 2.

5.3 Reverse Arm UP and DOWN Positions

Procedure to reverse the UP and DOWN magnet positions.

5.4 Magnetic Limit Adjustments

Adjusting the magnetic limit sensors for arm rotation.

5.5 Reverse Sensor

Adjusting the sensitivity of the reverse sensor for the arm.

5.6 Manual Operation of the Arm

Instructions for manually moving the gate arm.

SECTION 6 - OPTIONAL CONVENIENCE OPEN SYSTEM

6.1 Circuit Board Settings and Descriptions

Settings and descriptions for the convenience open system circuit board.

6.2 DC System Wire Schematic

Wiring diagram illustrating the DC system for convenience open.

SECTION 7 - OPTIONAL ACCESSORIES

7.1 Contact Sensor Installation

Installation guide for contact sensors (reversing edge).

LED Traffic Light

Accessory kit for synchronized LED traffic signals.

Manual Release Kit

Accessory kit for manual arm operation during power failure.

Lane Barrier Arm

Accessory providing a secondary barrier arm synchronized with main arm.

Fan Kit

Accessory kit to prevent heat and moisture build-up inside housing.

Heater Kit

Accessory kit for maintaining temperature in cold weather.

SECTION 8 - MAINTENANCE AND TROUBLESHOOTING

8.1 Maintenance

Procedures for routine inspection and service of the gate operator.

8.2 Diagnostics Check

Steps and tools for diagnosing system malfunctions.

8.3 Troubleshooting

Common problems, symptoms, and possible solutions for the operator.

8.4 Accessories Parts List

List of available part numbers for optional accessories.

DoorKing 1602 Specifications

General IconGeneral
Model1602
CategoryGate Opener
Max Gate Weight600 lbs
Max Gate Length20 ft
Gate TypeSwing

Related product manuals