10
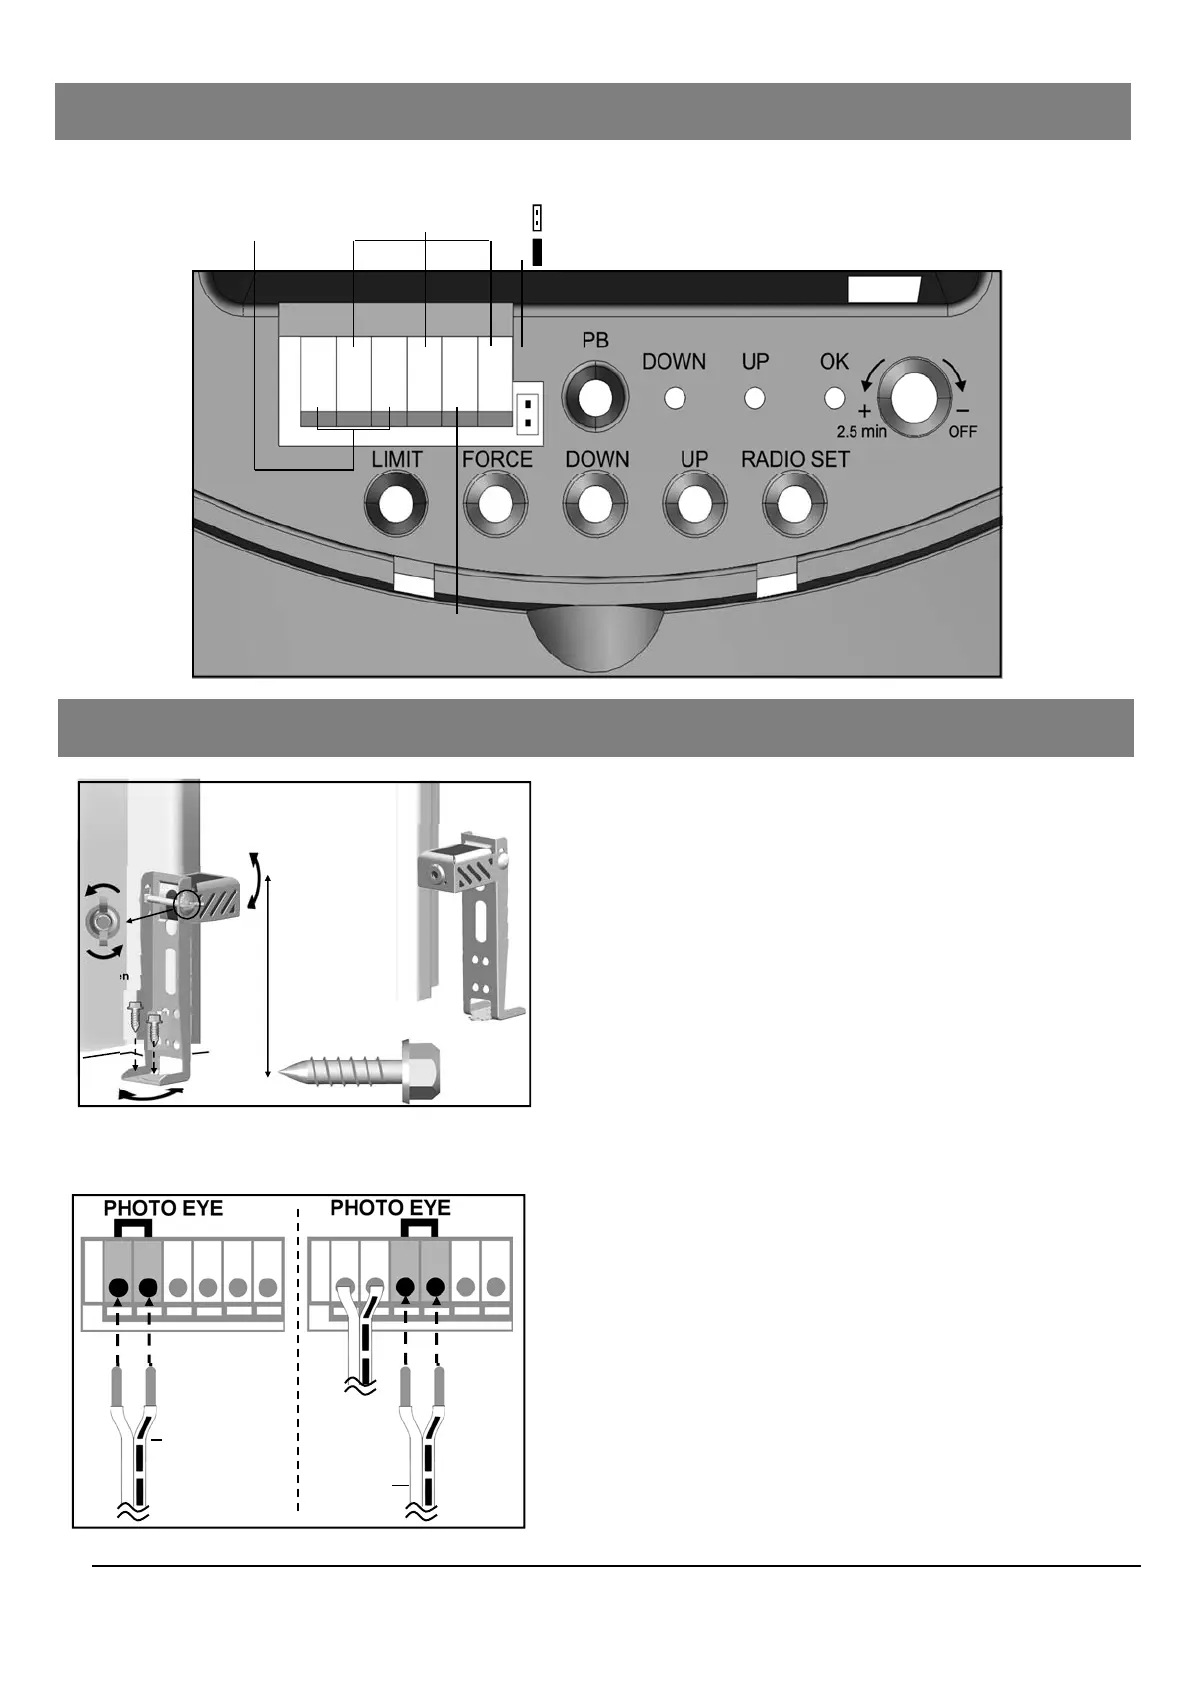
Interface
Ground
IR
Push Button
Photo Eye Selection
Jumper off = Selected
Fig. 1 (Floor Mount)
Fig. 2
From one of
the Photo Eye
From the
other one
#12 x 1”
Lag Screw
Loosen
Inside
Garage
Door Track
6” max. above floor
Alignment
Alignment
Inside
Garage
Door Track
Mounting Photo Eye Safety System
1. Place the Photo Eyes facing each other on each side of
the garage door, as shown in Fig.1.
2. If attaching to concrete, secure the photo eyes using
concrete anchors and bolts (not provided).
3. If necessary, align the Photo Eyes by loosening the
wing nut.
To Connect Photo Eye Safety System
1. Connect a pair of wires from either one of the Photo
Eyes to a pair of “PHOTO EYE” terminals on the rear of
the Opener as shown in Fig. 2.
2. Repeat above step to connect the other Photo Eye.
3. Remove the Photo Eye Selector jumper
4. Disconnect and reconnect power
Connecting Photo Eye Safety System (OPTIONAL)
Jumper on = Default, not selected
 Loading...