EasyManua.ls Logo

Doosan DBC 130 II User Manual

Doosan DBC 130 II
122 pages
To Next Page IconTo Next Page
Page #1 background imageLoading...
Page #1 background image
Installation Manual
DBC 130
Machine Tools

Table of Contents

Question and Answer IconNeed help?

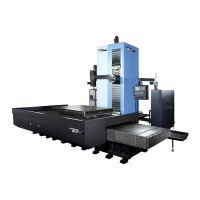
Do you have a question about the Doosan DBC 130 II and is the answer not in the manual?

Doosan DBC 130 II Specifications

General IconGeneral
BrandDoosan
ModelDBC 130 II
CategoryLathe
LanguageEnglish

Summary

Installation Site

Foundation Work

Foundation work timing and post checkpoints

Timing recommendations and checkpoints for foundation work completion.

Foundation work for installing the machine

Detailed foundation requirements for machine installation.

Transportation

What's Included

Table Bed Ass’y

Details and components of the Table Bed Assembly.

Column Bed Ass’y

Details and components of the Column Bed Assembly.

Column Body Ass’y

Details and components of the Column Body Assembly.

Spindle Head Ass’y

Details and components of the Spindle Head Assembly.

Duct Ass’y

Details and components of the Duct Assembly.

Coolant Tank, Chip Bucket, Chip Conveyor, TSC Ass’y, T/F(Option)

Included coolant, chip, and optional components.

Tool Magazine Ass’y (Option)

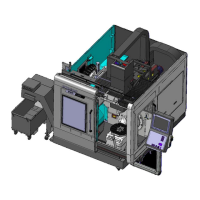
Details and components of the optional Tool Magazine Assembly.

Semi Splash Guard – Operator Part (Option)

Components of the optional Operator Part Semi Splash Guard.

Semi Splash Guard – Magazine Part (Option)

Components of the optional Magazine Part Semi Splash Guard.

Semi Splash Guard – Table Part (Option)

Components of the optional Table Part Semi Splash Guard.

List of tools related to the foundation work (1)

List of specific tools required for foundation work (Part 1).

List of tools related to the foundation work (2)

List of specific tools required for foundation work (Part 2).

BOLT KIT Shipping LIST

Shipping list for the bolt kit.

Installing the Machine Temporarily

Temporary installation of the column bed (Z-axis bed) assembly

Procedure for temporary installation of the Z-axis bed assembly.

Temporary installation of the table bed (X-axis bed) assembly

Procedure for temporary installation of the X-axis bed assembly.

Temporary Installation of ATC Base

Steps for temporarily installing the Automatic Tool Changer base.

Second Round of Grout Injection

Checkpoints before injecting grout

Key checks to perform before starting the grout injection process.

Selection of Grout

Guidelines for selecting appropriate grout materials.

Blending the grout mixture

Procedure for properly mixing grout and water.

Injecting the grout mixture

Steps for correctly injecting the mixed grout into foundation holes.

Curing the surface of grout

Methods for curing the grout surface to ensure proper strength.

Assembling the Main Unit

Installing the column

Detailed steps for installing the main column assembly.

Installing the spindle head

Detailed steps for installing the spindle head assembly.

Removing the Transit Clamps

Checking and Fueling the Oil Tanks

Hydraulic tank

Details for checking and fueling the hydraulic oil tank.

Oil Cooler Tank

Details for checking and fueling the oil cooler tank.

Table

Details for checking and fueling the table lubrication tank.

Lub. Tank

Details for checking and fueling the lubrication tank.

Spindle Air Oil Tank

Spindle Air Oil Tank

Details for checking and fueling the spindle air oil tank.

Air Service Unit Oiler Tank

Details for checking and fueling the air service unit oiler tank.

Spindle Head Air Filter Unit Oiler Tank

Details for checking and fueling the spindle head air filter unit oiler tank.

Connecting the Main Power and Air Sources

Connect the main power source

Procedure for connecting the main power supply to the machine.

Connecting the main air source

Procedure for connecting the main compressed air source.

Power On

Checking the Pressure on Each Unit

Hyd. Power Unit

Checking the pressure of the hydraulic power unit.

Main Air

Checking the pressure of the main air supply.

Oil Cooler

Checking the pressure of the oil cooler system.

Pressure of the lubrication pump

Checking the lubrication pump pressure.

Table Lubrication Pump

Table Lubrication Pump

Checking the table lubrication pump pressure.

Oil pressure on the table gear box

Checking the oil pressure for the table gear box.

Spindle Air Oil Operation Pressure

Checking the spindle air oil operation pressure.

Scale Air Operation Pressure

Checking the scale air operation pressure.

Assembling and Adjusting the Y Axis

Installing the ball screw nut in the Y axis

Procedure for installing the Y-axis ball screw nut.

Installing the Y-axis taper gib and back plate gib

Steps for installing Y-axis taper and back plate gibs.

Installing the Reference Gib

Installing the reference gib

Procedure for installing the reference gib for the Y axis.

Installing the ball screw nut

Procedure for installing the ball screw nut in the Y axis.

Machine Leveling

Move the machine to the coordinates...

Moving the machine to specific coordinates for leveling.

Setting the reference point for the X-axis level

Procedure for setting the reference point for X-axis leveling.

Place the completed level in the center...

Place the completed level in the center...

Adjusting level blocks and setting rough leveling for X and Z axes.

Adjust the level bolts in the center...

Adjust the level bolts in the center...

Adjusting level bolts in the center of the bed for final leveling.

Setting the reference point for the Z-axis level

Procedure for setting the reference point for Z-axis leveling.

Place the completed level in the grinding side...

Place the completed level in the grinding side...

Performing Z-axis leveling similar to X-axis leveling.

Take a note of the leveling values...

Recording leveling values for both X and Z axes.

The above sample is the common instruction...

The above sample is the common instruction...

Instructions for reading leveling values and measurements.

If the level measurement falls below the target...

Actions to take if leveling measurements are below target.

Precision Accuracy & Correction

Straightness of Z axis

Measuring and correcting the straightness of the Z axis.

Straightness of X Axis

Straightness of X Axis

Measuring and correcting the straightness of the X axis.

Straightness of Y Axis

Straightness of Y Axis

Measuring and correcting the straightness of the Y axis.

Straightness of Pallet Deck

Straightness of Pallet Deck

Measuring and correcting the straightness of the pallet deck.

Squareness Between Coordinate Axes

Squareness between coordinate axes

Measuring and correcting squareness between machine axes.

Parallelism of Movement to X/Z Axis, Pallet Deck, and Shaking of Index Table

Squareness in Division of Index Table

Squareness in division of index table

Measuring squareness in the division of the index table.

Parallelism of the X-axis Movement for the T-slot

Parallelism of the X-axis movement for the T-slot

Measuring parallelism of X-axis movement for T-slots.

Parallelism Between Center Line of Spindle and Movement of Z-axis

Parallelism between center line of spindle and movement of Z-axis

Measuring parallelism between spindle and Z-axis movement.

Run-out on the Spindle

Run-out on the spindle

Measuring and correcting spindle run-out.

Movement of spindle in the Z-axis direction

Measuring and correcting spindle movement in the Z-axis direction.

Resetting the Reference Point for Each Axis

Resetting the reference point for the W axis (W-axis stroke : 700mm)

Steps to reset the reference point for the W axis.

Resetting the Reference Point for the X Axis

Resetting the reference point for the X axis (X-axis stroke: 3000mm)

Steps to reset the reference point for the X axis.

Resetting the Reference Point for the Z Axis

Resetting the reference point for the Z axis (Z-axis stroke: 1600mm)

Steps to reset the reference point for the Z axis.

Resetting the Reference Point for the Y Axis

Resetting the reference point for the Y axis (Y-axis stroke: 2000mm)

Steps to reset the reference point for the Y axis.

Adjusting ATC

ATC installation & leveling

Steps for installing and leveling the ATC unit.

Adjusting the ATC Height

Adjusting the ATC height

Procedure for adjusting the ATC height and straightness.

Front/Rear Position

Adjusting the front/rear position and straightness of ATC rail.

Adjusting the Distance

Adjusting the distance

Adjusting the gap between ATC rails to 1mm.

Carriage Magazine Side Home Position Setting

Check the center position using the centering fixture...

Checking and verifying the center position with a centering fixture.

If you have to reset the reference point...

Resetting the reference point if magazine pot and changer mismatch.

Setting the Reference Point for the Tool Magazine Pot

Check the center position using the centering fixture...

Checking and verifying the center position with a centering fixture.

If you have to reset the reference point...

Resetting the reference point if magazine pot and changer mismatch.

Fine-tuning the Spindle Side of the Changer Arm

On the front operation panel, make necessary settings...

Making necessary settings on the front operation panel.

On the [ALH --] screen, press the MODE key...

Accessing parameter setting modes on the servo drive.

On the [0.0.4095] screen, press the up arrow key...

Navigating to Parameter #7 setting mode.

If you press the SET key on the [0.7.0000] screen...

Entering the setting mode for Parameter #7.

Setting Parameter #7 & Changer Movement

Installing the Covers

Installing the table bed covers

Steps for installing covers related to the table bed.

Installing the Column Bed Covers

Installing the column bed covers

Steps for installing covers related to the column bed.

Installing the Column Covers

Installing the column covers

Steps for installing various covers on the main column.

Installing the Semi Splash Guard (in the table side)

Installing the semi splash guard (in the table side)

Installing semi splash guards on the table side of the machine.

Installing the Semi Splash Guard (in the operator side)

Installing the semi splash guard (in the operator side)

Installing semi splash guards on the operator side of the machine.

Installing the Semi Splash Guard (in the chip conveyor side)

Installing the semi splash guard (in the chip conveyor side)

Installing semi splash guards on the chip conveyor side.

Installation Complete

Related product manuals