4.2 Hand-Guiding Operation
The user can change the robot’s pose by directly moving the robot. Use the Hand-guiding button on
the teach pendant or use the cockpit located on joint J6 to change the robot’s pose.
Caution
Before entering the robot’s operation range, press the Hand-guiding button on the teaching
pendant one or two times to make sure that the robot does not move when no external force is
applied.
If a tool is installed on the tool flange, configure the tool weight on the Workcell Manager and
Jog screens on the teach pendant before changing the robot pose. If the Hand-guiding button is
pressed without configuring the tool weigh, the robot may move abruptly.
When using tools whose center of gravity are far away from the flange too much (400 mm or
more), the robot can generate unstable vibrations. In such cases, operate the robot manually
using the jog function rather than with Hand-guiding.
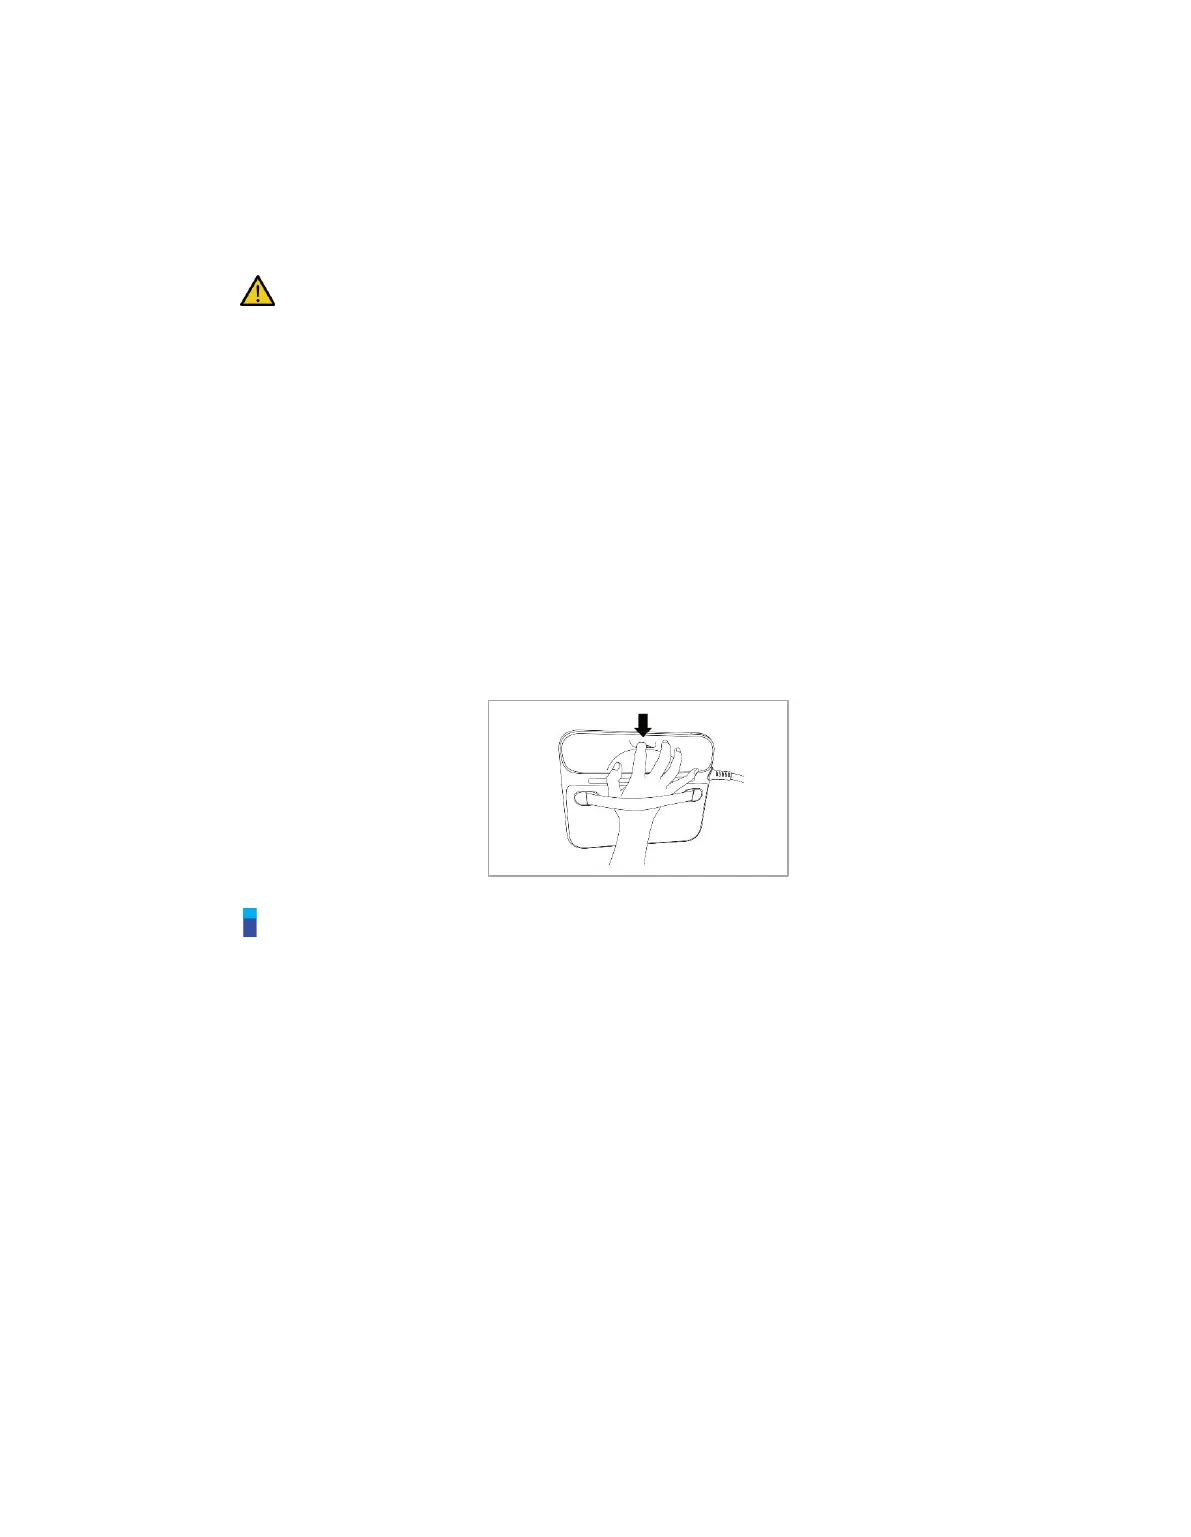
4.2.1 Teach Pendant Hand-Guiding Button
The user can change the robot’s pose while holding down the Hand-guiding button located on the back
of the teaching pendant.
Note
By default, the Hand-guiding button can only be used in Manual mode, and it cannot be used in
Auto mode when the task programs of Task Builder and Task Writer are operating. However, if
the robot is set to the Hand-guiding Ready state with the Hand Guide command of the Task Writer,
the button can be used even in Auto mode.