EasyManua.ls Logo

Doremi JNIOR 310 - User Manual

Doremi JNIOR 310
3 pages
Print Icon
To Next Page IconTo Next Page
Loading...
Install and setup JNIOR 310
Time required 10 to 15 minutes
Power up the unit
Connect 8-to-30v AC/DC (left/green LED is power ON)
When unit is powered up the right LED (orange) will show
that it is booting. This is an activity led.
Set the IP address with one of two methods:
Standard serial RS232 Male
115200 8N1 no flow control
The serial cable for the JNIOR is a straight-through
wired DB-9 Male to DB-9 Female
RJ45 Ethernet cross over cable
Ensure the PC you are using to set the IP address, is
in the same range as the JNIOR default IP address of
10.0.0.201
To set the IP address using RS232 and HyperTerminal and
type ipconfig
<enter>
To set the IP address using Cross Ethernet and Telnet and
type registry <enter>
Login for both sessions: Login = jnior / password = jnior
Follow the on-screen instructions to setting the IP address.
Please consult the JNIOR “Getting Started Manual” for
more details on setting the IP address.
Start a Telnet session:
Login = jnior
Password = jnior
Type: “registry to enter
the set up mode.
Start a HyperTerminal
session:
•Login = jnior
•Password = jnior
•Type: “ipconfig”to
enter the set up mode.
NOTE:AftersettingtheIPaddresstobeintherangeoftheDCP2000,youmustrebootJNIORto
confirmthenewIPaddresshasbeenimplemented.Toreboot,unplugthepower,wait5sec,
reconnectthepower
The JNIOR ships with the default IP address of 10.0.0.201
Ensure the DCP2000 is running software version 0.5.2-22SP1
Question and Answer IconNeed help?

Do you have a question about the Doremi JNIOR 310 and is the answer not in the manual?

Overview

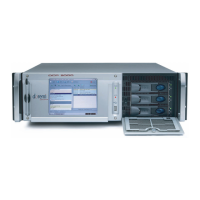
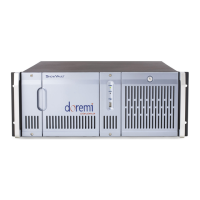
The JNIOR 310 is a network I/O resource designed for integration into process groups, offering robust control and monitoring capabilities. It is primarily used for managing and automating various functions within a system, particularly in conjunction with the Doremi DCP2000.

Function Description:

The JNIOR 310 acts as an interface between a control system (like the DCP2000) and external devices, enabling the control of General Purpose Outputs (GPOs) and monitoring of General Purpose Inputs (GPIs). It supports macro execution, allowing complex sequences of actions to be triggered by specific events or conditions. The device can manage output relays, trigger events based on input signals, and facilitate communication within a network environment. It also includes features for managing projector control, sending messages, and handling various other automation tasks.

Important Technical Specifications:

  • Power: The JNIOR 310 operates on an 8-30V AC/DC power supply. It has two power input terminals, each with a positive and negative connection. A green LED indicates power is ON, while an orange LED serves as an activity indicator during booting.
  • Connectivity:
    • Serial (RS232): Features a standard male DB-9 connector for serial communication. It supports a baud rate of 115200, 8 data bits, no parity, 1 stop bit, and no flow control (115200 8N1 no flow control). A straight-through wired DB-9 Male to DB-9 Female cable is used for connection.
    • Ethernet (RJ45): Equipped with an RJ45 Ethernet port, supporting cross-over cable connections.
  • Default IP Address: The device ships with a default IP address of 10.0.0.201.
  • Software Version: Compatible with Doremi DCP2000 running software version 0.5.2-22SP1.
  • Internal Software: Runs "slush" (Version 1.15) and includes a JNIOR Registry Editor for configuration.
  • Output Relays: Supports multiple output relays (e.g., Relay output #1 through #8), which can be configured as normally open (NO) or normally closed (NC).
  • Input Signals: Monitors multiple input signals (e.g., DIN1_ON through DIN8_ON, DIN1_OFF through DIN8_OFF).

Usage Features:

  • IP Address Configuration:
    • Via RS232 (HyperTerminal): Connect a PC via serial cable, open HyperTerminal, log in (username: jnior, password: jnior), and type ipconfig to enter setup mode.
    • Via Ethernet (Telnet): Connect a PC via an Ethernet cross-over cable (ensuring the PC's IP is in the 10.0.0.x range), open a Telnet session, log in (username: jnior, password: jnior), and type registry to enter setup mode.
  • DCP2000 Integration:
    • Registering the JNIOR: Add the JNIOR as a new device in the DCP2000's Device Manager (Menu > Doremi Labs, Inc / Device Manager > Add a new device: select JNIOR). Configure its IP address, username, and password.
    • Configuring GPO Actions: Create macros in the DCP2000's Macro Editor. Add actions to the macro, select "Insert new action," choose "Library" to browse existing actions, select "jnior" from the list, and then select the desired output device (e.g., "Select a device").
    • Configuring GPI Triggers: In the DCP2000's Macro Editor, navigate to the "Trigger Cue" tab. Create a new cue, connect to an event, name the macro, and select "Signal" as the source device name. Choose "jnior" from the library of actions and select the specific input signal (e.g., DIN4_ON).
  • Macro Execution: Macros can be configured to control various functions, such as opening/closing relays, triggering video output actions, sending messages, and controlling projector channels.
  • Test Cues: The system supports testing cues with playback, allowing users to create new shows, insert content, attach GPO macros, and attach trigger cues based on JNIOR inputs. The "TogglePlayPause" macro is an example of how JNIOR inputs can control playback.
  • User Authentication: Access to configuration and setup modes requires authentication with a username (jnior) and password (jnior). For critical operations, "SuperUser" privileges may be required, prompting for a password (default: 1234).

Maintenance Features:

  • Rebooting: After setting a new IP address, the JNIOR must be rebooted for the changes to take effect. This is done by unplugging the power, waiting 5 seconds, and then reconnecting the power.
  • Log Files: The JNIOR generates log files (/doremi/log/drmjniod.log) that can be accessed via Telnet (type tail /doremi/log/drmjniod.log <enter>) or by viewing the log file directly, providing detailed information about device operations and events.
  • Registry Editor: The JNIOR Registry Editor allows for advanced configuration and management of device settings.
  • Error Handling: The system provides feedback on authentication failures and requires proper credentials for critical operations.
  • Visual Indicators: The right LED (orange) serves as an activity indicator during booting, which can be useful for diagnosing startup issues. The red output LED on the device itself reacts accordingly to orange activity, providing a visual cue for operation.

Doremi JNIOR 310 Specifications

General IconGeneral
BrandDoremi
ModelJNIOR 310
CategoryServer
LanguageEnglish

Related product manuals