3
English
1. Make sure the
R
/
P
switch on the base of the telephone is set to
P
.
2. Lift the handset and press
P
on the front of the telephone.
3. Enter the full telephone number using the keypad.
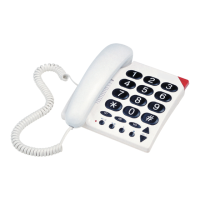
4. Press and hold the Memory Button for 2 seconds. A red light at the top
of the telephone will ash to conrm the number has been stored.
5. Replace the handset. The number has now been saved.
Note: Please remember to return the
R
/
P
switch on the base of the telephone to
the
R
position when you have nished saving your telephone number.
To dial the telephone number simple pick up the handset, wait for a dial-
tone and press the Memory Button. Your number will be dialled.
Storing up to 10 other telephone numbers using the 0 to 9 keys
This will allow you to assign up to 10 telephone numbers to the black
numeric keys 0 to 9.
1. Make sure the
R
/
P
switch on the base of the telephone is set to
P
.
2. Lift the handset and press
P
on the front of the telephone.
3. Enter the phone number using the keypad.
4. Press the Memory Button followed by a number on the keypad 0 to 9.
A red light at the top of the telephone will ash to conrm the number
has been stored.
5. Replace the handset. The number has now been saved.
6. You can repeat this process choosing a different number 0 to 9 for
each telephone number you wish to store.
Note: Please remember to return the
R
/
P
switch on the base of the telephone to
the
R
position when you have nished saving your telephone number.
To dial the telephone number simply pick up the handset, wait for a dial-tone
and press the Memory Button followed by the relevant number 0 to 9.
Please note you must press the relevant number 0-9 within 3 seconds of
pressing the Memory Button.