©
DOSATRON INTERNATIONAL / 11
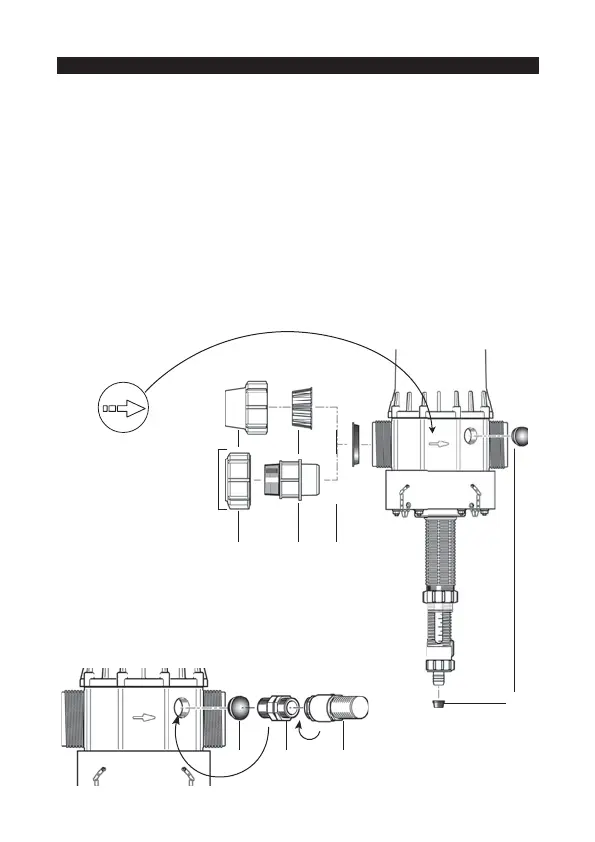
All models
- Remove the nuts (Fig. 2-A) and ferrules (Fig. 2-C) from the
Dosatron inlet and outlet.
- Remove the plastic caps (Fig. 2/3-B) which block the inlet and
outlet of your Dosatron before connecting to the water supply.
- Make sure the watertight seals at the inlet and outlet of the Dosatron
are correctly positioned.
- Make certain that the water flows in the direction of the arrows on the
pump body.
- Wrap the thread of the nipple with Teflon.
- Screw the nipple (Fig. 3-M) into the vacuum breaker (Fig. 3-V).
- Screw the whole assembly onto the dosing unit (Fig. 3).
NOTE : The Dosatron is shipped in OFF position (see § “Incorporated
bypass”).
ASSEMBLING THE DOSATRON (cont...)
Fig. 2
A
C
B
B
version US
VB M
Fig. 3
w
a
t
e
r
fl
o
w
Automatic anti-siphon device
- Screw the nipple (Fig. 3-M) into
the anti-vacuum valve (Fig. 3-V).
- Screw the assembly onto the dispenser (Fig. 3).
Fig. 3