©
DOSATRON INTERNATIONAL / 58
EN
© DOSATRON INTERNATIONAL / 57
( 8)
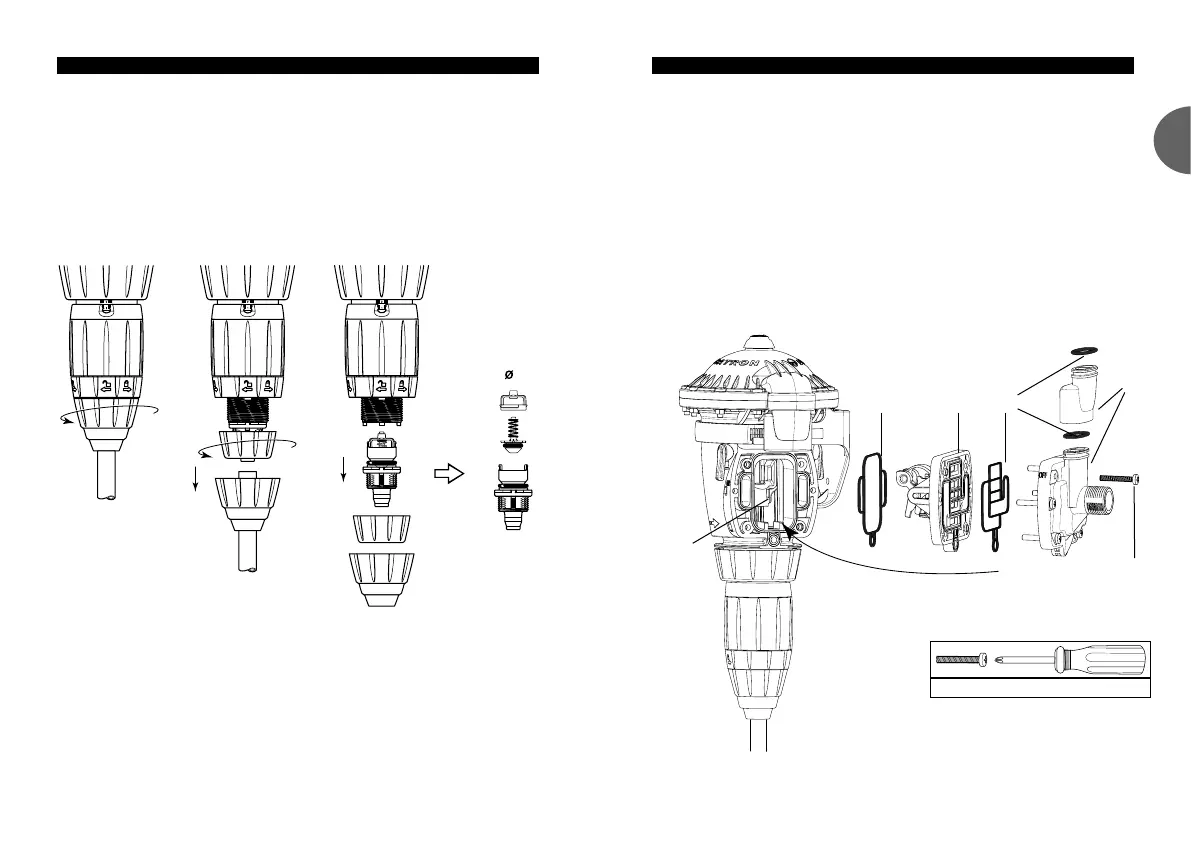
CLEANING AND RE-ASSEMBLING THE SUCTION VALVE SEAL
- Turn off the water supply and allow the pressure to drop to zero.
- Unscrew the nut and pull downwards to remove the suction tube (Fig. 15).
- Unscrew and take off the suction valve retaining nut (Fig. 16), pull
out the valve assembly, dismantle the valve and thoroughly rinse the
separate components in clear water.
- Re-assemble the components in the order and the plan position (Fig. 17).
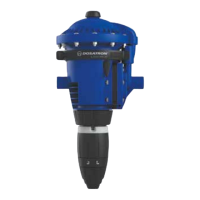
CHANGING SEALS IN THE ACTUATOR ASSEMBLY
- Wear protective eyewear and gloves.
- Rinse the DOSATRON and the injection areas by injecting clean
lukewarm water.
- Turn off the water supply and allow the pressure to drop to zero.
- Take the DOSATRON out of the installation.
- Unscrew the six screws (Fig. 18-J), dismantle the actuator assembly
(Fig. 18-K) and transfer parts (Fig. 18-L).
- Change out the seals (Fig. 18-M).
- Reassemble in the inverse order by hand by respecting the upward
position of the plunger piston and the actuator as shown (Fig.18-N).
Fig. 18
J
M
K
M
L
N
Tightening torque 2.5 N.m[22.12 in.lbf]
Fig. 15
Fig. 16
Fig. 17