©
DOSATRON INTERNATIONAL / 46
EN
© DOSATRON INTERNATIONAL / 45
ASSEMBLING THE DOSATRON
The DOSATRON is delivered with a suction tube (cut it to the needed
length) enabling its use with a large capacity concentrate container.
The tube must be fitted with its strainer and weights.
The instructions for fitting the tube are to be found in the specific chapter.
NOTE : The maximum suction height is 4 meters (13 vertical feet).
Fit the tube, equipped with its strainer and its weight, and immerse it in
the solution to be injected.
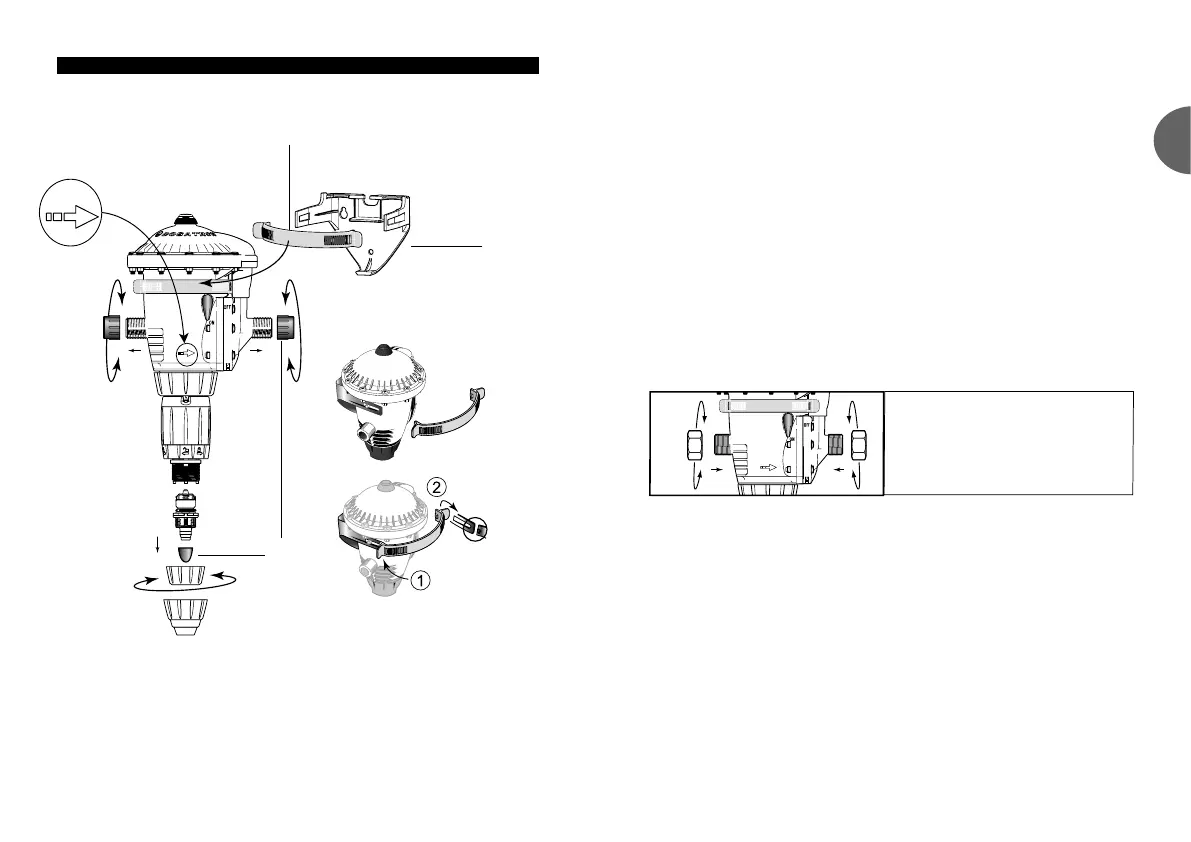
ASSEMBLY SHOULD BE CARRIED OUT WITHOUT THE USE OF TOOLS
The DOSATRON is delivered with :
- a mounting bracket (Fig. 1-A) and a strap (Fig. 1-B),
- a suction tube with a strainer.
The bracket enables the DOSATRON to be fixed to a wall.
Make certain that the water flows in the direction of the arrows on the
pump body.
Snap the DOSATRON into the bracket by fitting the two arms of the
bracket around the DOSATRON.
Fix the strap on the bracket by fitting the two lugs on the strap into the
holes in the arms of the bracket.
Remove the plastic caps (Fig. 1-C) which block the inlet and outlet of
your DOSATRON before connecting to the water supply.
Torque 20 Nm
thus 2kg
(Remember : 1 Nm = 0,1 DaN)
RECOMMENDATIONS
The DOSATRON can be connected to the water supply by means of
Ø 20 x 27 [3/4"] bore flexible hose and hose tail fittings with hose clips.
C
A
W
a
t
e
r
o
w
B
Fig. 1