contact us at w w w .DRpow er.com 11
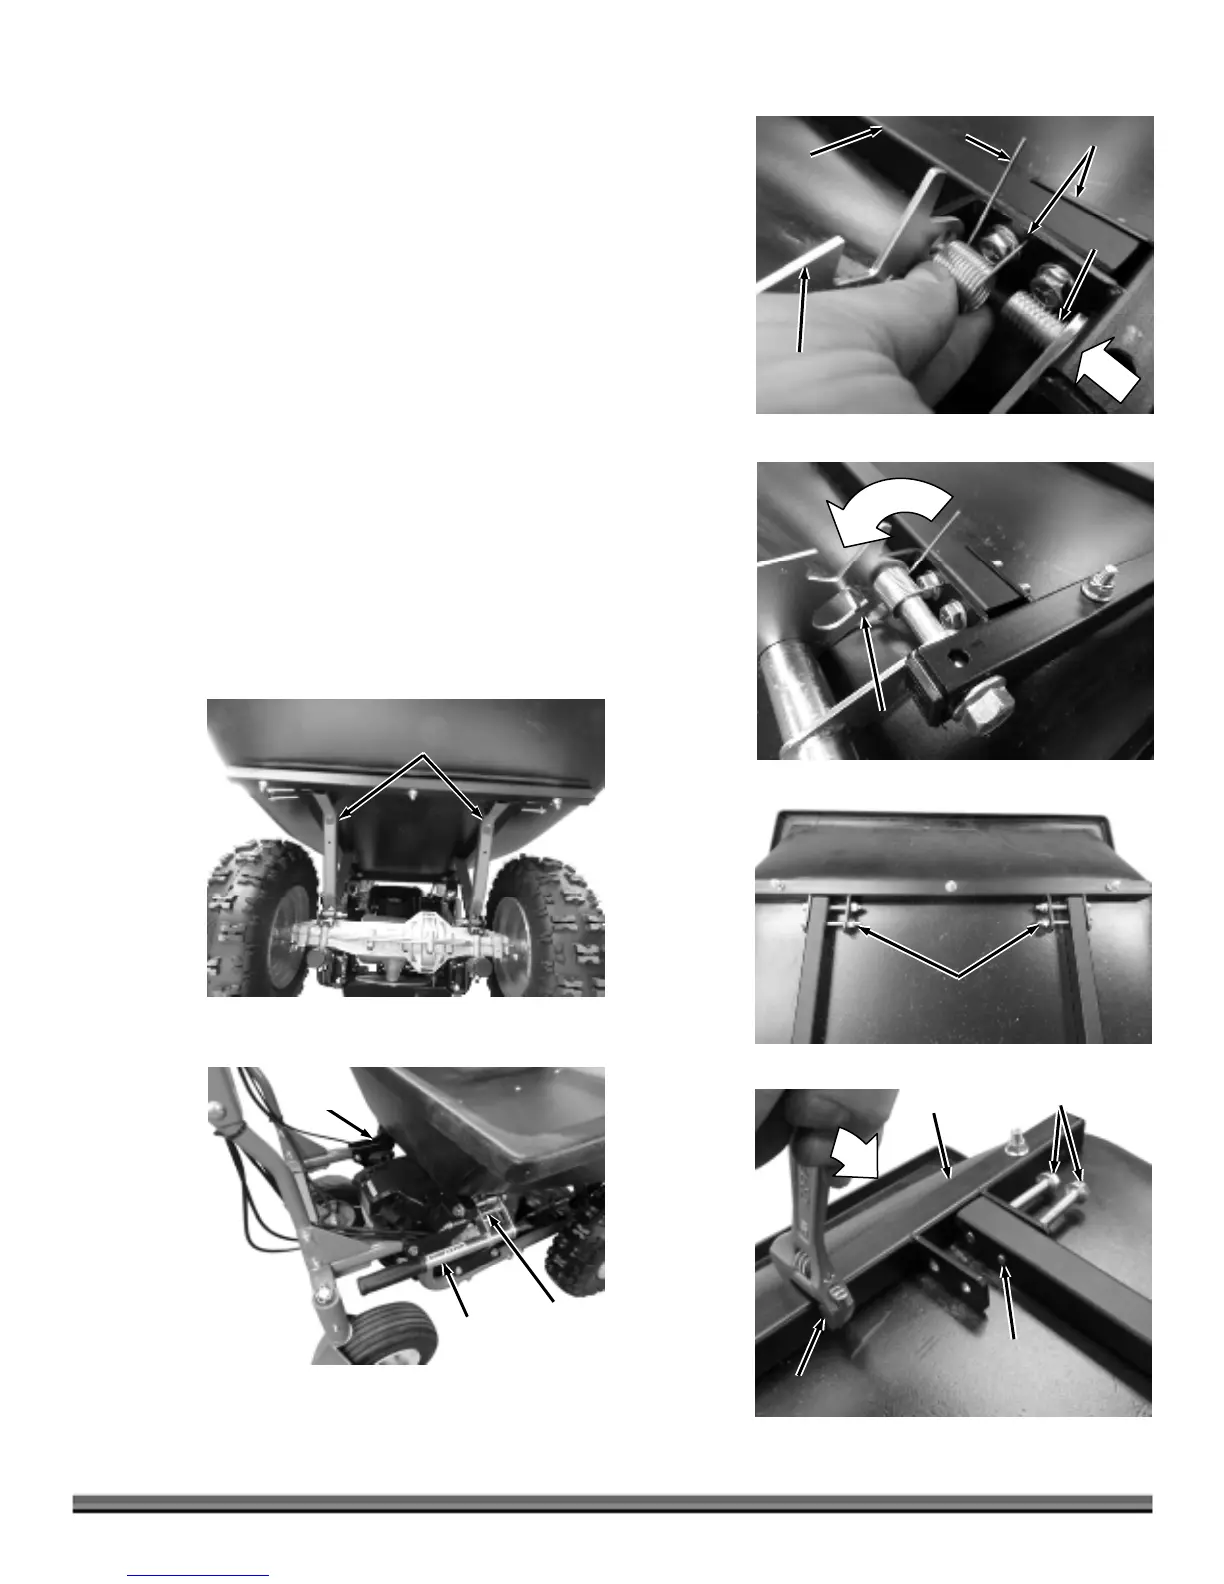
2. Insert one end of the Torsion Spring into the small hole in the Frame
(positioned as shown) and push it through to the hole on the other side of
the Frame Tube (Figure 8).
3. Install the 1/2-13 X 4" Flange Bolt through the Frame, Spring and Dump
Lever. Secure with the 1/2-13 Locknut using two 3/4" Wrenches. Do not
over tighten.
4. Rotate the remaining end of the Spring and secure it under the Spring Tab
(Figure 9).
5. Remove the Locknuts from the front of the Bed Frame and use a 1/2"
Wrench to turn the Front Bed Bolts out so the end of the threads are flush
with the inside of the Frame opening (Figures 10 and 11).
Note: To ease the process of aligning the ends of the Bolts, a 10" Adjustable Wrench
can be used on the Frame Tube to align the holes.
6. Place the Bed on the Power Wagon with the Dump Arms inside the Frame at
the front of the Bed Assembly (Figures 12).
7. Ensure the back of the Bed Assembly is on the Bed Rest Brackets and the
Dump Lever is fully latched onto the Latch Pin (Figure 13).
Dump
Handle
Figure 13
Latch
Pin
Bed Rest
Bracket
Bed
Figure 12
Dump
rms
Figure 11
djustable
Wrench
Front Bed Bolts
Even With
Tube (Flush)
Tube
Locknuts
Figure 10
Spring
Figure 8
Holes
Bolt
Dump
Leve
Frame
Tube
Spring
Tab
Figure 9

 Loading...


