CONTACT US AT www.DRpower.com 11
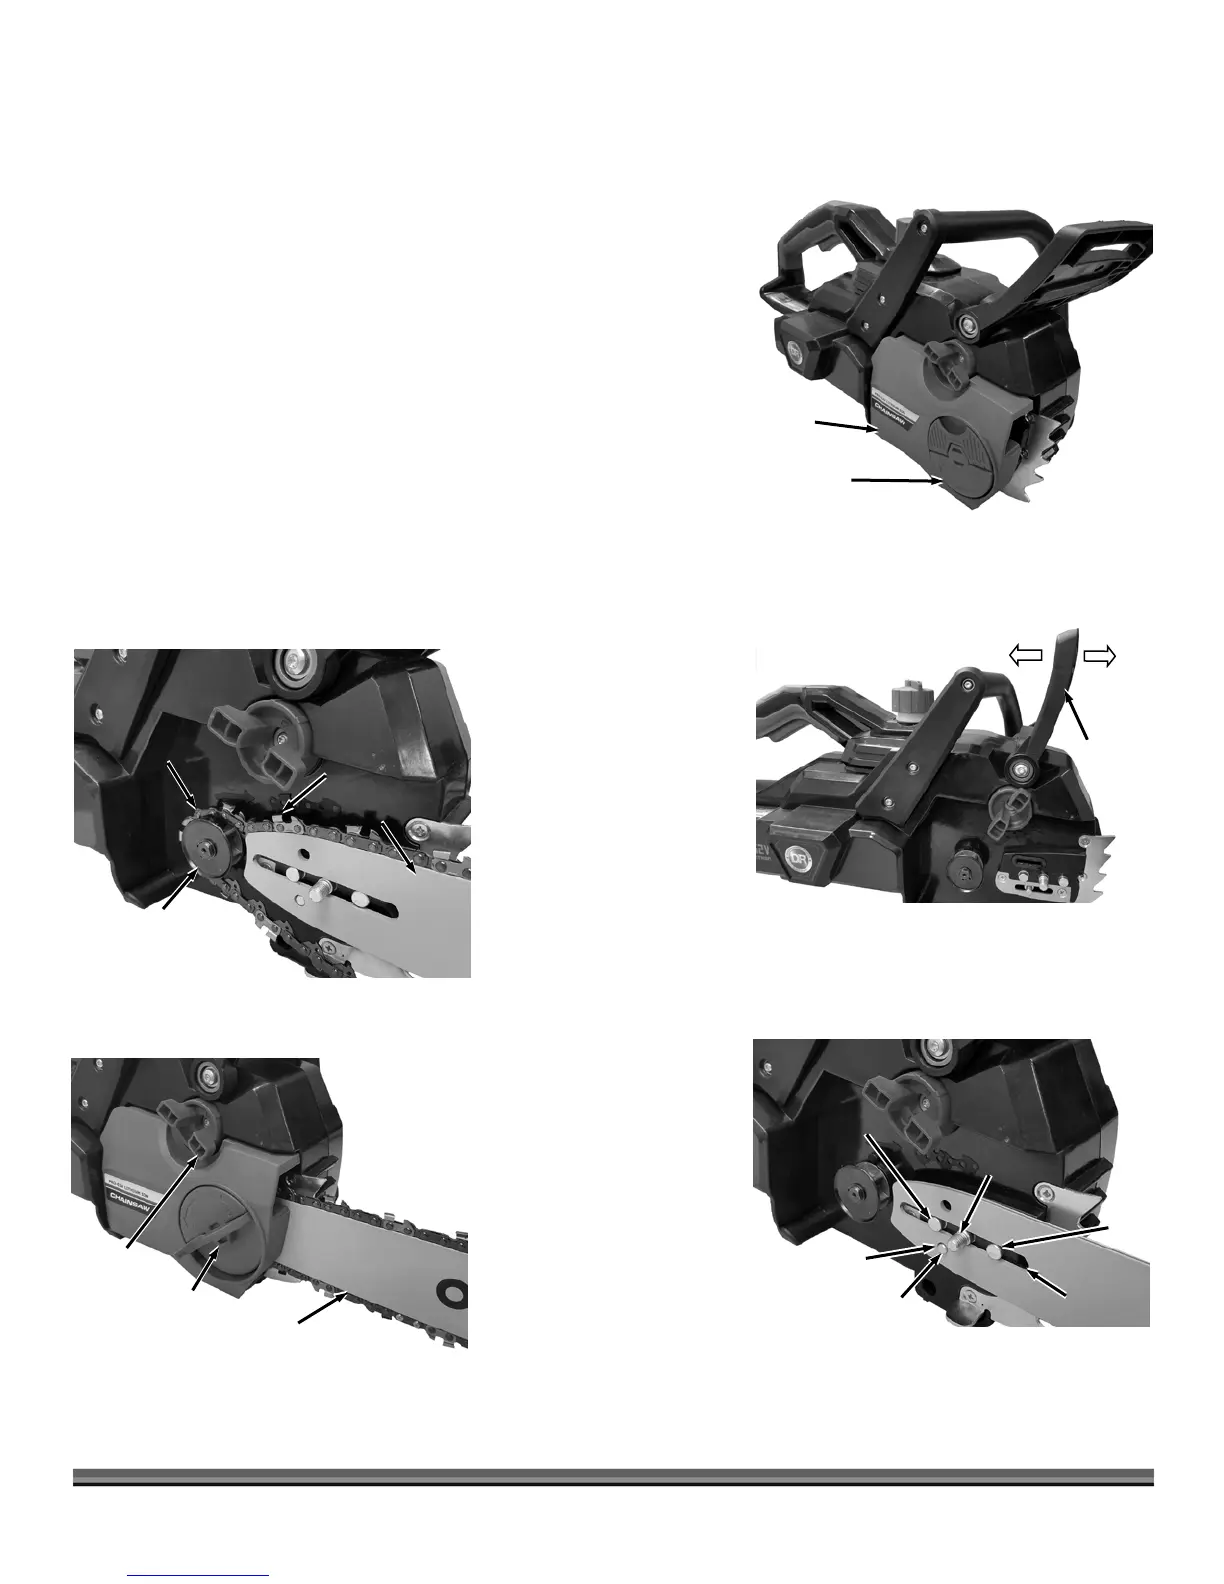
Assembling Your DR PRO-62V CHAINSAW
1. Locate a clean flat surface to work on.
2. Remove the Side Cover by turning the Lock Knob counter clockwise (Figure
5).
3. Check to make sure that the Chain Brake is disengaged by pulling back on
the Front Damper (Figure 6).
4. Position the Bar Slot over the Bar Post and Pins (Figure 7). Ensure that the
Tension Nut is fully into the Bar Tension Hole.
5. Feed the Chain onto the Sprocket and Bar with the sharp Tooth edge (on
the top side of the Bar) facing forward (Figure 8). Start from the Sprocket
and work clockwise feeding the Chain around the Bar.
6. Loosely secure the Side Cover onto the Bar Post (Figure 9).
7. Turn the Tensioning Knob clockwise to tension the Chain until the Chain is
snug on the bottom of the Bar and the Chain can be turned easily by hand.
Once the Chain Tension is set, tighten the Side Cover with the Lock Knob.
Slot
t