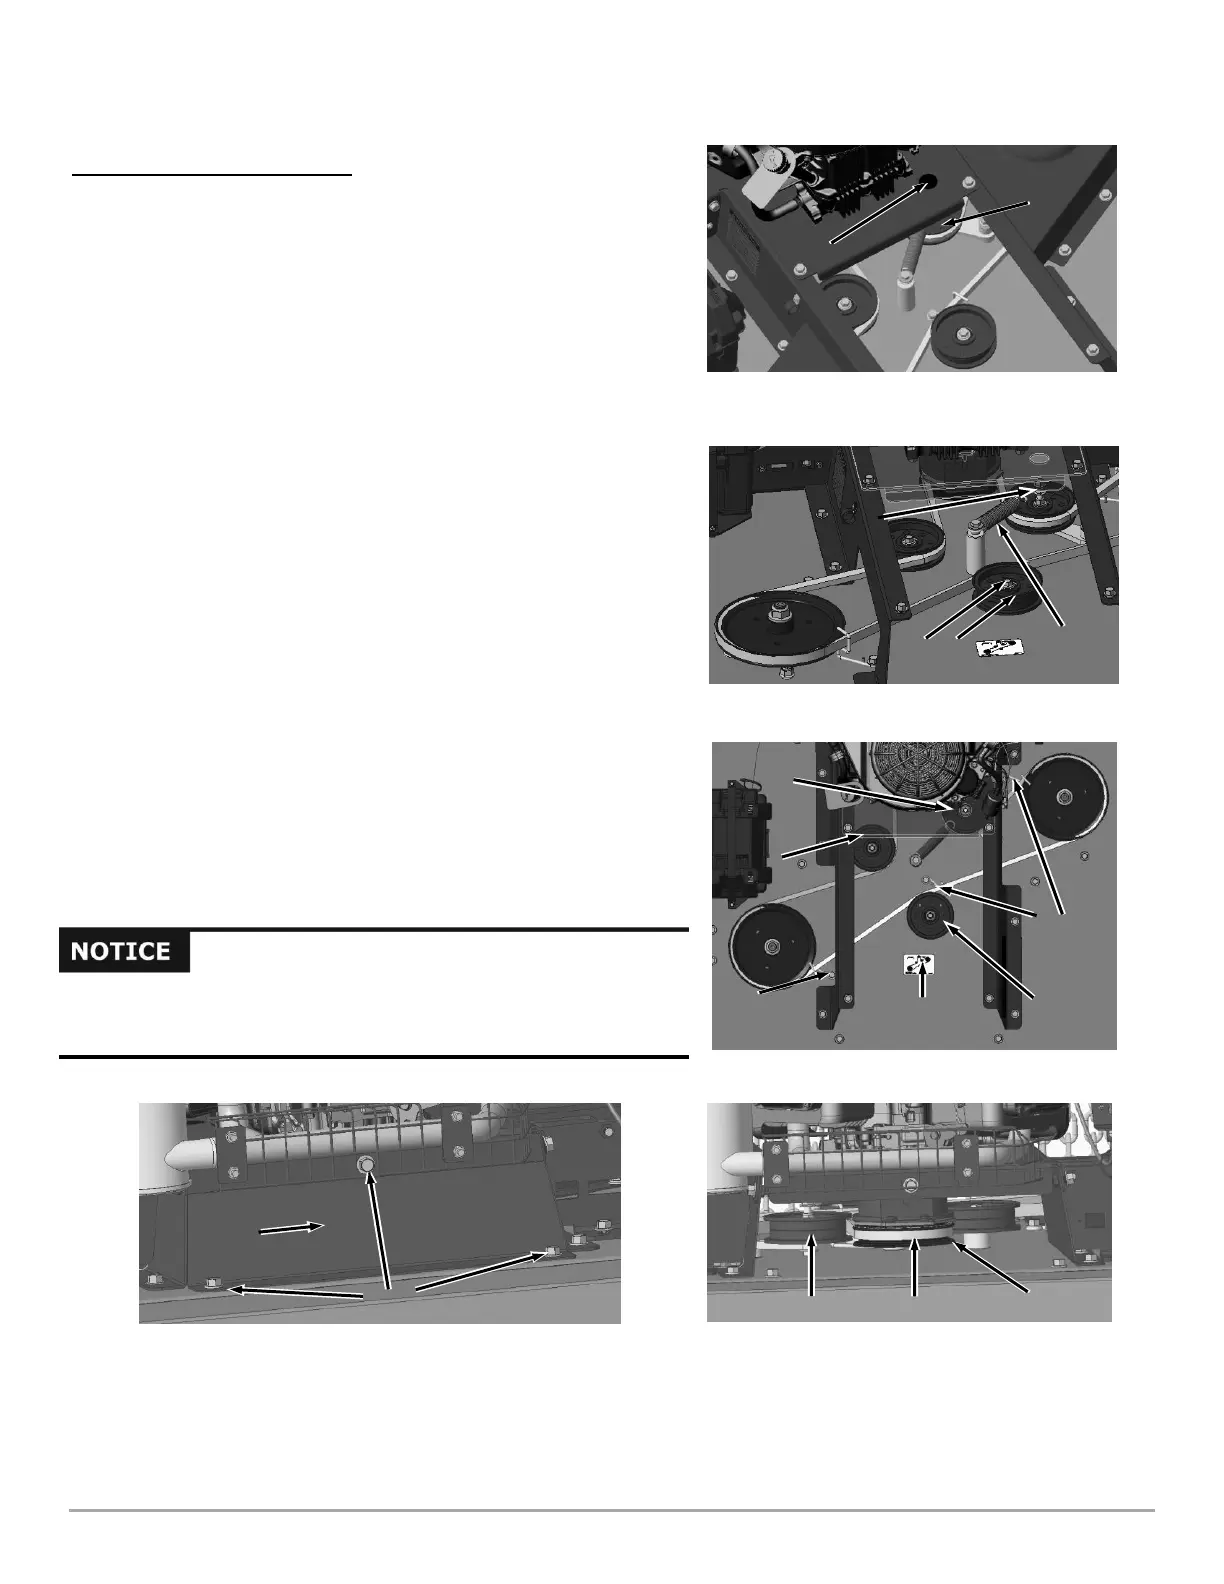
Installing a New Blade Belt
1. Lay in the new Belt referencing the Belt Routing Label located on the
center of the Deck (Figure 57).
2. With the Belt still loose, reattach the Tensioner Spring onto the Tensioner
Pulley. Tighten down the Locking Nut. Make sure the Nut is fully engaged
in the Nylon locking material, but do not tighten all the way down to where
the Spring can’t freely rotate.
3. With the Belt roughly routed in the correct orientation and the Tensioner
spring reattached, lift the Belt into place on the Clutch Pulley at the rear of
the machine (Figure 59).
4. Keeping tension on the Belt so it doesn’t fall off the Clutch Pulley, move to
the left side of the machine, and route the Belt around the Tensioner
Pulley.
5. Insert the Blade Belt into the Blade Pulley “V” Groove on the left side of
the machine. Rotate the Blade Pulley Clockwise until the Blade Belt rests
fully into the Pulley groove.
6. Continuing to work clockwise, line up belt on the Center Idler Pulley. Try to
keep tension on Belt so it doesn’t fall off any previously engaged Pulleys.
7. Ensure Belt is engaged around rear Idler Pulley (Figure 56).
8. At this point, Belt should be getting tight. Position Belt above remaining
Blade Pulley. Bring belt into “V” Groove at inlet of Blade Pulley and rotate
Blade Pulley Clockwise until Blade Belt slides fully into Pulley groove.
9. Perform a final check to ensure Belt is installed properly onto Clutch
Pulley, Rear and Center Idler Pulleys, Tensioner Pulley, and both Blade
Pulleys. Reference Belt Routing Label on the top of Deck (Figure 54).
10. Reinstall Belt Cover at the rear of machine (Figure 58).
11. Reinstall both sides of Pulley Covers (Figure 52).
12. Reinstall Gas Tank Plate, making sure Fuel Line, Vapor Lines, and Wire
Harness do not get pinched under the Plate (Figure 51).