20
TOW BEHIND DR
®
FIELD and BRUSH MOWER
Removing and Replacing the Drive Belt
Tools Needed:
9/16" Wrench
5/16" Nut Driver
Removing the Belt
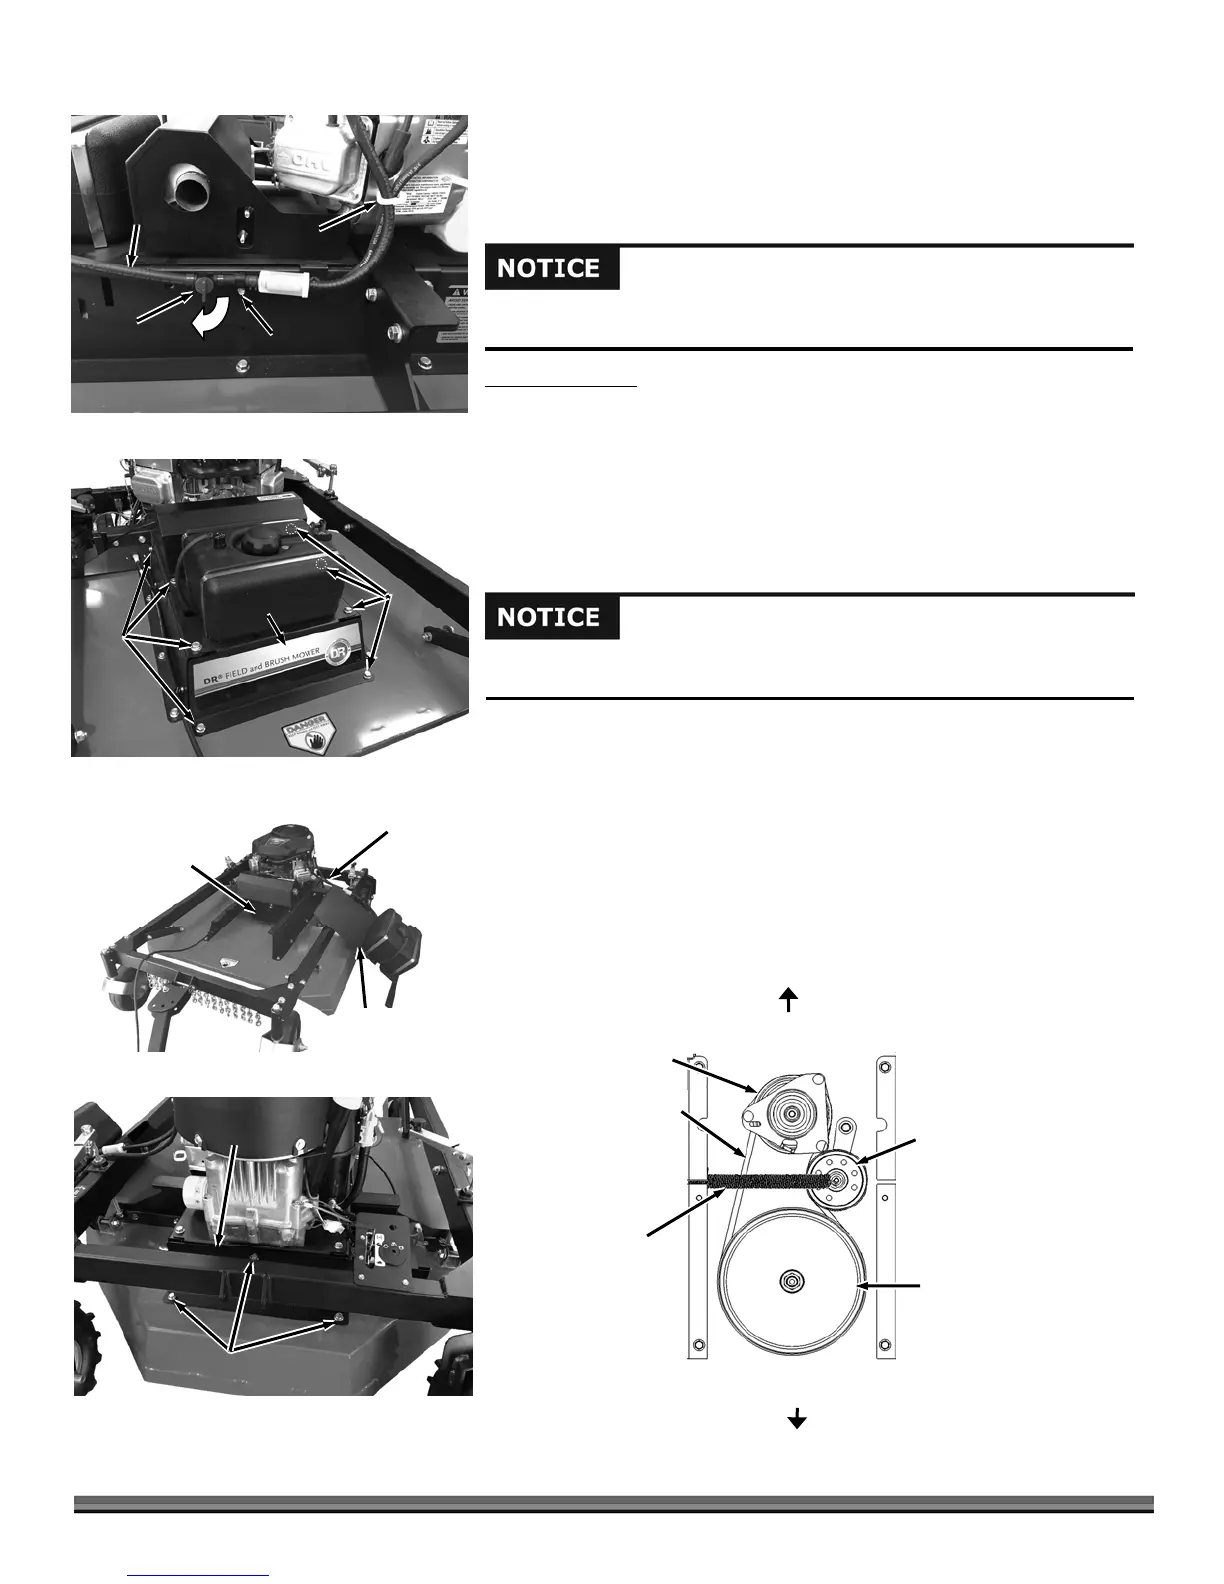
1. Turn the Fuel Shut-Off Valve to the Closed position (Figure 32).
2. Using a 5/16" Nut Driver, Remove the Cable Clamp securing the Fuel and
Vapor Lines.
3. Remove the Fuel and Vapor Lines from the Cable Guide on the Engine.
4. Using a 9/16" Wrench, Remove the eight bolts securing the Gas Tank Plate
(Figure 33).
5. Carefully lift the Gas Tank Plate and position it on the Fuel Line side of the
machine (left hand side) (Figure 34).
Note: It is helpful to lift the front of the Gas Plate up while pulling it from under the
Muffler on the 20hp Models.
6. At the back of the machine, use a 9/16" Wrench to remove the three Bolts
securing the Belt Cover and set the Belt Cover aside (Figure 35).
7. From the front of the machine where you removed the Gas Tank Plate,
rotate the Blade Pulley Counter Clockwise as you roll the Drive Belt up and
over the Blade Pulley (Figure 36).
Fuel Shut-Off
Valve Closed
Fuel
Line
Cable
Guide
Figure 32
Cable
Clamp
Bolts
Figure 35
Belt
Cove
Figure 34
Blade
Pulle
Gas Tank
Plate
Fuel
Line
Right
Hand
Side
Left
Hand
Side
Bolts
Bolts
Figure 33
Gas Tank
Plate
Use only DR belts on your machine. They have been thoroughly tested and
roven for man
hours of use.
When moving the Gas Tank Plate, be careful not to stress the Fuel Lines
because it could dama
e the Fuel Lines or Connections.
Figure 36
Clutch
Drive Belt
Tensioning
Spring
Blade
Pulley
Idler
Pulley
Rear of
Machine
Front of
Machine
Top View
Right Side
Left Side
 Loading...
