22
TOW BEHIND DR
®
FIELD and BRUSH MOWER
Replacing the Carbon Canister (Pro and Pro-XL Models)
Tools needed:
Wire Cutters
Pliers
1. Remove the Gas tank Plate as described in section “Removing and
Replacing the Drive Belt” in this Chapter.
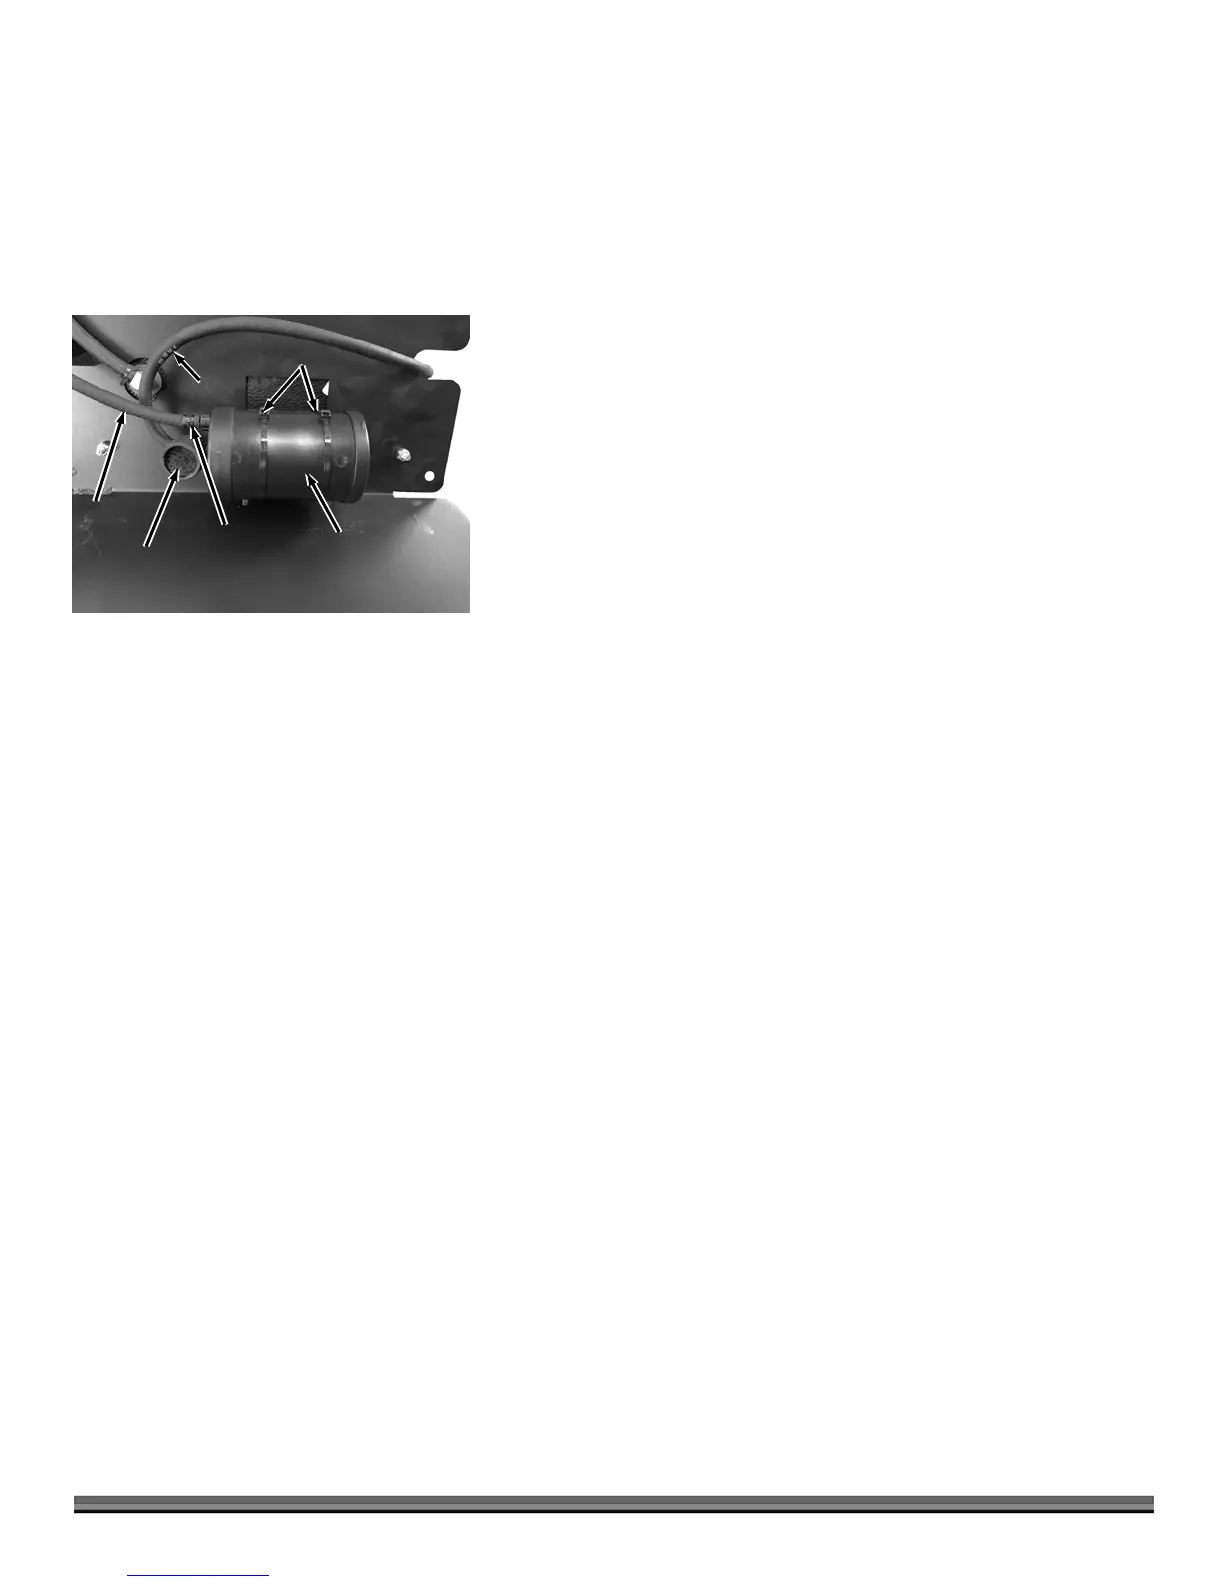
2. Cut the two Cable Ties that are securing the Carbon canister to the Gas Tank
Plate using Wire Cutters (Figure 38).
3. Remove the rubber Filter Elbow for better access to the Hoses.
4. Slide the Hose Clamps down from the Hose connections using Pliers and
twist the Hoses from the Canister.
5. Install the Hoses onto the new Carbon Canister and position the Hose
Clamps with Pliers.
Note: The Hoses MUST be installed onto the new Canister in the same location as
they were on the old Canister. The Canister is labeled “Purge” (this hose is from the
engine) and “Tank” (this hose is from the top of the fuel tank).
6. Slide new Cable Ties through the Canister Brackets and position the Canister
onto the Brackets. Make sure the Filter is facing down (the filter can be
rotated if needed).
7. Tighten the Cable Clamps around the Canister and cut the excess with Wire
Cutters.
Figure 38
Carbon
Canister
Carbon Canister
Cable Ties
Filter
Purge
Hose
Tank
Hose
Hose
Clamp
 Loading...
