10 DR
®
POWERWAGON
Assembling the DR POWERWAGON
Tools & Supplies Needed:
Two 9/16" Wrenches
1/2" Wrench
1/2" Socket with Ratchet and Extension
Two 3/4" Wrenches
10" Adjustable Wrench
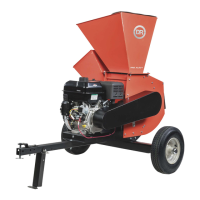
Parts Supplied in Product Package - PREMIER AND PRO MODELS (Figure 4
and list below):
Item # Part # Description Qty
1 ........... 38540 ....... Spring, Torsion, 360 Deg, .063" Wire, .798" OD ... 1
2 ........... 33353 ....... Bolt, Hex, Flange, 1/2-13 X 4", GR5 ....................... 1
3 ........... 38596 ....... Bolt, Hex, Flange, 3/8-16 X 1-3/4", GR5, ZP .......... 2
4 ........... 38598 ....... Bolt, Hex, Flange, 5/16-18 X 2-1/2", GR8, ZP ........ 2*
5 ........... 33335 ....... Nut, Nylon Lock, Flanged, 1/2-13 ........................... 1
6 ........... 33333 ....... Nut, Nylon Lock, Flanged, 3/8-16 ........................... 2
7 ........... 33332 ....... Nut, Nylon Lock, Flanged, 5/16-18 ......................... 2*
*Pro Model has Quantity of 4 for these items.
Parts Supplied in Product Package – PRO-XL MODEL (Figure 5 and list below):
Item # Part # Description Qty
1 ........... 37936 ....... Bracket, Actuator, Dump Arm ................................ 1
2 ........... 39084 ....... Bolt, Hex, Flange, 1/2-13 X 1-1/2", GR5, ZP .......... 1
3 ........... 38596 ....... Bolt, Hex, Flange, 3/8-16 X 1-3/4", GR5, ZP .......... 2
4 ........... 39085 ....... Bolt, Hex, Flange, 5/16-18 X 3", GR8, ZP ............... 1
5 ........... 38598 ....... Bolt, Hex, Flange, 5/16-18 X 2-1/2", GR8, ZP ........ 4
6 ........... 33335 ....... Nut, Nylon Lock, Flanged, 1/2-13 ........................... 1
7 ........... 33333 ....... Nut, Nylon Lock, Flanged, 3/8-16 ........................... 2
8 ........... 33332 ....... Nut, Nylon Lock, Flanged, 5/16-18 ......................... 5
Compare the contents of the Product Package with the “Parts Supplied in
Product Package” list above. If you have any questions please contact us at
www.DRpower.com or call 1-800-DR-OWNER (376-9637) for assistance.
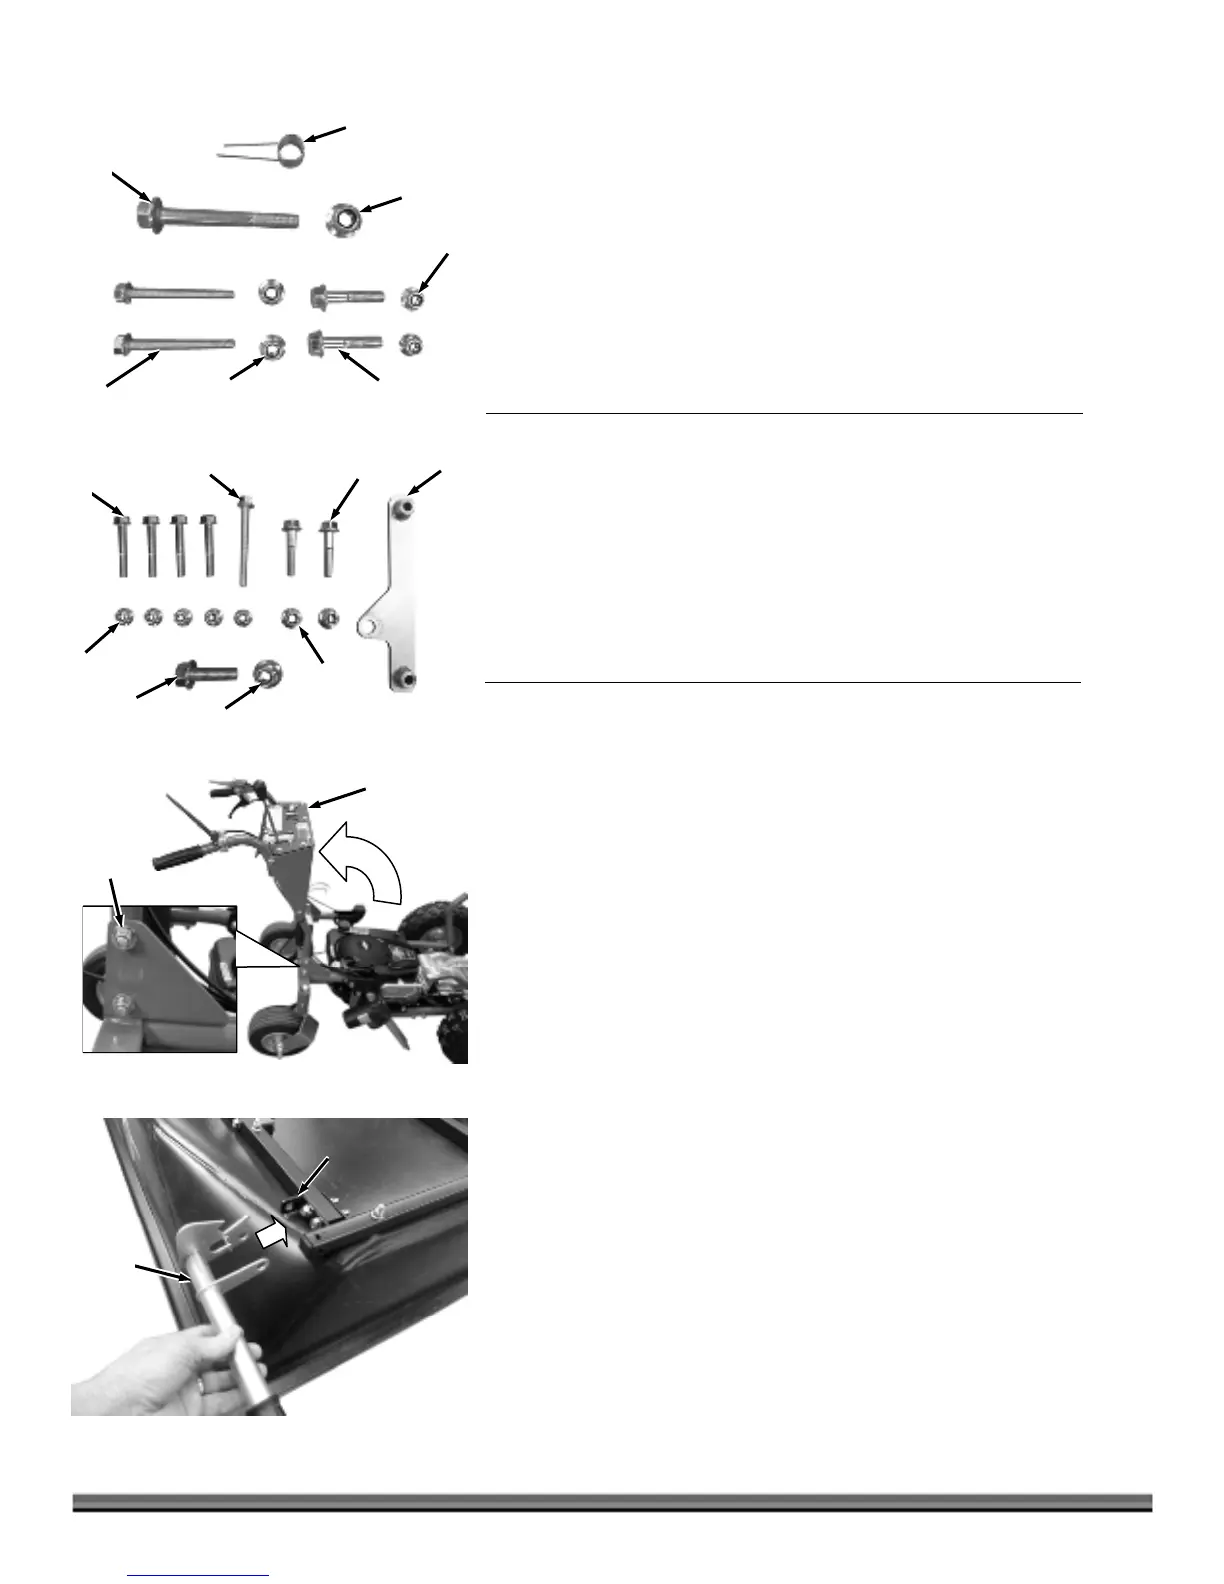
1. Lift the Handlebars to the operating position and install a 3/8-16 X 1-3/4
Flange Bolt and Locknut on each side using two 9/16" Wrenches (Figure 6).
Note: Ensure that the top Handlebar Bolts are installed in the same direction as
the lower Bolts with the heads on the inside of the Handlebars.
2. Tighten the lower Handlebar Bolts that were already in place.
Premier Bed - Assembly and Installation
If you have the Pro or Pro-Xl Model, refer to the next section “Pro and Pro-XL
Bed - Assembly and Installation”.
If you are installing the Flatbed on your POWERWAGON, proceed to the
“Flatbed Installation” section in this Chapter.
1. Position the Dump Handle at the right rear corner of the Bed where the
Mounting Bracket is located (Figure 7).
Dump
Handle
Figure 7
Dump Handle
Mountin
Bracket
Bolts and
Locknut
Figure 6
Handlebar
ssembly
1
Figure 5
5
2
3
4
7
8
1
Figure 4
2
3
4
5
7
 Loading...