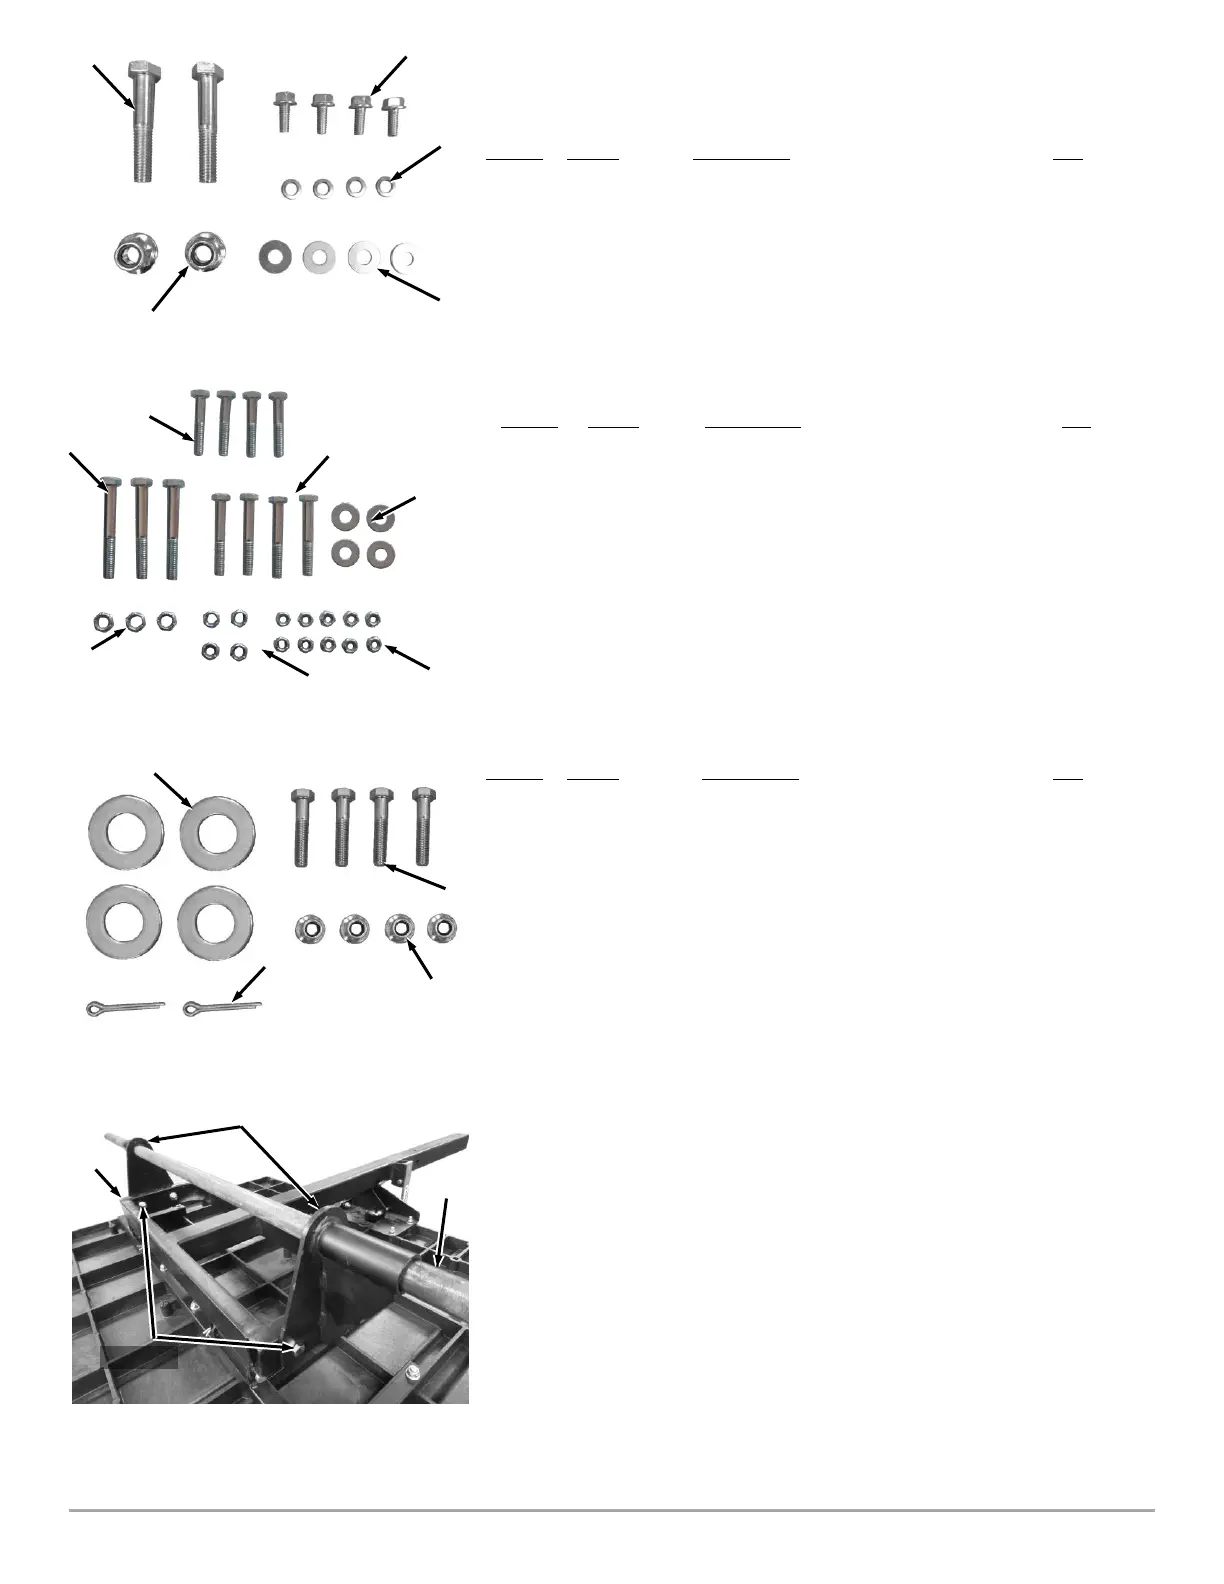
Power Unit Hardware (Figure 6):
Item # Part # Description Qty
1 ............. 265561 ............ Bolt, HCS, 1/2-13 X 2.75", GR5, ZP ............... 2
2 ............. 350231 ............ Bolt, Hex, Flange, 5/16-18 X .75" .................. 4
3 ............. 112431 ............ Washer, Lock, 5/16", Split, ZP ....................... 4
4 ............. 112411 ............ Washer, Flat, 5/16" USS, ZP .......................... 4
5 ............. 333351 ............ Nut, Nylon Lock, Flange, 1/2-13 .................... 2
Enclosure Hardware (Figure 7):
Item # Part # Description Qty
1……………123371……….Bolt-Hcs 3/8-16 X 2 3/4 Gr5 Zp ......... ………….3
2……………150451……….Bolt-Hcs 5/16-18 X 1-3/4 Gr5 Zp ....... ………….4
3……………101471……….Bolt-Hcs 5/16-18x2 1/4 Gr2 Zp .......... ………….4
4……………112411……….Washer-Flat 5/16 Uss ........................ ………….4
5……………110731……….Nut, Nylon Lock, 1/4-20, ZP .............. ………..10
6……………110761……….Nut-Lock Nylon 5/16-18 .................... ………….4
7……………164131……….Nut-Lock Nylon 3/8-16 Lowpro ......... ………….3
Wheel Hardware (Figure 8):*
Item # Part # Description Qty
1 ............. A0001216052 .... Washer, 1.00"ID X 1.58"OD X .134" Thick .. 4**
2 ............. 123341 .............. Bolt, HCS, 3/8-16 X 1.75", GR5, ZP ............. 4
3 ............. 333331 .............. Nut, Nylon Lock, Flange, 3/8-16 .................. 4
4 ............. 126851 .............. Pin, Cotter, 3/16" X 1.5" ............................... 2
**Only two needed for Premier (single wheel) machines.
Installing the Wheels
(Use Wheel Hardware Bag Set, see Figure 8)
Tools Needed:
• 9/16" Wrench and 9/16” Ratcheting Socket
• Pliers
1. Tip the Cart over to access the Frame (Figure 9).
2. Position the Axle Brackets and loosely secure with four 3/8-16 X 1.75"
Bolts and Locknuts using a 9/16" Wrench and Ratcheting Socket.
3. Slide the Axle through the Brackets until the same amount sticks out on
the side. Do not tighten the hardware until you are finished step 7 on the
following page.
 Loading...