14 DR
®
LEAF and LAWN VACUUM
Assembling the Power Unit
(Use Power Unit Hardware Package, see Figure 6)
Tools Needed:
• 1/2" Wrench or 1/2" Ratcheting Socket
• 3/4" Wrench and 3/4" Ratcheting Socket
• Scissors / diagonal cutters
• Optional Floor Jack
1. Cut the cable tie holding the machine keys and place them in a safe
location not to be lost.
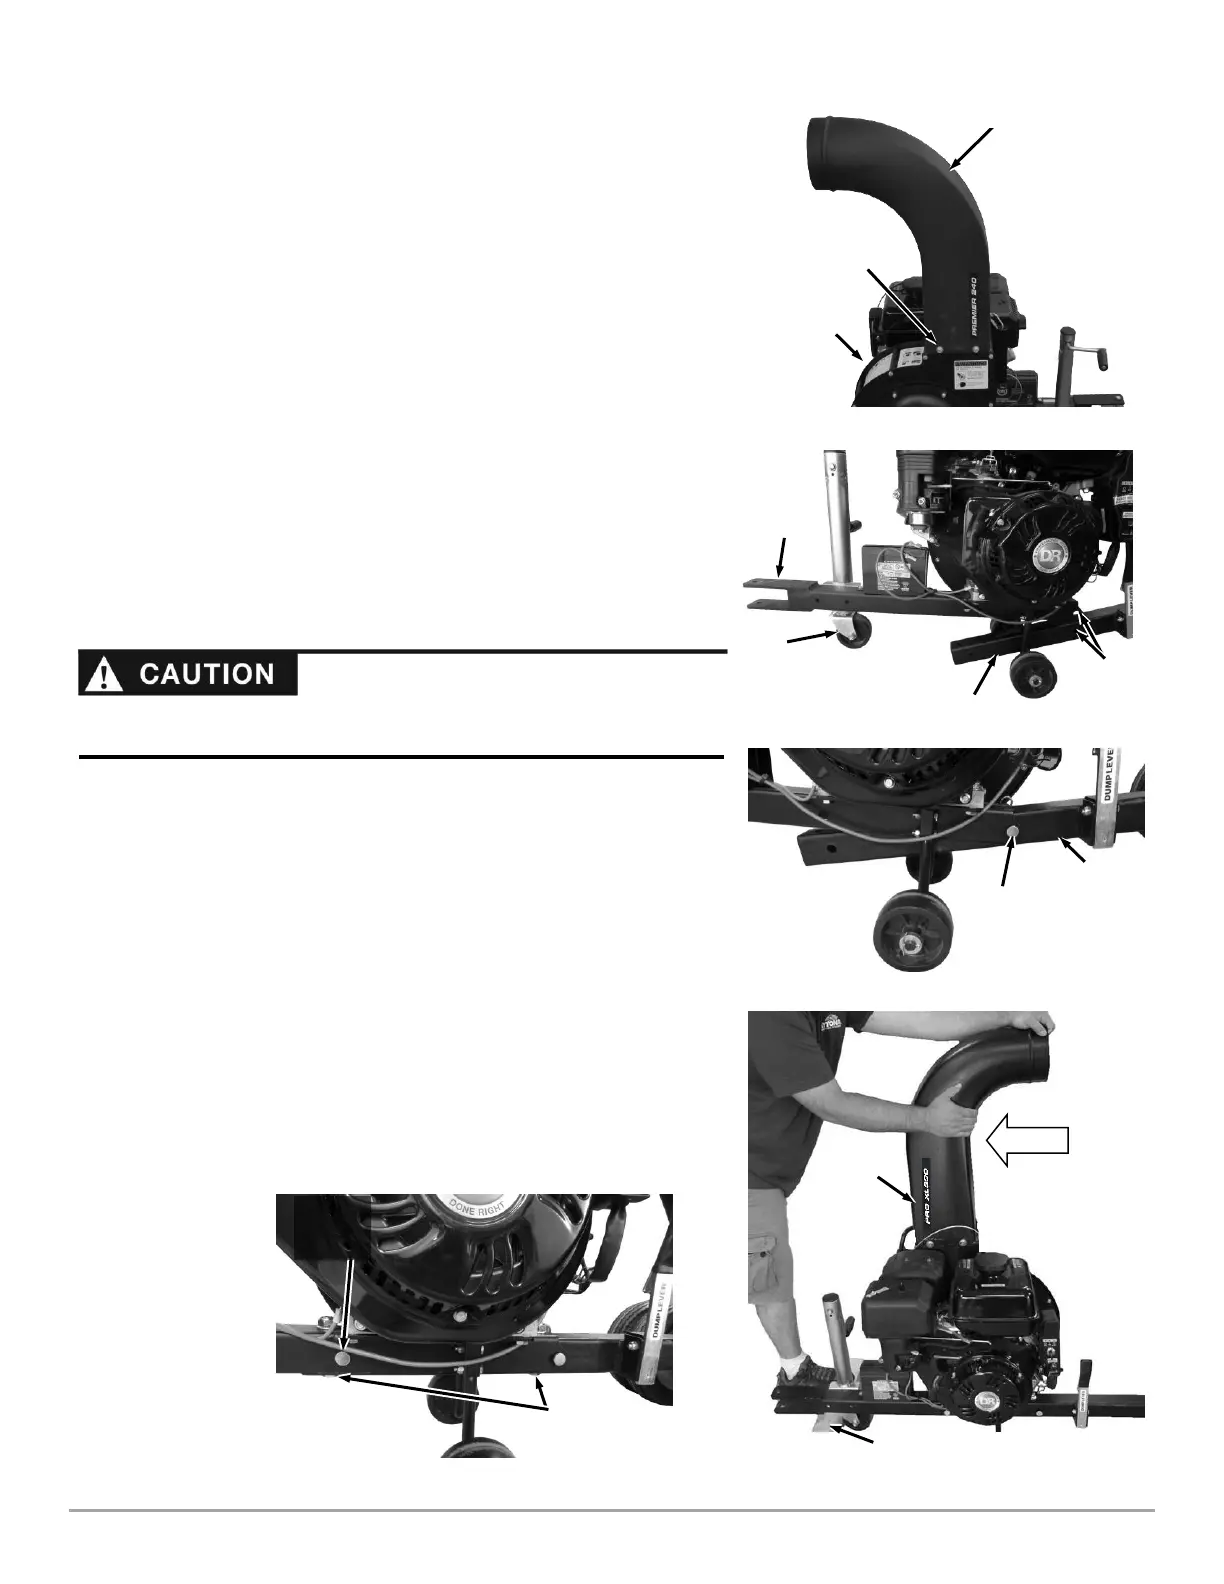
2. Place the Outlet Chute on top of the Impeller Housing (make sure to
orient as shown) and secure with four Bolts, Lock Washers, and Flat
Washers using a 1/2" Wrench or socket (Figure
16)
.
Installing the Power Unit
(Use Power Unit Hardware Package, see Figure 6)
1. Position the Power Unit at the front of the Cart with the Tow Hitch
facing forward and the rear holes aligned.
2. Lift the Cart Frame to align the rear hole in the Engine Unit with the hole
in the Frame and insert a 1/2" X 3.5" Clevis Pin and Hitch Clip (Clevis
Pins and Hitch Clips are provided in the Product Package (Figure 18).
3. Chock the Wheels of the Cart to keep it from moving and have a helper
pull forward on the Outlet Chute so the Power Unit and Cart Frame front
holes are aligned (Figure 19).
Note: If you have a Floor Jack or similar you could jack under the Dump Lever to
align the Frames without a helper.
4. Insert the 2nd 1/2" X 3.5" Clevis Pin and Hitch Clip into the front holes of
the Engine Unit and Cart Frame (Figure 20).
5. Place the two 1/2-13 X 2.75" Bolts from underneath up through the two
vertical Holes and secure with 1/2-13 Locknuts using a 3/4" Wrench and
3/4” Ratcheting Socket. Remove the Floor Jack if one was used.
 Loading...