CONTACT US AT www.DRpower.com 17
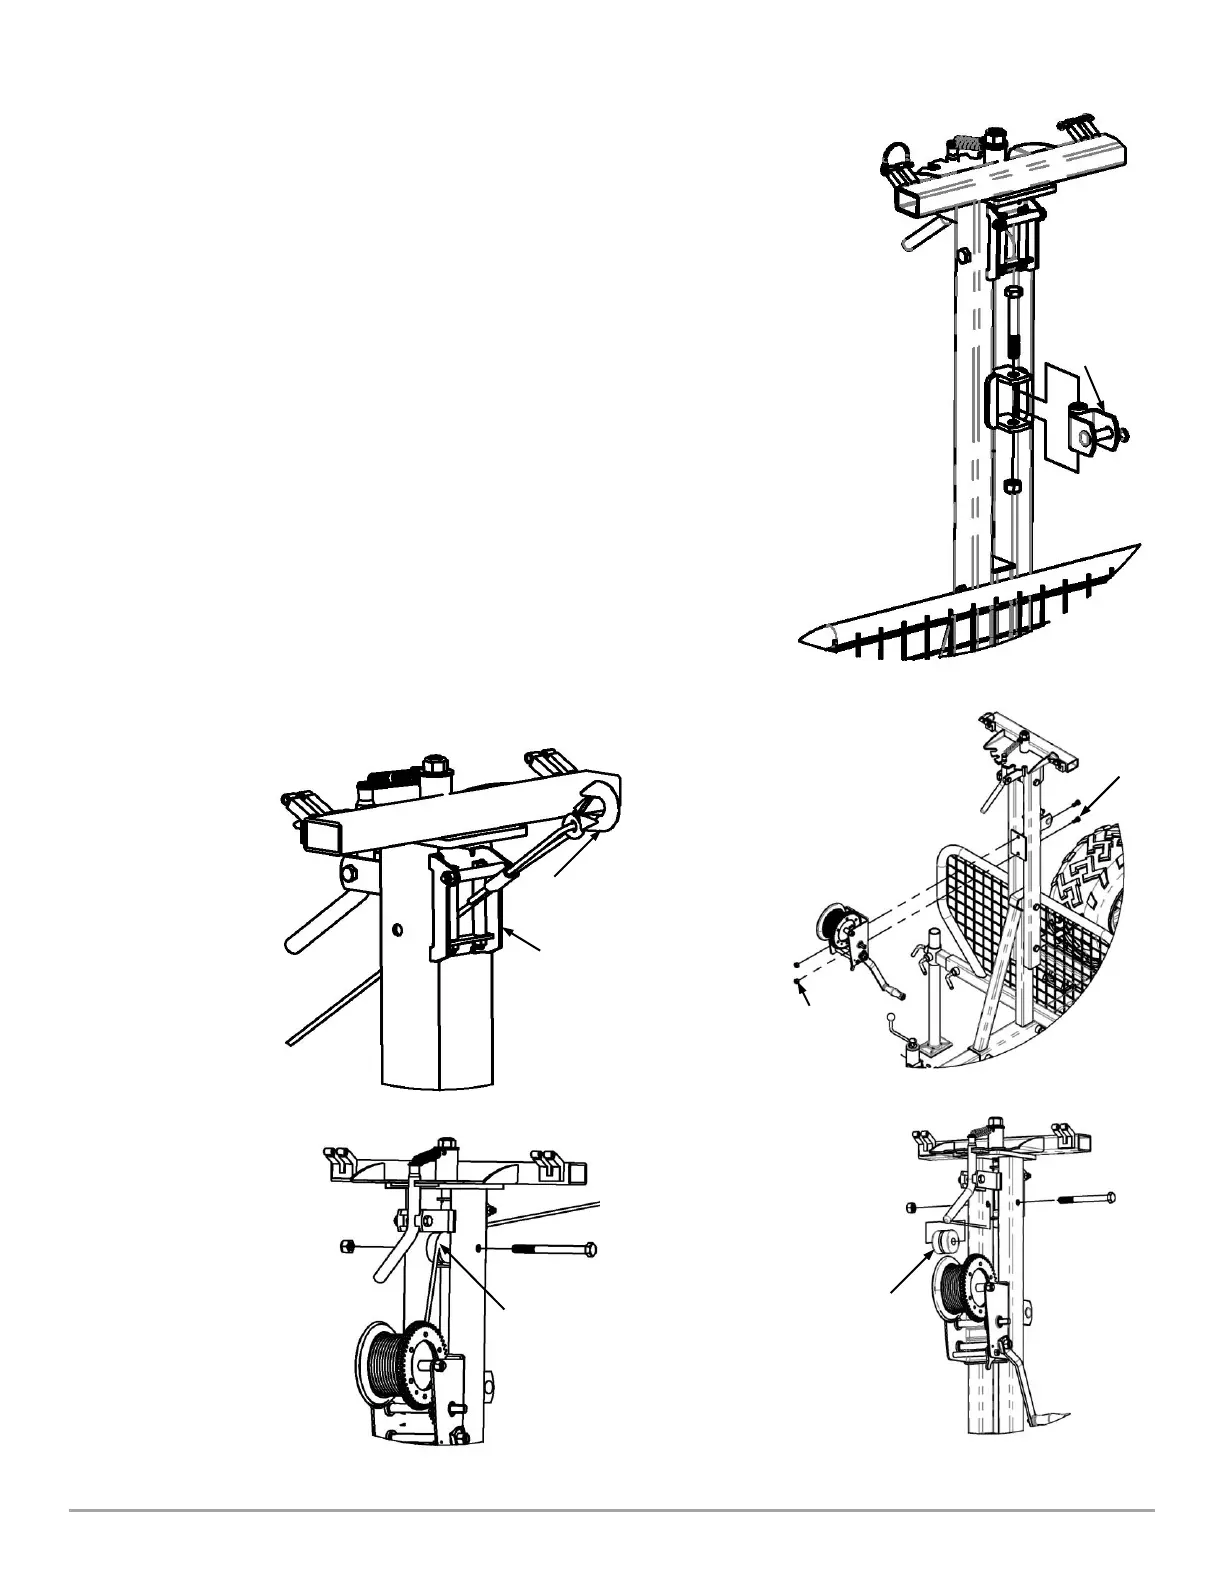
Attaching the Winch and Boom
Tools Needed:
12mm, 13mm, 17mm and 22mm Wrench
17mm, 21mm, and 24mm Socket
5" Long Socket Extension
Adjustable Wrench
NOTE: Before installing the Winch and Boom to your DR VERSA TRAILER, follow the
instructions shipped with your Winch to properly install the Handle and Cable.
You may want to install the Cable after the Winch has been installed to your
Trailer.
1. Remove the Boom Swivel Bracket (Figure 29) using a 24mm Socket and
Adjustable Wrench.
2. With the assistance of a second person, install the Winch (Figure 30), with the
Crank Handle facing to the Left, using two M8 x 30mm Bolts, and Lock Nuts.
Tighten using a 12mm Socket w/Extension for the Lock Nuts and a 13mm
Wrench for the Bolts. Reinstall the Boom Swivel Bracket.
3. Remove the Cable Guide (Figure 31) using a 21mm Socket on the Bolt and a
22mm Wrench on the Nut.
4. Pull the Winch Hook up through the Cable Guides on the Crane (Figure 32) and
reinstall the Cable Guide with the Cable on Top of the Guide (Figure 33). Make
sure that Guide is free to rotate.
 Loading...