CONTACT US AT www.DRpower.com 27
Changing the Drive Configuration (from Cross Drive to Inline
Drive)
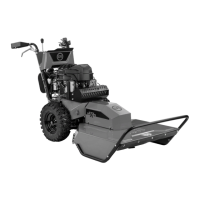
The Cross Drive configuration uses the Control Arms on the right as shown in
the upper illustration (Figure 54). We found this to be to be the preferred
configuration for the majority of users so Machines are shipped from the factory
as Cross Drive. We recommend extensive practice by anyone that may be using
this machine before switching drive configurations.
The Inline Drive configuration uses the Control Arms on the left as shown in the
lower illustration (Figure 54). Converting to this configuration is explained in the
following steps.
Tools Needed:
1/2" Socket with Extension
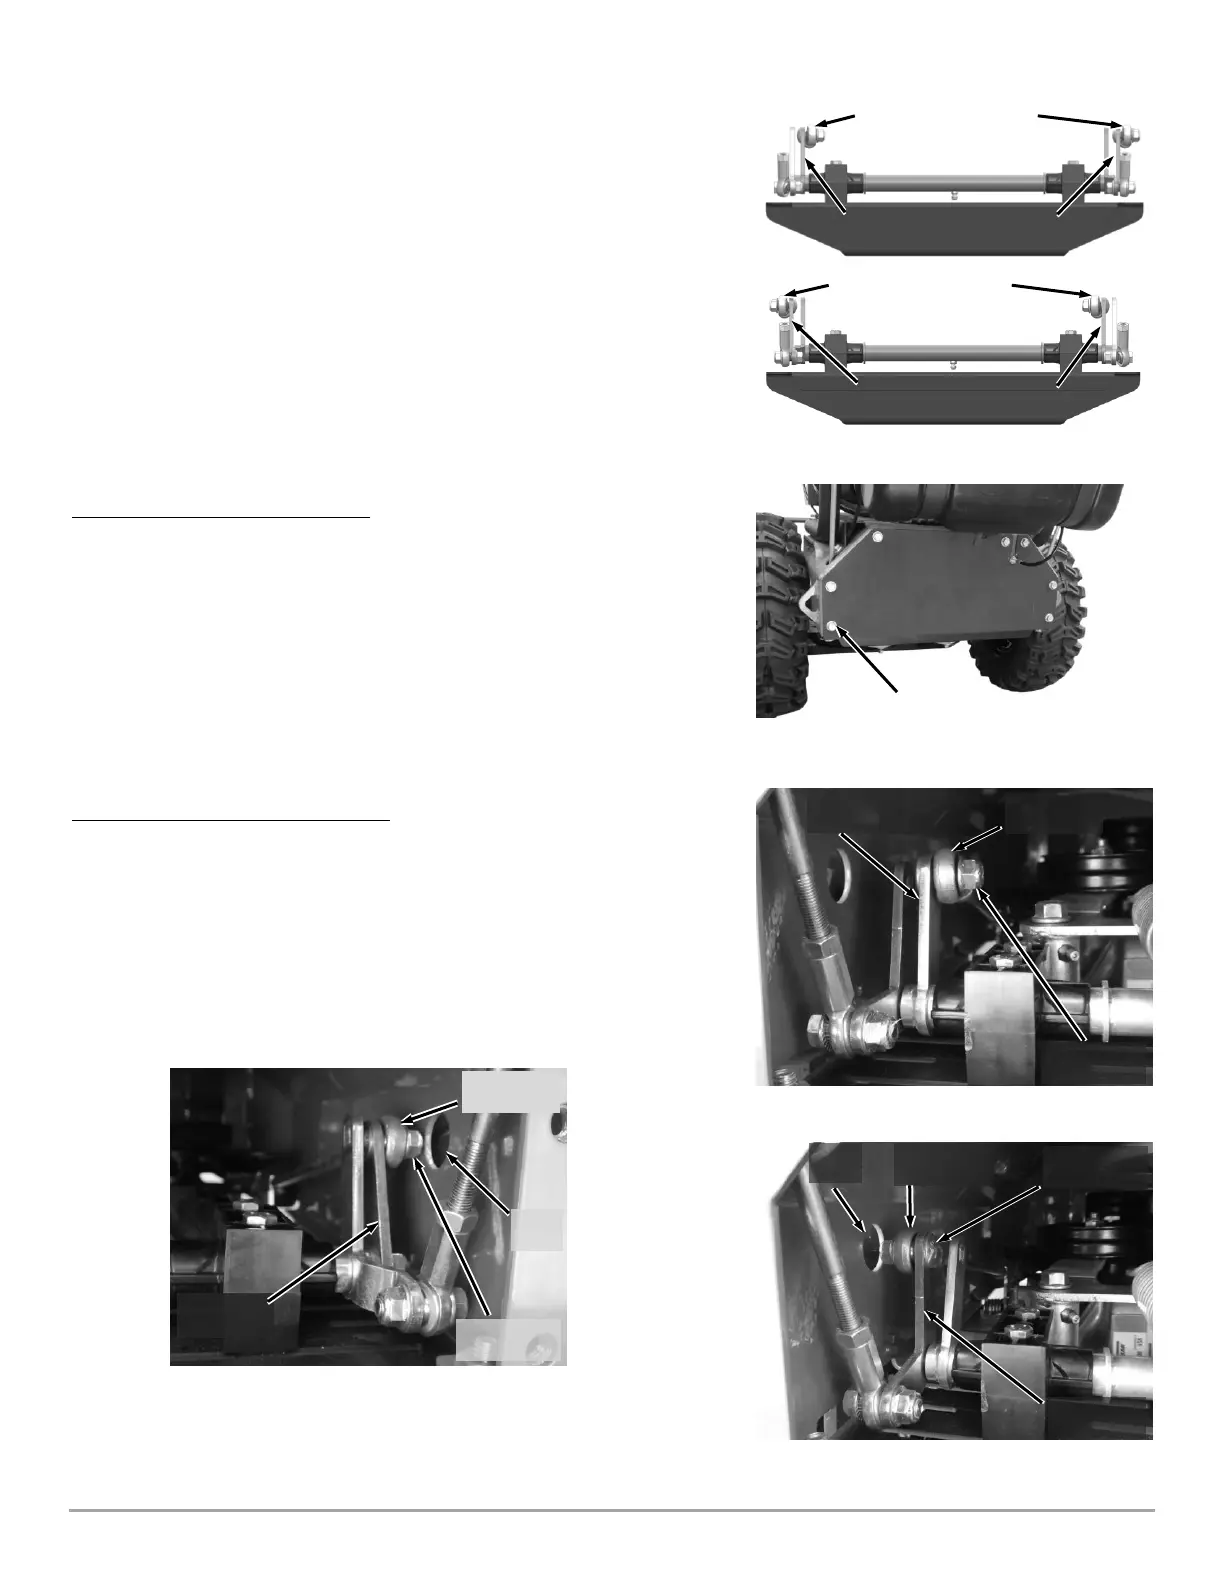
1. Remove the Rear Cover Plate using a 1/2" Wrench (Figure 55).
Adjustment at left side of the Frame
Note: Move the Linkage as needed to allow removal and installation of the Carriage
Bolts. The head of the Carriage Bolts are always positioned between the
Control Arms.
2. Use a 1/2” Socket to remove the Locknut and Carriage Bolt securing the
Transmission Link to the right Control Arm (Figure 56).
3. Move the Transmission Link to the left Control Arm and secure with the
Carriage Bolt and Locknut using the 1/2 Socket and Extension (Figure 57).
Note: Use a socket with extension when accessing the locknut through the cut-out in
the Frame.
Adjustment at Right Side of the Frame
4. Use a 1/2” Socket and Extension to remove the Locknut and Carriage Bolt
securing the Transmission Link to the right Control Arm (Figure 58).
Note: Use a socket with extension when accessing the locknut through the cut-out in
the Frame.
Cross Drive uses Right Control Arms
Inline Drive uses Left Control Arms
Carriage Bolt
and Locknut
Carriage Bolt
and Locknut
Carriage Bolt
and Locknut