Input Level (Tape
&
Patch Inputs):
Input Impedance (Microphone):
Input Impedance (Tape
&
Patch):
Output Level w/Processing:
Output Impedance:
Muting (Microphone Input Only):
Frequency Response:
Distortion:
Supply Requirements:
Size:
Weight:
15
mV minimum for full processing,
30 mV maximum.
1
Megohm
50 K ohm
0-50
mV
adjustable into 50 K ohm load.
50 K ohm
10 to 20
dB
attenuation during speech
pauses.
400-6000 Hz
@
-6
dB
Less than 5% T.H.D.
@
1
kHz,
20
dB
clipping.
11-16
VDC
@
95
mA
7” L x
6-l/4”
W x
2-l/4”
H
(17.8 cm x 15.9 cm x 5.4 cm)
1.4 lb.
(.63
kg)
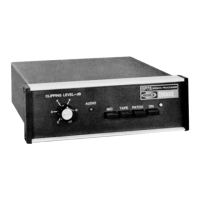
III.
INSTALLATION
Locate the SP75 at a convenient location. If the SP75 is placed on top of the
TR7 transceiver, the microphone cable from the rear of the SP75 can be routed
along the side and underneath the TR7. DO NOT block the power amplifier
cooling slots on the right side of the TR7.
The SP75 may be secured to the top of a RV7, MS7, or equivalent cabinet with
the two retaining clips provided. First, remove the screw-in mounting feet on
the SP75 and replace with the four number 6 screws provided. Place the four
stick-on rubber feet on the bottom of the SP75 next to the cover mounting
screws on the cover. Remove the top screws on each front extrusion end cap of
the MS7 or RV7 and the bottom screws on each SP75 end cap. Place a retaining
clip between the end cap and extrusion. Position so that the hole is properly
aligned and replace end cap screws. Repeat retaining clip installation on the
other side.
2
Plug the SP75 output cable into the TR7
micrl
phono plug on the SP75 supply cable into the
the PS7 power supply. The microphone ma:
input.
If another transmitter other than the TR7 is u
can be installed on the SP75 cable
replacing
plied. Connect the red wire to the P’M’ connect
the shielded cable to the microphone audio
black wires to the ground connection.
When using a transmitter/power supply
corn1
connect the positive SP75 supply (11-16 V)
11
cable plug. Connect the negative supply lead
Do not connect the negative supply lead to
tl
as this shield is not internally connected in th
supply negative connection through the
ou,
transmitter or transceiver chassis. This is
t
from being introduced across the SP75
outp,
RF feedback condition.
ADDITIONAL GROUNI
In addition to the above supply connection t
prevent any possibility of creating undesira
SP75 which could result in RF feedback.
*.,
1) Any microphones or other inputs
connec
grounded through any other path othe:
,
connector.
2) When a phone patch or tape recorder are cc
NOT be grounded elsewhere, such as throu
the patch or recorder must be grounded,
SP75 may need to be isolated by a
transfc
3) See the following diagrams for examples.
3
 Loading...