Section 2 - Mounting Brackets (Brackets Only Installation)
1. Mark wall, jamb or ceiling for placement of mounting brackets.
Caution: Before mounting shades, verify measurements on the card provided with
the shade, and ensure the brackets are installed at the correct width.
2. Drill small starter hole in mounting surface (if necessary).
3. Attach brackets using appropriate fasteners for mounting surface.
The installer is responsible for selecting mounting hardware appropriate for site conditions.
Please Note: The brackets shown are for standard 120V motors. Hardware for other motors will vary.
24V shades use the same hardware as Manual FlexShades. Please review manual shade
instructions for parts information.
4. Place operator (motor) end onto its bracket. If a coupled unit, see separate
instruction sheet for Coupled FlexShades.
5. Slide notched pin on idler end into slot on bracket. Slip retainer clip onto idler end
between bracket and roller (see Fig. 2).
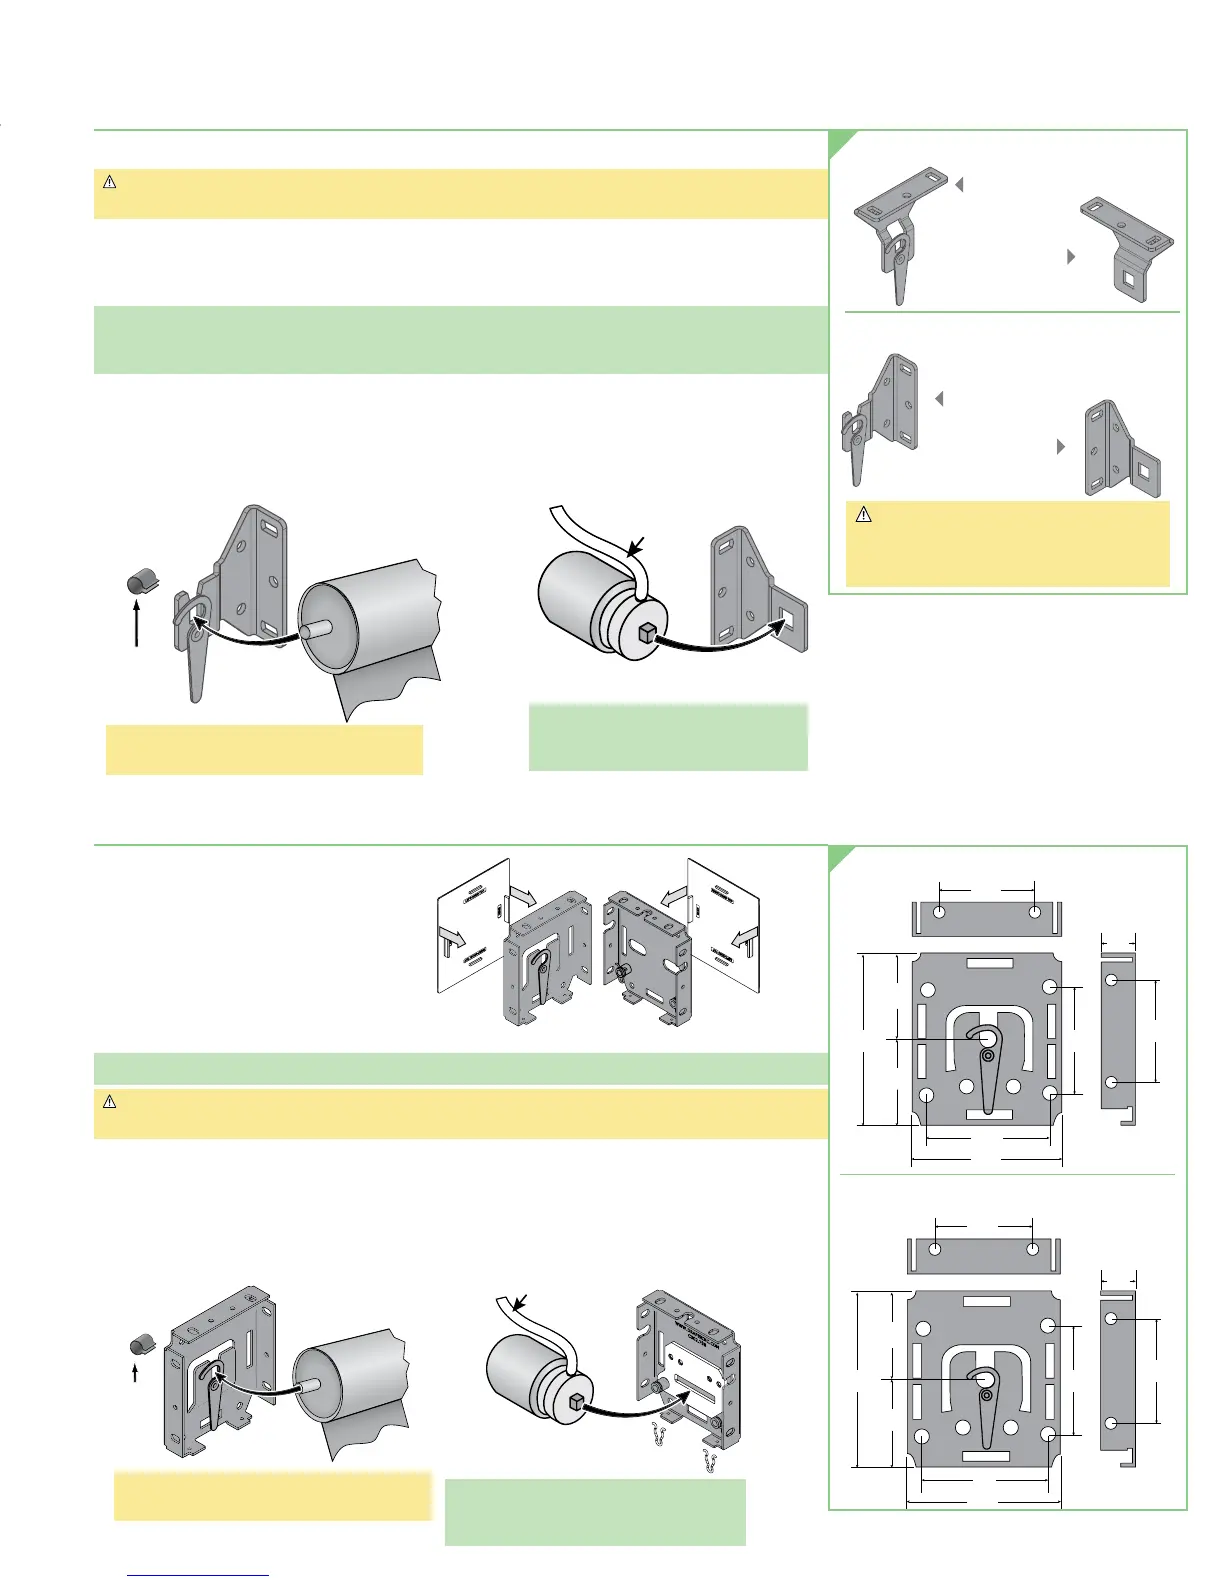
Figure 2
Clip
Idler End
of Roller
Idler
Bracket
*Don't forget: install retainer clip on shaft
between bracket and roller!
Please Note: Install motor so that limit
switches are pointed
down or accessible.
Operator
Operator
Bracket
Motor
Cable
CEILING MOUNTING BRACKETS
IDLER
OPERATOR
WALL MOUNTING BRACKETS
IDLER
OPERATOR
Caution: DO NOT use wall brackets for
ceiling installations.
DO NOT use ceiling brackets for
wall installations.
Section 3 - Mounting Endcaps for Fascia
1. Snap end covers into place (see Fig. 3).
2. Mark wall, jamb or ceiling for
placement of mounting endcaps.
3. Drill small starter hole (if necessary)
in mounting surface.
4. Mount endcaps using appropriate
fasteners for surface. If this is a coupled unit,
be sure to mount coupled endcap in the center position.
Please Note: Installer is responsible for selecting mounting hardware appropriate for site conditions.
Caution: Before mounting shades, verify measurements on the card provided with the shade,
and ensure the endcaps are installed at the correct width.
5. Place operator (motor) end into its endcap (see Fig. 4).
6. For coupled units see separate instruction sheet for Coupled FlexShades.
7. Slide notched pin into idler endcap and attach retainer clip (see Fig. 4).
2 ¼"
4 ½" 3"
4 ½"
2
7
/
8
"
2 ¼"
5
/
8
"
2
7
/
8
"
3"
3 ¾" 2"
3 ¼"
2"
1
7
/
8
"
1
7
/
8
"
5
/
16
"
2"
2 ½"
2 ¼"
4 ½" 3"
4 ½"
2
7
/
8
"
2 ¼"
5
/
8
"
2
7
/
8
"
3"
3 ¾" 2"
3 ¼"
2"
1
7
/
8
"
1
7
/
8
"
5
/
16
"
2 ½"
SMALL ENDCAPS FOR FASCIA
Figure 3
Retainer
Clip
Idler End
of Roller
Endcap
Operator
Endcap
Cable
Please Note: Install motor so that limit
switches are pointed down
or accessible.
Figure 4
LARGE ENDCAPS FOR FASCIA
*Don't forget: install retainer clip on shaft
between bracket and roller!
page 3 of 8
Motorized FlexShade
®