page 11 of 28
Foundation
™
for LED Panels
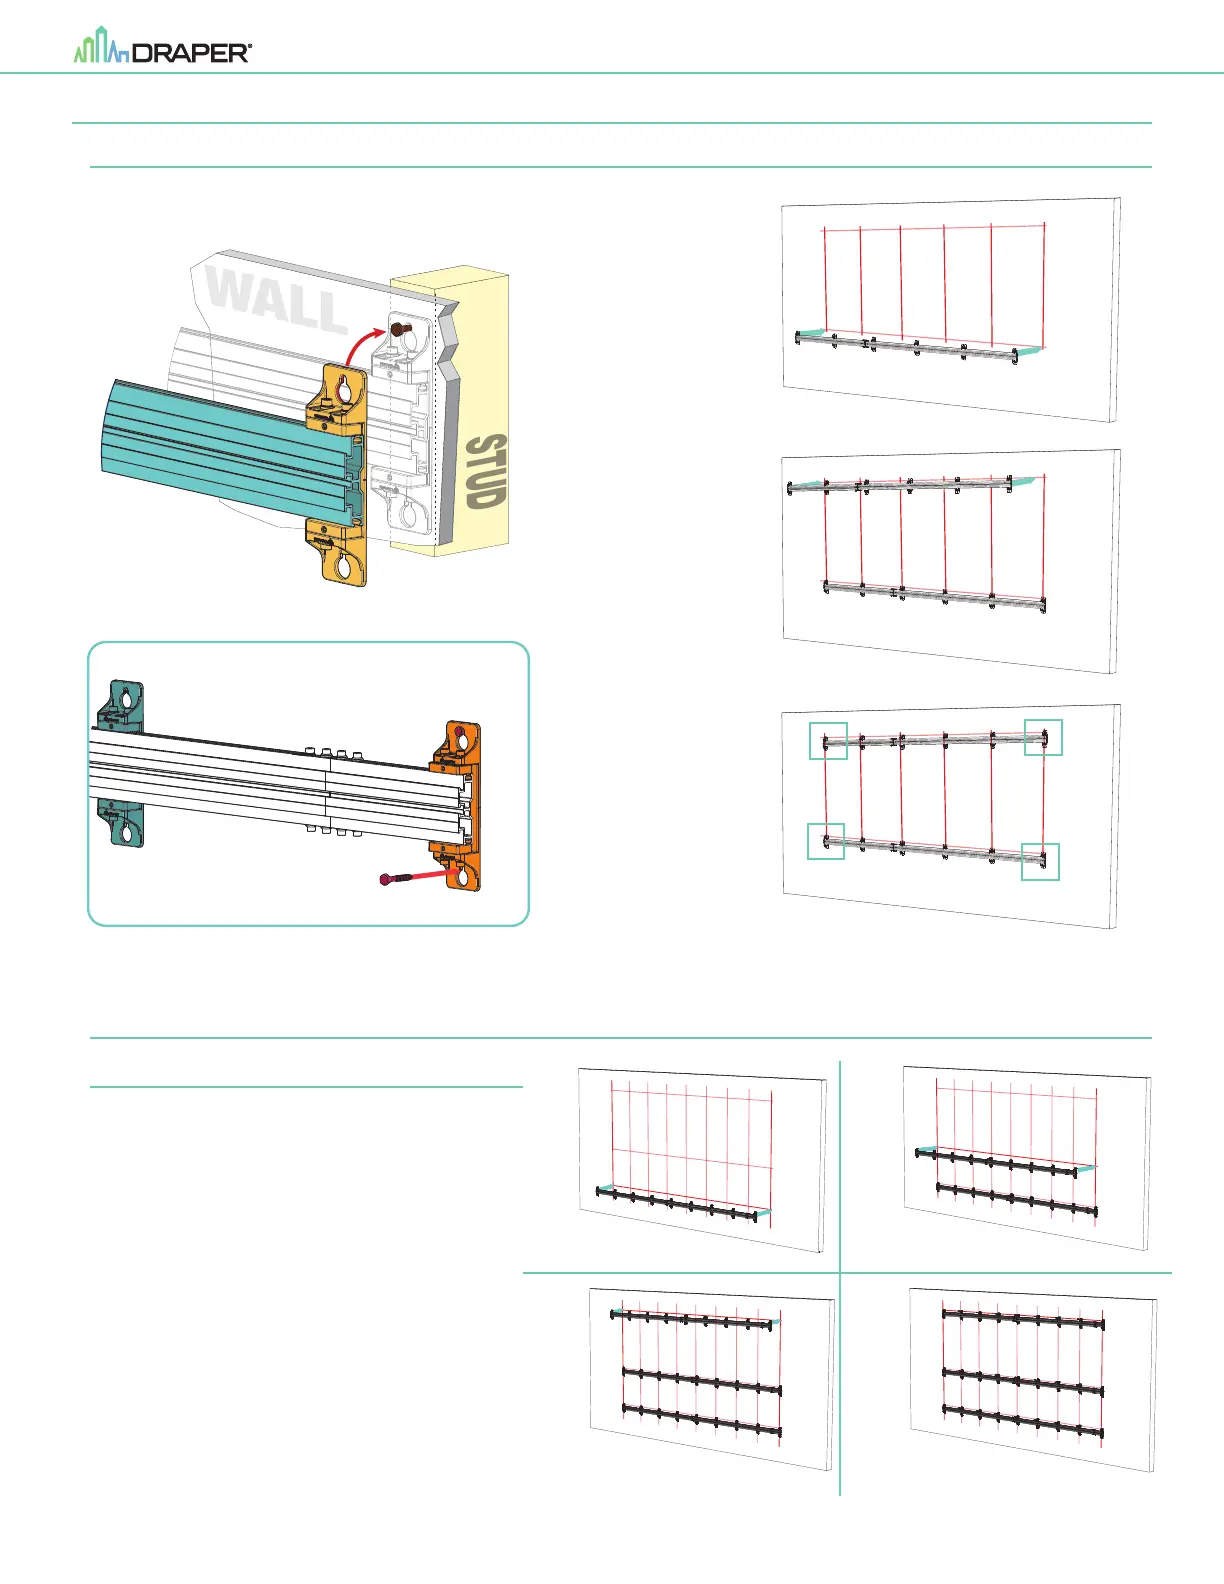
Leave Inner Brackets
loose for now
Secure Outer Bracket
on each side of each rail
Slide Rail Section B
over Rail Connector
Slide Rail Section B
over slats in wall bracket
Slide Rail Connector
into slots in Section A
Tighten all rail connector screws
with 5mm hex wrench
2
1
3
Section 5 - Hanging Horizontal Rails
Section 5.1 - For LED arrays up to 6 panels high - 2 Horizontal Rails
1.
Using the top keyhole slots of the outer wall mounting brackets, hang the bottom
horizontal rail on the pre-installed mounting hardware (see Section 3, Step 5).
2. Using the top keyhole slots of the outer wall mounting brackets, hang the top
horizontal rails on the pre-installed mounting hardware.
3.
Secure the outer wall mounting brackets on each side of the horizontal rails.
Leave the inner brackets loose for now.
Section 5.2 - For LED arrays 7 panels or higher - 3 Horizontal Rails
1.
Using the top keyhole slots of the outer wall mounting
brackets, hang the BOTTOM horizontal rail on the pre-
installed mounting hardware (see Section, 3 Step 5).
2.
Using the top keyhole slots of the outer wall mounting
brackets, hang the MIDDLE horizontal rail on the pre-
installed mounting hardware.
3.
Using the top keyhole slots of the outer wall mounting
brackets, hang the TOP horizontal rail on the pre-installed
mounting hardware.
4.
Secure the outer wall mounting brackets on each side of
the horizontal rails. Leave the inner brackets loose for now.