Do you have a question about the Draper Onyx and is the answer not in the manual?
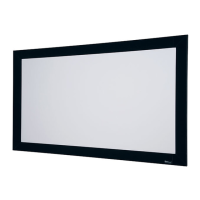
The Onyx Permanently Tensioned Projection Screen by Draper is a sophisticated display solution designed for optimal visual performance and ease of installation. This device is engineered to provide a consistently flat and taut viewing surface, ensuring a high-quality image free from wrinkles or distortions. Its permanent tensioning system is a key feature, distinguishing it from screens that may sag or ripple over time.
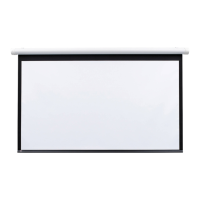
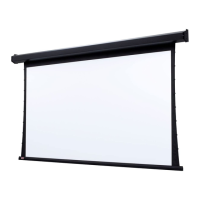
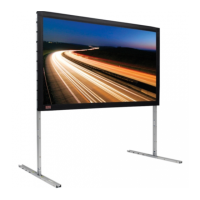
The screen's primary function is to serve as a high-definition projection surface for various applications, from home theaters to professional presentations. It is designed to be wall-mounted, offering a sleek and integrated look in any environment. The assembly process is carefully outlined to ensure a precise and durable setup, emphasizing the importance of proper alignment and secure connections for long-term stability.
One of the core usage features of the Onyx screen is its precision-cut mitered corners, which contribute to a clean and professional aesthetic. The frame is constructed from aluminum extrusions, providing a lightweight yet robust structure. These extrusions are connected using specialized connectors that are secured with setscrews, ensuring a rigid and stable frame. The design allows for a relatively straightforward assembly, although it requires attention to detail to achieve the desired level of precision.
The viewing surface itself is a critical component, featuring a unique tensioning mechanism. Plastic tubing is inserted into pockets along the hem of the viewing surface, and then surface retention extrusions are carefully slid along these hems. This system distributes tension evenly across all four edges of the fabric, pulling it taut and flat against the frame. The rounded edge of the surface retention extrusions is designed to be visible, indicating proper installation and tensioning. This method prevents the fabric from snagging or tearing during installation, a common issue with less refined tensioning systems.
For maintenance and long-term performance, the manual provides several important considerations. The screen is designed to be accessible for complete removal, which is crucial if the fabric becomes damaged or if other service is required. This foresight in design simplifies potential repairs or upgrades, extending the lifespan of the device. The frame itself is not meant to have anything fastened to it, preserving the integrity of the viewing surface and preventing accidental damage.
The installation process includes several steps that highlight the screen's usage features. The frame assembly pieces are joined face down on a clean surface, with connectors inserted into the aluminum extrusions. The instructions emphasize ensuring that these connectors are fully seated and that setscrews are tightened securely. This meticulous approach to assembly ensures that the frame is perfectly square and rigid before the viewing surface is applied.
Once the frame is assembled, the viewing surface is carefully draped over it. The surface retention extrusions, with the plastic tubing already inserted, are then engaged with the frame extrusions. The manual specifies inserting one side of the surface into a notch on the frame extrusion, followed by the opposite side, and then the remaining edges. This sequence helps to evenly distribute the initial tension. If additional tension is desired over time, the instructions guide the user to adjust the surface one edge at a time to a different tension notch, demonstrating a flexible approach to maintaining optimal flatness.
The mounting system for the Onyx screen involves Z-brackets that are installed on the wall. The manual provides clear guidance on determining the appropriate height and ensuring that the brackets are mounted parallel and at an equal height. This attention to detail ensures that the screen hangs level and securely. The design allows for minor horizontal adjustments once the screen is engaged with the wall brackets, providing flexibility during final positioning. The screen is designed to sit approximately 1¼" from the wall, creating a subtle floating effect that enhances its aesthetic appeal.
For enhanced stability, particularly for flown screens, a Corner Reinforcement Kit is available. This kit includes corner gussets and fasteners that are installed after the screen is fully assembled. The gussets are aligned with the frame and secured with self-threading fasteners, further reinforcing the mitered corners and preventing any potential movement or distortion over time. This feature underscores the screen's robust design and its suitability for various installation scenarios, including those where extra rigidity is required.
The manual also includes important cautionary notes regarding handling and assembly. For instance, when lifting the assembled screen, it is crucial to lift from both corners simultaneously to prevent damage to the frame, especially for larger screens. This highlights the delicate nature of the frame's structural integrity during handling. Furthermore, the ideal temperature range for assembling folding screens is specified (68°-78° F or 20°-26° C) to prevent damage to the surface and avoid voiding the warranty, emphasizing the importance of environmental conditions during installation.
In cases where minor corner gaps might exist in painted frames, the manual suggests readjusting the frame or applying a small bead of black silicone to fill the gap. This practical tip demonstrates a commitment to achieving a flawless finish and provides a solution for minor aesthetic imperfections that might arise. The emphasis on working the silicone into the gap and removing any excess from the face of the frame ensures a clean and professional appearance.
Overall, the Onyx Permanently Tensioned Projection Screen by Draper is a meticulously designed device that prioritizes both performance and user experience. Its permanent tensioning system, robust frame construction, flexible mounting options, and detailed assembly instructions contribute to a high-quality projection surface that is durable, aesthetically pleasing, and easy to maintain. The inclusion of troubleshooting tips and cautionary notes further enhances its usability, ensuring that users can achieve optimal results and enjoy a superior viewing experience.
| Screen Type | Fixed Frame |
|---|---|
| Aspect Ratio | 16:9 |
| Frame Color | Black |
| Type | Fixed Frame |
| Screen Gain | 1.0 |